29 July 2008
Empanadas
Last time I made empanadas, nearly fifty of them,
Rolling, cutting, filling, folding. From my mothers old Argentine cookbook, half in English, half in Spanish, and torn across the cover.
The traditional way, although I forgot the hardboiled egg. I always do. But please don't skip the olives and raisins. It sounds odd, but it gives that sweet salty balance.
I froze them ahead of time, and then baked them. So that I could look like one of the hosts I always want to be, the one who serves things with ease.
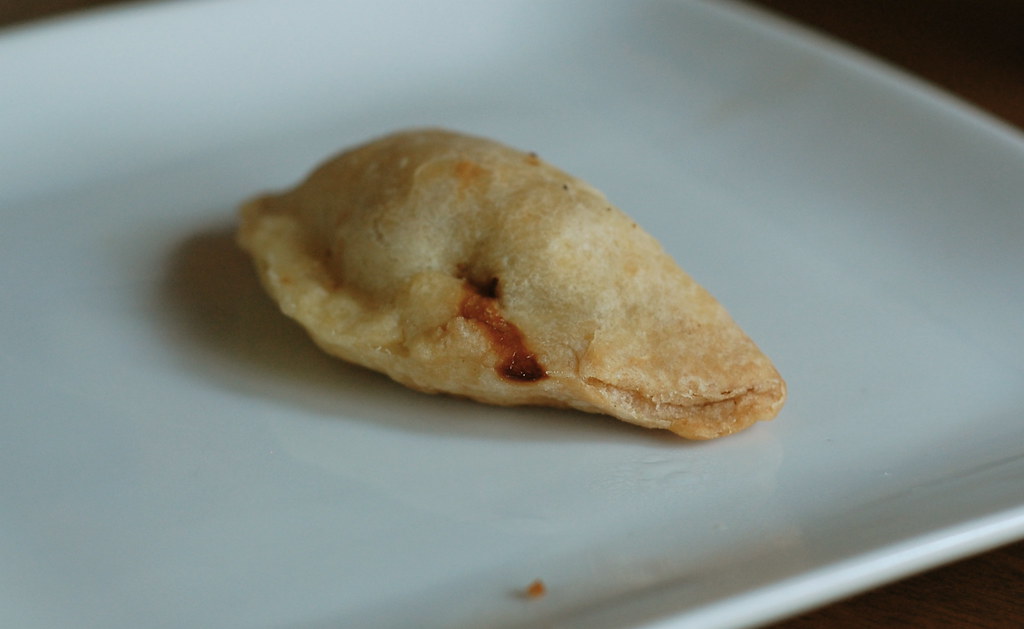
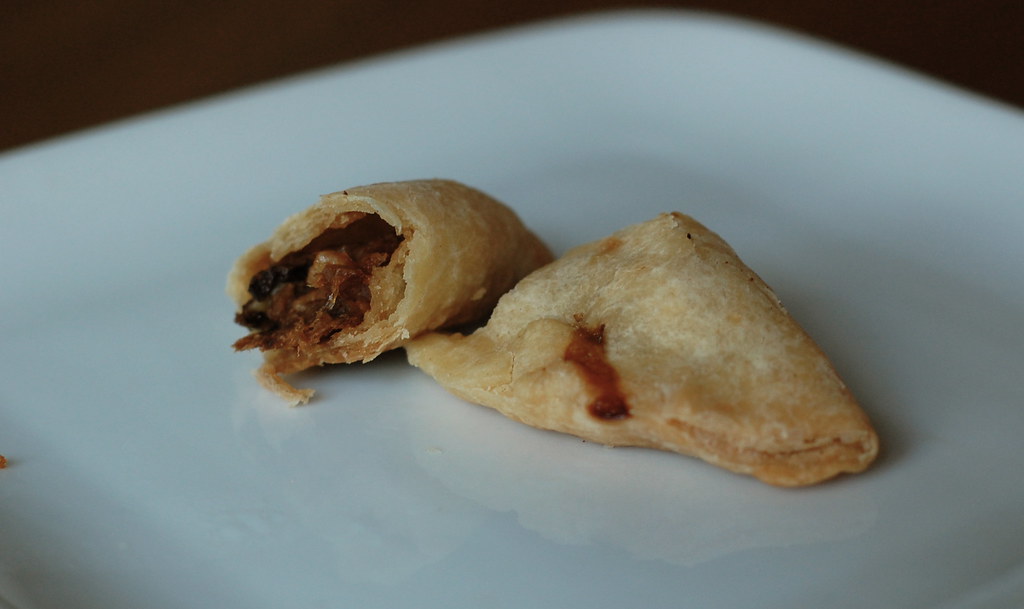
They disappeared so fast, into the stomachs of hungry guests, that I didn't even get a picture. So you'll never know how beautiful they looked on their platter, all of them, with their fork-pleated edges.
Except for this one. That I had to hide and save, just for you. Or really, for me. Because I'm afraid I ate it too.
Empanadas
Though it would be completely sacrilegious, for vegetarians you can make these with an imitation meat (like crumbled soy protein sausage) or chopped mushrooms. And if you are pressed for time, I won't hold it against you if you use purchased pie crusts, pie crust mix, or puff pastry in place of making your own pastry. Adapted from Asi Cocinan Los Argentinos.
1 recipe shortcut pastry of choice
3/4 lb ground beef
1/4 cup lard or butter
1 bunch scallions, chopped
1 clove garlic, chopped
1 small sweet green pepper, finely diced
2 tablespoons tomato paste
1/2 teaspoon each oregano, cumin, paprika, and parsley
2 heaping tablespoons seedless raisins, chopped
2 tablespoons chopped green olives
1 large hardboiled egg, chopped
1. Heat fat in a large skillet. Add the scallions, garlic, and pepper and saute until softened. Add the tomato paste and the spices and stir to combine, at this point I usually add a few spoonfuls of water to get everything to combine. Add the beef, stirring to break it up, and cook until no longer pink. Remove from the heat, add the raisins, olives, and chopped egg. Taste for seasoning (remember the olives are brined, so salt is usually not needed).
2. Roll out your pastry and cut circles with a biscuit cutter or inverted glass. Have a small bowl of water at your side. Place a small spoonful of filling in the middle of each circle, moisten the inner edges of the pastry and fold to seal. Crimp by twisting the edges or with the tines of a fork. Avoid over-stuffing the empanadas. Refrigerate or freeze empanadeas until ready to bake.
3. Preheat oven to 375F. Spread empanadas on a baking sheet and bake until golden brown and some of their filling is oozing out. Frankly, I've never timed this exactly but I'd guess 25-35 minutes, depending on the size of your empanadas.
27 July 2008
How To: Composed Cheese Plate
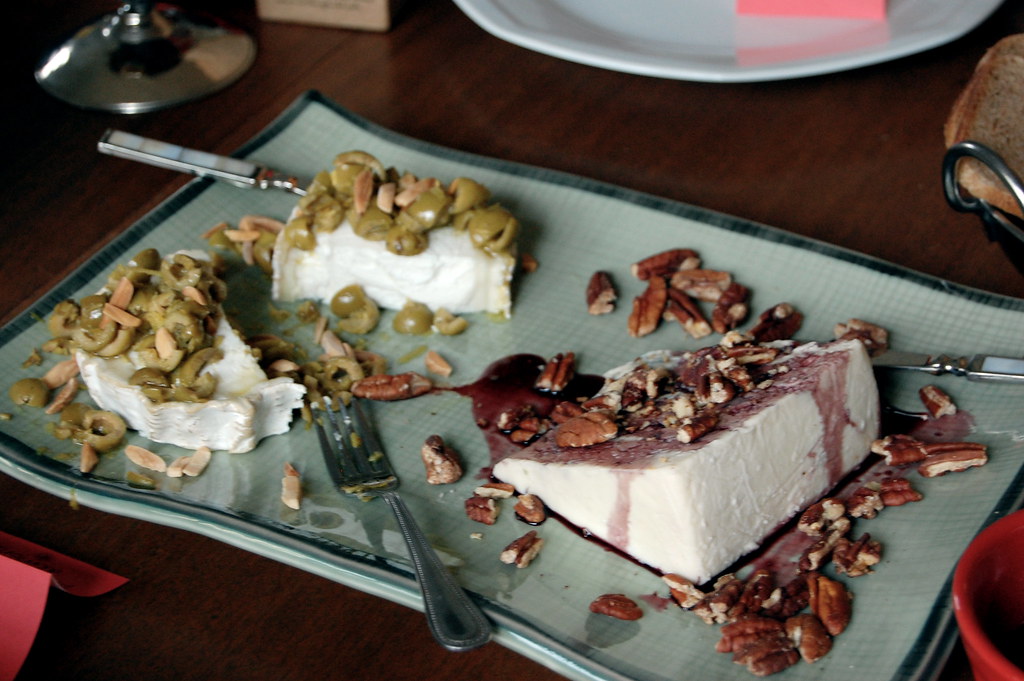
When you're having company, one of the easiest appetizers (or desserts, if you're French) is simply a few well-chosen cheeses. But as easy as that is, I love to do composed cheese plates, ie, pairing cheese with condiments and nuts and such. It's fun to brainstorm ideas for different pairings, and you can easily serve just one plate and still impress your guests. For my last party I chose two pairings: blue cheese with red wine reduction and candied pecans, and goat cheese with warm lemon, olives, and marcona almonds. Red wine reduction may sound fancy but in fact it's a good thing to make when you've got half a bottle of red wine leftover that's not going to be consumed. Oh wait, that doesn't happen to you? Well, it's easy to make with a cheap bottle of red wine too. The nice thing is that the reduction keeps well in the fridge, and can be used for other savory applications.
Also, cheese plates aren't just for the same old boring apples and grapes pairings- stone fruits, marinated prunes, melons, guava paste, chutneys, chestnut pastes, infused oils and wholegrain mustards are all fun to play around with. I've listed some of my pairing ideas below, what are your favorite cheese plate ideas?
A few more cheese plate ideas:
Feta with Honey and Sesame
Mexican Cojita with Chili Oil and Lime
Port Salut with Pears and Walnuts
Goat Cheese with Tapenade and Roasted Red Peppers
Digestive Biscuits Topped with Fig Jam and Shavings of Pecorino Romano
Mozzarella with Black Olives, Sundried Tomatoes, and Basil, served with Semolina Crackers
Blue Cheese with Red Wine Reduction and Candied Pecans
Combine 1 bottle red wine and 1/4 cup sugar in a saucepan and bring to a boil, simmer until reduced by half. At this point, taste for sweet/tart balance, the amount of sugar you use will depend greatly on the wine. You don't want it to be too sweet, but the sugar will smooth out some of the harsh/tart edges of the wine as it reduces. Continue to simmer until the wine has reached a thicker syrupy consistency, usually I find it's reduced by 3/4. Store in the fridge.
Place 3 tablespoons brown sugar, 1 teaspoon water, and 1/2 teaspoon cinnamon in a small saucepan and heat until the sugar melts and bubbles. Add 1/3 cup pecans, tossing to coat, and spread pecans on parchment or foil. Allow to cool.
Arrange blue cheese (I used Bleu d'Auvergne) on serving plate. Drizzle red wine and sprinkle pecans on top.
Goat Cheese with Green Olives, Lemon, and Marcona Almonds
Arrange on a plate:
chevre (or similar goat cheese)
Heat in a small saucepan and pour over cheese:
a splash of olive oil
1/4 cup chopped pitted green olives
zest of 1 lemon
a few sprigs of fresh thyme, optional
Serve with marcona almonds.
22 July 2008
Party: Deconstructed
More pictures here.
Sources and Methods:
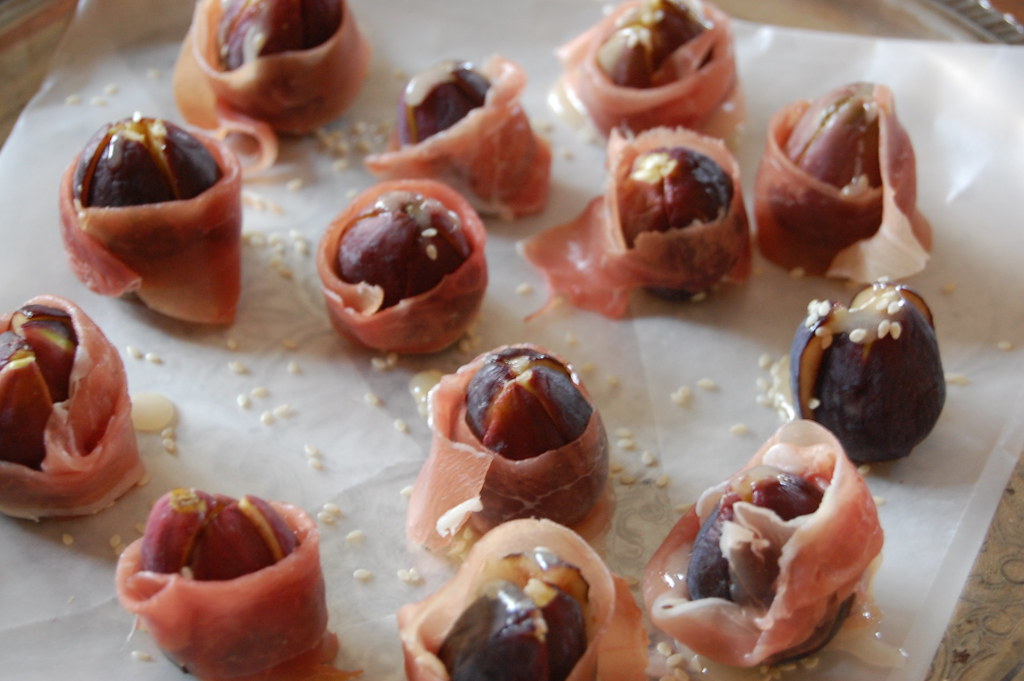
Figs with honey, sesame, and prosciutto
Composed Cheese Plate
Roast Cherry Tomatoes with Basil Aioli
Empanadas
Chicken Tikka Kebabs
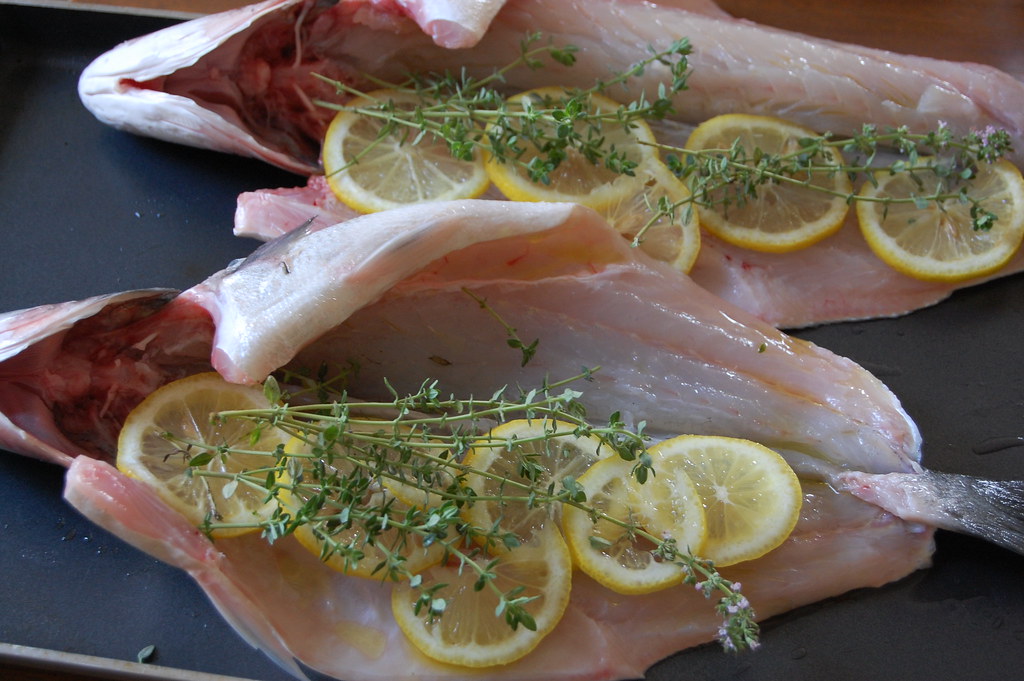
Whole Roast Branzini (roast at 425F for 20 minutes)
Mushrooms with Truffle Oil
Black Rice Pilaf
Carrot Cake
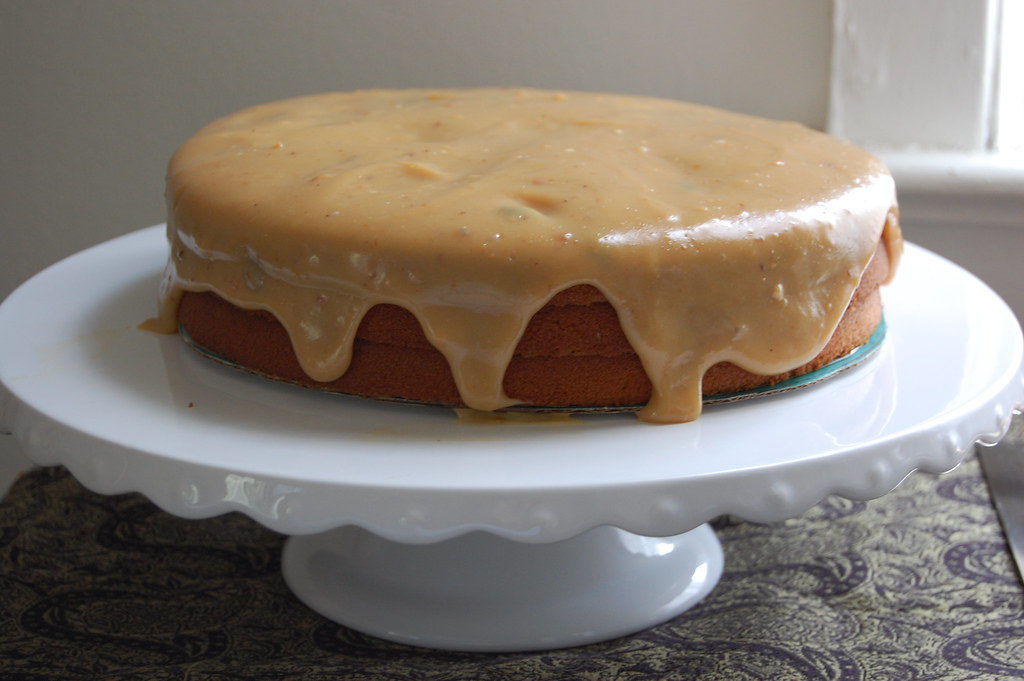
Caramel Cake
chicken, prosciutto, eggs, and fish from Eastern Market
mint, basil, tomatoes from my garden
black rice from Kalustyan's
white truffle oil from Dalloyau (thanks mom!)
grains of paradise from Penzey's
orange flower honey from the Abbaye de Sénanques, Provence (thanks mom!)
figs from my uncle's tree in Texas
cheeses from Eastern Market and Cowgirl Creamery
mushrooms from the Penn Quarter farmer's market
remaining groceries from Yes! organic market and Safeway
19 July 2008
Caramel Cake
Last year I told you all about the cake so good that I cannot celebrate my birthday, almost every birthday of my entire life, without it. And while that carrot cake is still irreplaceable, why have one cake when you can have a big party and two cakes on your birthday? It sure sounds good to me.
In fact, you could go as far as to say that the whole party was an excuse for me to cook, and in particular to bake two cakes. And not just any cake, but this cake, this caramel cake.
Caramel cake has long been an object of desire in my family, in South Carolina we look forward to the local 12-layer version, and in Tennessee we come home with Driver's Burnt Sugar cake. I've made a few attempts at caramel cake in the past, however I find the 12-layer version (like this) a bit too much like candy for my taste, not enough cake and too much sugary icing. Other versions involve just plain cake frosted with caramel icing, which doesn't have enough deep caramel flavor for me. So for a while now I scrounged caramel cake recipes, combining notes and coming up with a recipe that I thought would meet my caramel cake dreams.
I may be biased, considering I'm eating a piece of this caramel cake as I type, but I think this is one of the best cakes I've made, ever, ever, ever. First of all, it incorporates caramel syrup into the cake itself, so it's a true caramel cake, and it's got just enough of that sweet-crackly burnt sugar icing that I love. But most of all, I think this is the most perfectly-moist crumbed cake I've had. I actually got nervous as I was typing up the recipe, wanting to make sure I copied my stained scribbled notes exactly right, so that I could record this one for all the future caramel cakes to come.
Caramel Cake
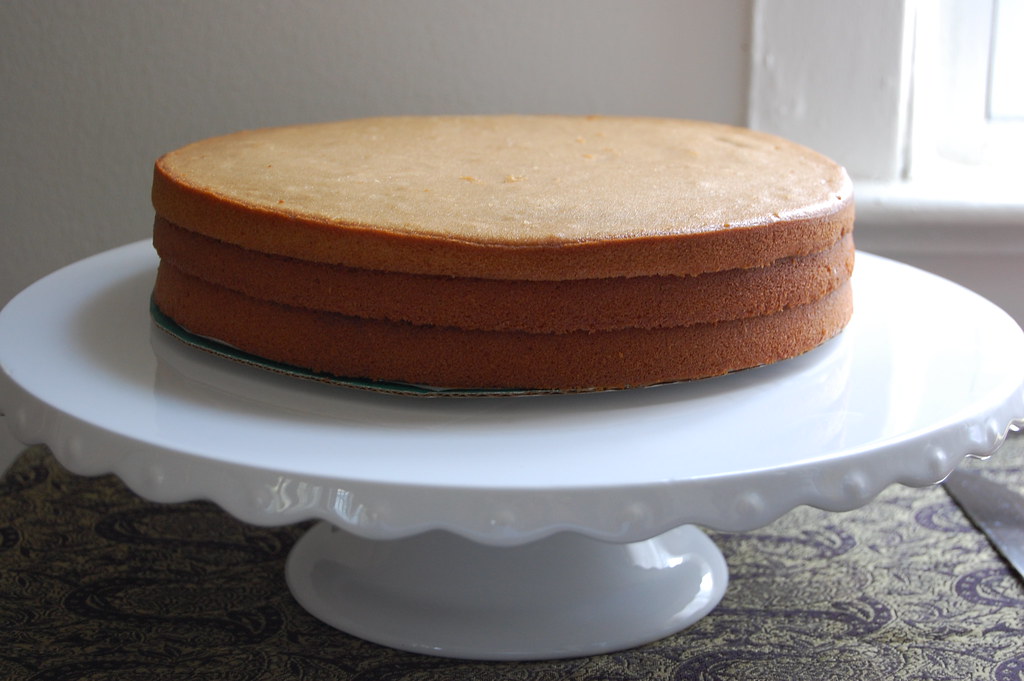
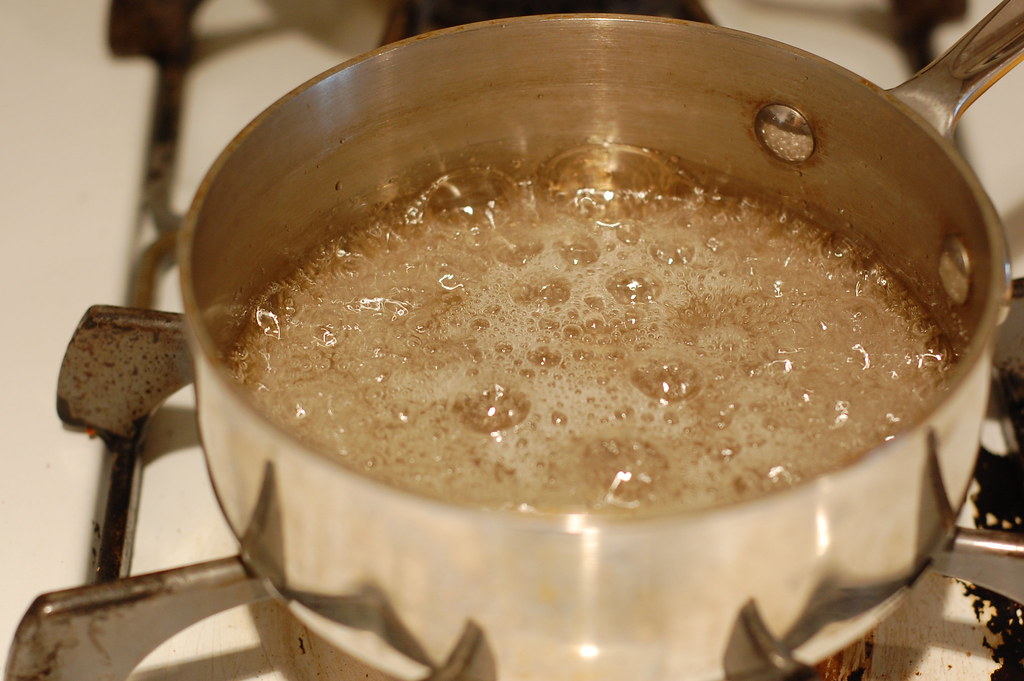
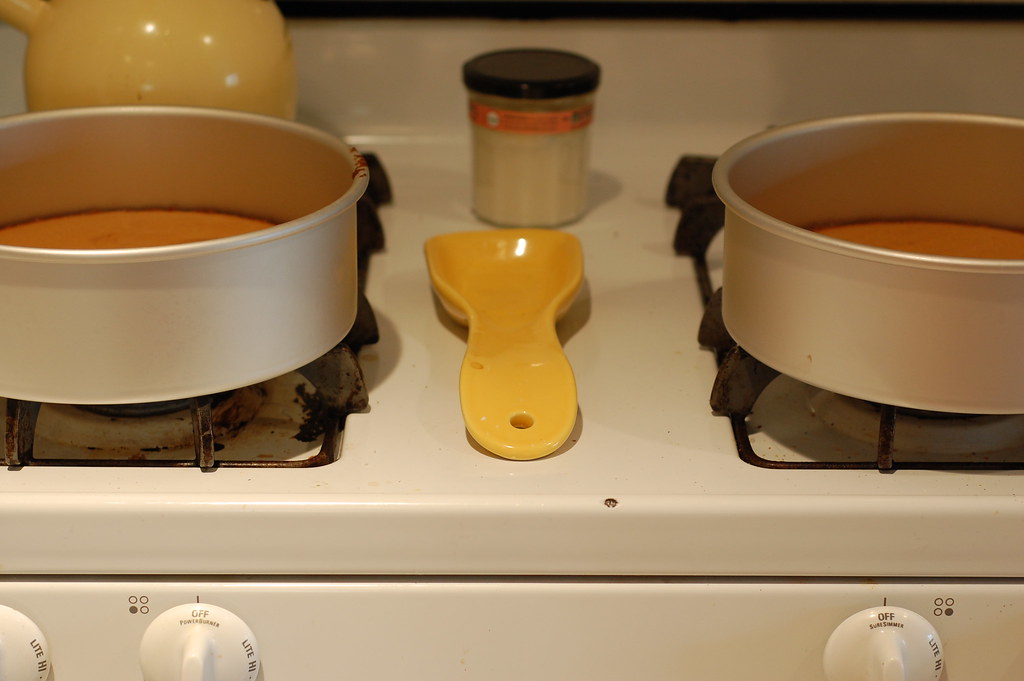
Don't be afraid of the caramel in the first step of this recipe, it's very easy and only requires that you watch the pan closely as it boils. I suppose it would be logical to make extra caramel syrup for adhering the cake layers, but I never remember to, so I simply assemble the cake layers with a few spoonfuls of maple syrup that I have on hand. Keep in mind these cakes don't rise very much, so don't be surprised.
for caramel syrup:
1 cup sugar plus 1/2 cup water
1/4 cup water for stopping
for cake:
14 tablespoons (7 oz) unsalted butter
1 3/4 cups light brown sugar
3/4 teaspoon salt
1/2 cup caramel syrup (from above)
3 eggs
1 teaspoon vanilla extract
3 cups all purpose flour
1 teaspoon baking powder
1 1/2 cups buttermilk
for assembly:
4 tablespoons maple syrup or caramel syrup
for glaze:
1 1/2 cups heavy cream
3/4 cup light brown sugar
1 tablespoon corn syrup
1 teaspoon vanilla
pinch salt
1. Make caramel syrup: Place the sugar and water in a saucepan and bring to a boil, have the additional 1/4 cup water ready on the side. Boil the syrup, watching closely, until it turns dark amber. Remove the pan from the heat and add the remaining water to "stop" the caramel. Stir the mixture with a fork until it comes together, then set aside to cool to room temperature.
2. Make cake: Preheat oven to 350 F, grease and flour 3 9-inch cake pans. In a bowl cream the butter until smooth, then cream in the brown sugar and salt until the mixture is light and fluffy. Stir in the caramel syrup. Beat in the eggs, one at a time, and then the vanilla, until very smooth and combined. Sift together the flour and baking powder. Add the flour in three additions, alternating with the buttermilk, to make a smooth cake batter. Divide cake batter among prepared pans. Bake in the center of the oven (rotating pans halfway through), for 30 minutes, or until firm, golden, and the sides pull away from the edge of the pan. Set aside to cool.
3. On a cake plate, stack the cake layers, spreading 2 tablespoons maple syrup or caramel syrup between the layers so that they stick together. Press down firmly (at this point, the cake can be triple-wrapped in plastic wrap and frozen for up to one month, or simply covered with plastic wrap and refrigerated overnight).
4. Glaze cake: Combine cream, brown sugar, corn syrup, and salt in a saucepan. Boil the mixture until it reaches 235 F, or soft-ball stage. Remove the pan from the heat and add the vanilla. Give the mixture several rapid stirs, then quickly pour it over the cake before the glaze hardens.
15 July 2008
Cauliflower "Couscous" with Basil-Lemon Sauce
I am inherently suspicious of restaurant recipes marketed to the home cook, restaurant cooking and home cooking are two very different breeds, one toy poodle, the other shaggy haired retriever, each with their own place and purpose. I am even more suspicious of recipes masquerading one ingredient as another: zucchini pretending to be spaghetti, pizza made with a turnip crust (really), mock cashew cheese.
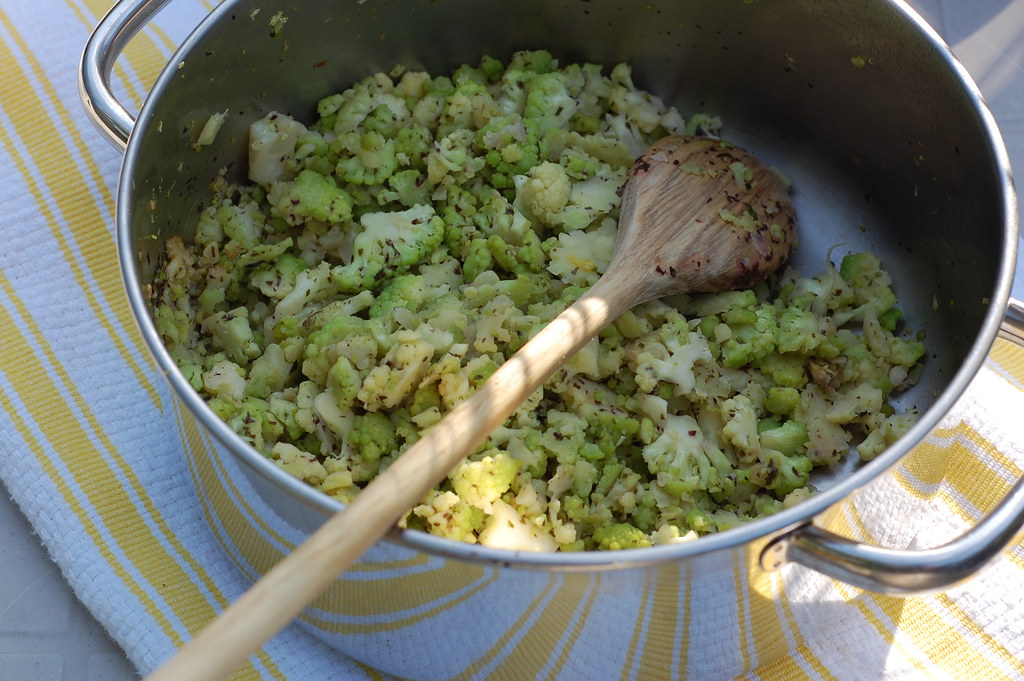
So naturally, I was quite suspicious when I read about "cauliflower couscous," in which tiny bits of cauliflower make a couscous-like dish. I was even skeptical about the sauce recipe, I mean, basil, lemon, and maple syrup, it sounded weird. But the reviews were so enthusiastic over on Leites Culinaria that I was intrigued enough to give it a try. I already had a head of green cauliflower (why green? it just looked so pretty at the store), and I had purple basil in my garden (I always plant purple basil, because it just looks cooler). My main piece of advice is that chopping the cauliflower can be a messy prospect, use a big cutting board and surround the edge with a rolled up dish towel to catch flying crumbs, then simply run your knife around the outer edges of the cauliflower, shaving off bits. As you get closer to the center of the cauliflower you'll have to do some more chopping, and I've also heard you can do the whole thing buy grating the cauliflower with a box grater.
And as for the end result? Well, I stand corrected because it was darn good. No, it's not a replacement for couscous, but think of it as a whole new way of seeing cauliflower. The recipe is just-right as written, but I imagine you could play around sauteing the cauliflower bits with a variety of seasonings and sauces: butter and nutmeg in the winter, spicy curry paste, or sumac and black olives, oh the possibilities.
Cauliflower "Couscous" with Basil-Lemon Sauce
For the sauce:
about 1/2 cup loosely packed fresh basil leaves
zest and juice of 1 lemons, preferably Meyer
1/4 cup fruity extra-virgin olive oil
1 teaspoon maple syrup
For the cauliflower:
1 tablespoon unsalted butter
1 tablespoon extra-virgin olive oil
1 medium onion, very finely diced
1 medium head cauliflower, florets finely diced (or grated), stems and stalks discarded
kosher salt, freshly ground black pepper
Basil-Lemon Sauce
optional: fresh basil chiffonade for garnish
Make the sauce:
1. Combine the basil, lemon zest and juice, oil, and maple syrup in a blender. Purée and transfer to a jar with a tight-fitting lid. The sauce will keep in the refrigerator for about 7 to 10 days.
Make the couscous:
1. Melt the butter with the olive oil in a large saute pan or dutch oven over high heat. Add the onion and sauté until the onion softens, about 2 minutes.
2. Add the cauliflower, stir thoroughly, salt and pepper liberally, and cook until the cauliflower softens, about 10-12 minutes.
3. Add 2 tablespoons of the sauce and cook until tender and fragrant, another 10 minutes. Adjust the salt, add the remaining sauce, mix thoroughly, and transfer to a serving bowl. Top with the basil chiffonade.
09 July 2008
Eggplant Fetteh
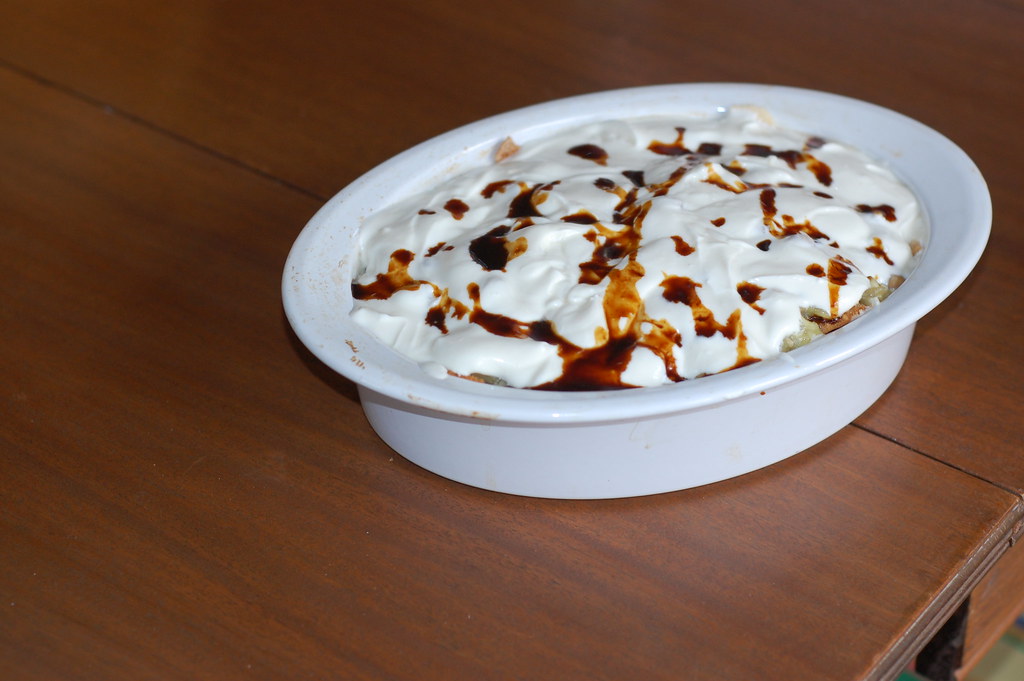
Ah-he-hem, where were we now? I hope you all had a nice holiday, with fireworks and plenty of grilling. Last time, we talked a little about one of my favorite dishes of all time, fetteh. I gave a basic recipe for the Middle Eastern combination of yogurt, chickpeas, and pita bread, but now it's time to delve a bit more into the dish fetteh, and try one of my favorite variations of fetteh with eggplant and pomegranate molasses.
While the history of fetteh is undocumented, it likely finds its roots in the ancient Middle Eastern dish tharida. Food historians Clifford Wright and Charles Perry have written that tharida (from the word tharada, to crumble bread into broth) involves bread moistened with stock and various meats, often layered with legumes and vegetables. Tharida historically included eggs rather than the yogurt used in fetteh. Today tharida no longer exists but fetteh is popular throughout the Arab world, and shops selling fetteh can be found on nearly every street of Damascus and across Syria, Lebanon, and Jordan.
The word fetteh means to crumble, and it comes from the crumbled pita pieces used to make the dish. I think there's a pantheon of great dishes made from stale bread: pappa e pomodoro, ribollita, tostadas, stuffing, gazpacho, and I think fetteh gets a star in that walk of fame. It's a classic peasant dish made of leftovers and staples. I once saw "fetteh" translated as "Middle Eastern panade," and while not exactly accurate, it is an interesting comparison as both Mediterranean dishes rely on a layering of stale bread, dairy, broth, and legumes.
These days, we're more likely to make fetteh by toasting or frying the pita pieces instead of waiting for them to get stale, and there are a myriad of variations made rich with poached chicken or lamb, even a favorite rural version involving a sheep's hoof served on top (I was served it once, and I'll admit totally turned off by the jelly-like quality that comes from the gelatin in the hoof).
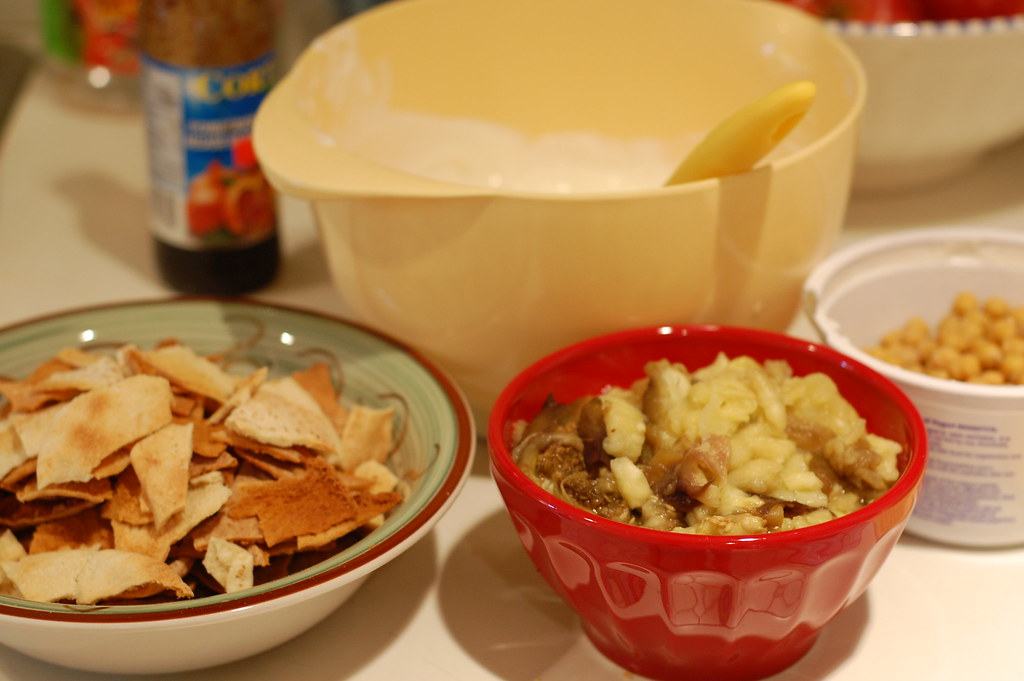
Here's where we'll get into fetteh technique a little, and like I said before, there are a million different ways to make fetteh. First, fetteh is served warm, but the whole dish is not heated or baked. Rather, the heat comes from the freshly toasted bread and steaming hot chickpeas. By the time you take the yogurt out of the fridge and stir up the yogurt mixture, it should have come to room temperature so that it doesn't cool the dish off too much. Second, the fetteh dish should melt into a cohesive-almost-stew-like consistency. I choose either a large pyrex bowl or casserole dish, and the key to the consistency is to drizzle a little of the chickpea liquid over the pita pieces to encourage them to warm and soften into the dish, without making them soggy. If you include meat in your fetteh, like poached chicken breasts or lamb, you can drizzle that nice flavorful stock over the bread.
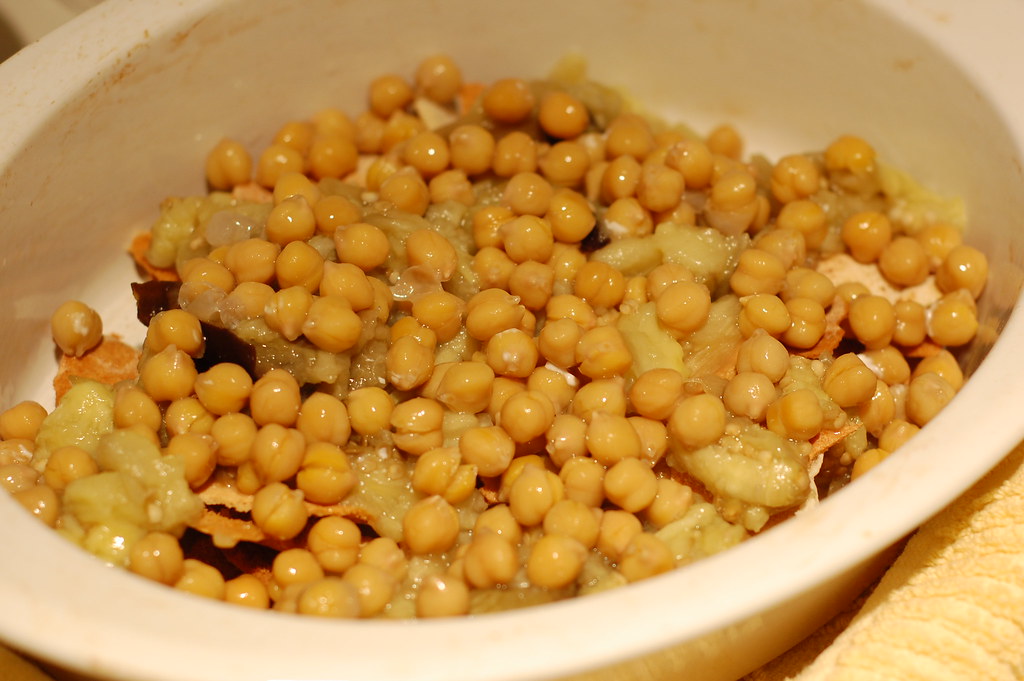
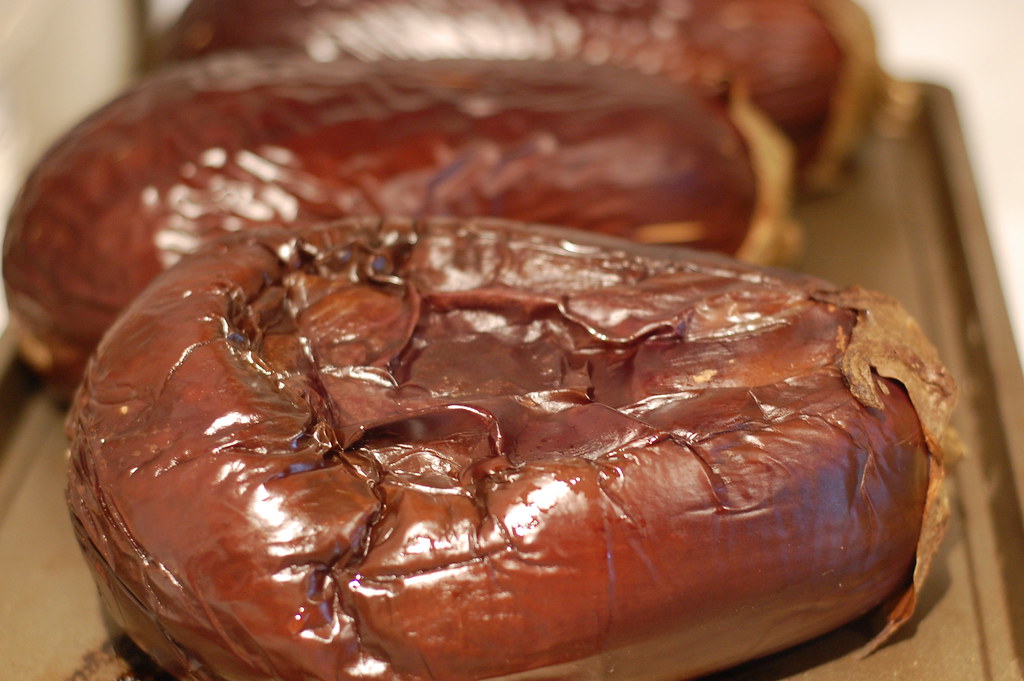
Fetteh should be served as soon as it's prepared, and purists will tell you it should never be kept as leftovers, when it gets soggy and cold, though I've eaten my fairshare of it (it's just too good to let go). That said, it's an easily portable dish, simply carry the components separately and assemble on site. My version of eggplant fetteh is admittedly a cheaters version. The fanciest versions start with lamb-stuffed eggplants (bathinjan mehshi), and other versions involve slow simmering of lamb and slicing and frying eggplants. Me, I usually skip the lamb altogether and just toss the eggplant in the oven to roast, then scoop out the flesh. It's a working girls short cut eggplant fetteh, but one I've made so many times I could do it in my sleep. And if you've taken the time to read all this about fetteh, well, you might need a short-cut too.
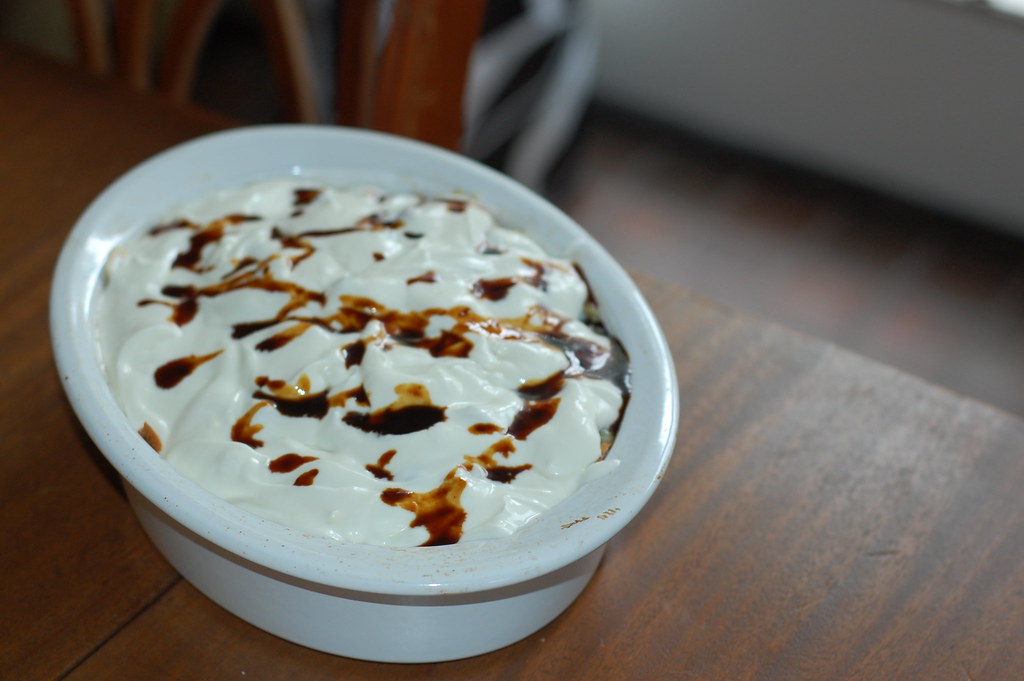
Eggplant, Yogurt and Bread Casserole with Pomegranate (Fetteh Bathinjan)
The amounts of yogurt may seem a bit odd, but I find buying the two containers of Greek-style and regular yogurt produces just the right amount and consistency for the yogurt sauce, without any odd leftovers.
1 very large or 2 medium sized pita breads
1 can chickpeas, or 1 1/2 cups cooked from scratch, with their liquid
2 medium sized eggplant
1 18-ounce container full fat Greek-style yogurt
1 6-ounce container regular plain yogurt
1 clove garlic
2 tablespoons lemon juice
2 tablespoons tahini
1/4 teaspoon salt
optional: shredded cooked lamb
pomegranate molasses, for drizzling
for garnish: pomegranate molasses, or pomegranate seeds, or pine nuts sauteed in butter
1. Preheat oven to 450F. Pierce eggplant with a knife in several places, place on a baking sheet and roast in the oven until tender and collapsed, about 45 minutes.
2. Meanwhile, separate the pita breads in half and toast in the oven until golden brown and firm (watch carefully that they don't burn). Break pita into approximately 1-2 inch pieces and set aside.
3. In the bottom of a large bowl, smash the garlic clove with the salt with a fork until the garlic is pulpy. Add the lemon juice and tahini and stir to combine. Stir in both containers of yogurt.
4. Empty chickpeas with their liquid into a pan and bring to a simmer. Simmer chickpeas until they are tender and smush easily between your fingers, this often takes as long as 20 minutes.
5. When the eggplant has cooled slightly, slit open the eggplant and scoop out the flesh into a bowl, discarding the skin. Slightly crush the eggplant flesh with a fork.
6. Get out a casserole dish or large pyrex bowl. Spread some of the pita pieces over the bottom of the dish, ladle some of the chickpeas over top, along with some of the chickpea liquid so that the liquid softens the bread. Top with some of the eggplant. Drizzle yogurt mixture over top so that the surface is completely covered. Drizzle just a tiny bit of pomegranate molasses over top. Repeat layering (I find a casserole only needs two layers, while a bowl usually three), finishing with the yogurt over top. Finish with a drizzle of pomegranate molasses, or pomegranate seeds or pine nuts. Serve immediately.