30 January 2007

Kadhi Pakoras (Chickpea Dumplings in Yogurt Sauce)

pakora2
I have a compulsive inability to let food go to waste. I scrape up anything leftover in a dish, no matter how small, and tuck it away in the refrigerator. Consequently, our fridge is often littered with little tiny bits of cheese, a lone half apple, victims of my parsimony. I scheme creative ways to combine them all into a meal, unable to simply let that cheese rind go.

So that little bit of chickpea flour leftover from a botched attempt at some sort of dosi? I couldn't just let it go to waste, no, it called to me from the back of the cabinet, crumpled and shoved behind the more popular flours. 'Find a way to use me,' it pleaded.

And so the quest began, because I couldn't just use the chickpea flour, I had to find some interesting-unfamiliar-hopefully tasty- but really who knows- recipe. As I browsed recipes for boondi raita and parathas and pakoras, I realized I was way out of my league. Asofetida? Methi? What have I gotten myself into.

Finally, I picked a recipe for kadhi pakoras (chickpea fritters in yogurt sauce) that seemed pretty straight-forward. But even then, could I leave well enough alone and just follow the directions? Of course not. The dumplings were supposed to be fried but I decided they would be lighter and friendlier if boiled. And I added a bit of cooked chickpeas which were also in the begging-to-be-finished-off leftovers arena, figuring that chickpeas go with, well chickpeas.

If you are by now seriously doubting the efficacy of the recipe- well, have a little faith people! It actually came out quite nicely, and the dumplings had a fluffy texture reminscent of matzo balls, bathed in a creamy yogurt sauce. If I did them again I might up the spice mixture a bit, or add some greens to the dumplings, but all in all it was perfect for a simple weeknight meal, and for cleaning the cabinets.

pakora3

Kadhi Pakoras (Chickpea Dumplings in Yogurt Sauce)
This recipe is very much a work in progress, it needs to be tested a few more times to work the kinks out. So if you try it, be forewarned it might not be perfect, but I'd love to hear your feedback!

for pakoras (dumplings):
1 cup chickpea flour (besan)
1/2 tsp baking powder
1 tbl chopped onion
1/3 cup cooked chickpeas, plus more for serving
1 tsp cumin
pinch salt

for kadhi (yogurt sauce):
1 generous cup plain yogurt
2 tbl flour
1 small garlic clove, minced
1/2 tsp turmeric
1/2 tsp mustard powder
1/2 tsp good quality curry powder

for serving:
chopped spinach or parsley


- Heat a pot of water so that it is just simmering. Sift together the chickpea flour and baking powder. In a food processor, pulse the remaining ingredients (chickpeas, onions, cumin and salt) until pureed. Add 1/2 cup water to the chickpea flour, stir to combine, then stir in the chickpea puree. Beat the mixture vigorously with a wooden spoon, trying to encorporate as much air as possible. Form the batter into balls with a spoon, they don't have to be perfect. Drop the balls into the simmering water as you form them, put only ~4 in the pot at a time to prevent over crowding. Cook the dumplings until they float and are puffy and cooked through, 3-5 minutes. Remove with a slotted spoon to drain on a towel. Continue until all the dough is used up.

- In a saucepan off the heat, combine the yogurt, flour, garlic, turmeric, mustard and curry powder and stir vigorously until the mixture is very smooth and shiny. Place the pan over low heat and cook, stirring constantly, for only a few minutes until the yogurt is warm and thick. Do not let it boil or it will curdle! It is very important to keep stirring it in a circular motion to prevent curdling. Remove from the heat and add the dumplings. Serve with chopped greens and extra chickpeas sprinkled over the top.

28 January 2007

Happy Spring Rolls


If you have not already read Michael Pollan's article "Unhappy Meals" this past weekend, I urge you to get to it. Like most of Pollan's work, it will have you looking at what you put on your plate and how you buy it in a whole new light. What I always enjoy about his writing is that, while I don't always agree with everything, there is always some piece of information or perspective that is revelatory enough to stick with you long after you've read the piece.

For example: "Today, a mere four crops account for two-thirds of the calories humans eat." Or: "Chemical fertilizers simplify the chemistry of the soil, which in turn appears to simplify the chemistry of the food grown in that soil." However, more than these pieces of information, the best part about Pollan's work is the type of critical thinking he applies to his work, an approach unfortunately lacking from most food and nutrition writing today.

Now, if you are worried I am going to send you off with a recipe for steamed broccoli, fear not. Pollan's diet advice goes something along the line of, "eat mostly plants (i.e. fresh fruits and vegetables), use meats, fats, and grains sparingly." As someone who generally follows this, I can assure you I eat very well. Rather, I offer you bright spring rolls, filled with the wonderful crunch of fresh vegetables and the subtle sweetness of crab meat. I don't know why I don't make these more often because they are very satisfying and easy to eat.

The rice paper rolls come in a flat round package, and can be found in a well-stocked supermarket or a Chinese market. But the best part about these? The peanut dipping sauce. It's downright addictive, not to mention great as a sauce on noodles. Just make sure you don't eat too much, you know, healthy diet and all.


Crab and Vegetable Summer Rolls with Peanut Dipping Sauce
If crab is too pricey, you can use shrimp or imitation crab meat, or leave it out all together. Some slivered mango makes a nice addition as well. It's good to have some extra rice paper rounds in case some tear.

10-12 rice paper rounds*
1 cucumber, peeled and cut into matchsticks
1 large carrot, grated or sliced into thin ribbons or matchsticks
1/2 cup bean sprouts
a few cilantro leaves, minced
1 tbl soy sauce
2 tbl lemon juice
1 tsp sugar
1 cup lump crabmeat or diced cooked shrimp

1. Prep the vegetables. Combine the soy sauce, lemon juice, and sugar in a bowl, add the cucumber, carrot, sprouts, and cilantro and toss to coat.
2. Fill a large shallow baking pan with warm water. Soak one rice paper round in the water for about 30 seconds to soften, then transfer to your work surface. Place a bit of crab on the bottom third of the rice paper roll, then add a bit of the vegetables. Fold up the bottom of the rice paper roll, tuck in the sides, and roll up. Repeat this until all rolls and filling has been used up. Keep the rolls covered with a damp towel to prevent them from drying out. Slice each roll in half and serve with dipping sauce.

*Rice paper rolls are available in the Asian food section of well-stocked groceries, or at Asian markets.

Peanut Sauce
This sauce is worth every effort, I'm sure you'll find a myriad of uses for it, whether as a dipping sauce, a sauce for noodles, even a dressing for salad. We like it spread on celery.

2 tablespoons vegetable oil
1 scallion, chopped fine
1 garlic clove, chopped fine
1 tablespoon finely grated peeled fresh gingerroot
1 cup water
1/2 cup creamy or chunky peanut butter
1/4 cup soy sauce
1/4 cup white vinegar
2 tablespoons firmly packed brown sugar
1/4 teaspoon dried hot red pepper flakes

In a saucepan heat oil over moderate heat until hot but not smoking and cook scallion, garlic and ginger, stirring, until fragrant, about 1 minute. Stir in remaining ingredients and bring to a simmer, stirring. Simmer sauce, stirring, until smooth and cool to room temperature. Sauce may be made up to 3 days ahead and chilled, covered. If sauce is too thick after chilling, stir in 1 to 2 tablespoons hot water until sauce reaches desired consistency.

27 January 2007

Bitter Orange Peels in Syrup


After writing about my experience candying orange peels with Umm Hana, you didn't think I'd leave you without a recipe? Certainly not. And if you are wondering, having read my description, why anyone would want to undertake such a laborious and lengthy process, I assure you the results are worth it. Umm Hana recommends doing this in a large batch (get it all over with), and then preserving them to enjoy throughout the year.

Perfect for anyone who loves marmalade or covets orangettes, the bitterness of the peels is tamed by the sweet syrup. Some people find the syrup too sweet and just enjoy the peels, while sugar-fiends pour lots of extra syrup on top. This is traditionally served on its own, but I like to cut up the peels and stir them, with a spoonful of syrup, into some tangy thick yogurt.


Bitter Orange Peel in Syrup
Bitter oranges have a unique flavor unlike regular oranges- grapefruits can make a good substitute.

14-16 bitter oranges, Seville oranges, or 6 grapefruits
5 cups sugar
juice of 1/2 a lemon

1. Using the fine part of a box grater, grate the zest from the oranges until the colored part is removed. Halve the oranges, if you want you can squeeze the juice from them to use in the syrup, but you don't have to. Remove and discard the fruit's pulp making sure to scrape away the interior white pith, so that you just have the bare peels. Cut the peels into half again (so they are quartered, or in thirds for larger grapefruits). Prepare a needle and thread.

2. Roll the peel up starting from the pointed end and string onto the thread. Continue rolling up and threading the peels so you have several long garlands.

3. Submerge the peels in a pot of water and bring to a boil, let boil 3-4 minutes. Remove the peels, drain the water, and repeat this blanching process at least three times in order to remove any bitterness. Pat the peels with twoels so they are very dry and set aside.

4. Add reserved orange juice (if using) and enough water to the pot to cover all the peels (don't actually put the peels in the pot, just estimate by eye, usually I use about 5 cups total liquid but it will depend on the dimension of your pot). Add the sugar and a squeeze of lemon juice. Bring this mixture to a boil, stirring so that the sugar dissolves, then add the peels. Simmer the orange peels in the syrup until tender and sweet and the syrup is thick enough to drop in a thick stream from a spoon. This could take up to half an hour. Let cool, then cut and remove the threads and pack the peels with into jars and pour syrup over to cover. Keep any leftover syrup seperately, it's great drizzled over yogurt. Store in the refrigerator.

Serve the peels with their syrup as part of breakfast or as an afternoon treat or dessert, with some Arabic coffee. Either serve with a knife and fork or place a tooth pick in the peel to facilitate eating. You can also slice the peels and serve them with yogurt, for breakfast, or with clotted cream, for dessert.

25 January 2007

An Introduction

Allow me an introduction.

I arrived in Syria alone, with one very large red suitcase and only 3 nights reserved in a hotel. I had just graduated from college and bought myself a one-way ticket to Damascus, not knowing it would lead to a wonderful group of friends, a job I loved, a couple nervous breakdowns, and a life's worth off cultural experiences. All I knew was I needed a place to stay while I got myself settled.

I had lunch with Michael, my sole friend in Damascus, who mentioned he knew a family who wanted a boarder. He warned me they lived in a poor area, but said they were good people and had great food. The next day Michael led me around the walls of the old city, then down a dirty and busy street full of liquor stores signifying we were in the Christian area, past a monastery and down a squalid dirt road. I was dubious by the time I reached the apartment door, but I was relieved to be greeted by two beautiful young girls who kissed my cheeks and welcomed me into a lovely warm sitting room. Soon, Um Hana, a tall worn-looking woman in her house dress, began ferrying platters of little Syrian pizzas, potatoes, and gorgeous salads to the table. Despite my limited formal Arabic and the family's lack of English, it was clear Michael was right about their good-nature and certainly right about the food. Over a lengthy afternoon of mate and tea it was decided I would stay with them for 1 month while I looked for a flat of my own.


My first few days, Um Hana showed me the local buses and vans and walked with me from Bab Sharqi to the house repeatedly to make sure I wouldn't get lost, pointing out which vegetable sellers had good prices, which pharmacist was good. She showed me how to light the difficult sobia heaters to ward off the January chill and how to heat water for the bath. But mostly, she taught me how to cook.

I considered myself a fairly accomplished home cook, but this was a different world to me. Being a poor family, nearly everything was made from scratch- jam, cheese, biscuits, and everything was made in huge volume. I came home one afternoon to find Umm Hana and one of the girls seated on the floor with a huge pile of oranges- enough to fill a bathtub. "We're making jam," she said. We spent the next four hours grating the zest from the bitter oranges, trading places when our knuckles became raw, then halving and removing the pulp (they were a type of bitter orange), and then taking the prepared peels, rolling them up, and sewing them into long strings with a needle and thread. Finally, the peels were blanched and rinsed several times in a giant pot, then cooked in a sugary syrup to make jam. Only a week ago I'd been in New York eating at my favorite neighborhood place, now I was sitting on the floor of a Damascus apartment sewing together orange peels.


Though my Arabic was still limited, Umm Hana is perceptive and when I expressed my interest in cooking she began showing me how to make things. But first I had to be taught the best way to cut a tomato, and how best to pound things in a mortar and pestle. I played sous-chef as we made freekiah b'il djaj, cooking chicken and cracked green wheat on Sunday morning while the 3 children were at church, or stewed green moloukhia leaves and fried stale pita for perfect fattoush salad. Over the period of three days Umm Hana made cheese, adding rennet to a huge pot of milk, draining curds and whey, pressing, salting, and drying.

Those first few weeks I was also learning a lot about Syria, Syrian culture, and this new family. My first night there I realized in horror that while I slept in my spacious bedroom, the rest of the family slept in a tiny sideroom, all 5 of them on mattresses on the floor. I called Michael, asking him what I could do. Nothing, he replied cynically, your rent money is enough. The children's clothes were mended and worn and the father was completely absent. The whole time I was there I saw him twice, he ran a small shop which made no money and spent evenings whiling away in his time in cafes and bars. Clearly Um Hana was the backbone of the family, managing the family's money, hiring tutors because the schools were bad. When I bought them a big tin of fancy shortbread rings or an extra bucket for washing they responded awkwardly, I realized that by buying them things I simply highlighted our differences. Rather, it was best for me to help out around the house, folding laundry, secretly buying extra laundry detergent, tutoring the children's English and taking them for an occasional ice cream.

After I moved out, I continued to visit the family regularly, and had regular phone calls from Um Hana. Come by, she'd say, I'm making moloukhiyya, your favorite. As soon as I arrived I would take up my usual station in the kitchen, stuffing vegetables, chopping salads. She told me how she admired the freedom of Western women to travel and study, about how she had once worked in a factory sewing sequins on clothes, about how she wished she could have had more from her life but that she was contented with her home, she loved to cook and enjoyed her children and friends. My Arabic had improved too, and we joked and gossiped and I realized what Umm Hana wanted, what she needed was not a sous-chef but a confidant, a friend. The garlic I pounded was merely a ruse for something deeper, friendship.


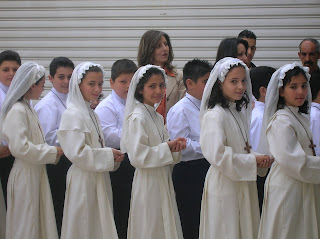
When her family sent her little ring-shaped biscuits from Hasake, she set aside a box for me, knowing I loved them. She sent me home with jam and leftovers. When my family visited, Umm Hana cooked for them. In exchange, I tried to help out when I could, helping clean and rent an apartment Umm Hana had inherited, running errands, bringing them fruits and small sweets. I attended the youngest girl's First Communion and celebrated Easter with them, went to the kids final summer camp performance. In order to make more money, Um Hana began cooking for some local students, providing evening meals in her modest kitchen for a group of 5 British and Italian boys. She turned out Arabic staples as well as French and Chinese dishes (she makes a mean vegetable stir-fry the kids call Assia-wiya).

We all have mentors in cooking, usually our mothers and grandmothers, who teach us the classic dishes, the handed down recipes, the secret tips and tricks. Umm Hana has certainly taught me all these things, but more important are all the other things she has taught me. The true meaning of generosity, the value of family and friendship, how to bridge a cultural divide, how 'help' has more than one meaning. Because sometimes, all you need is for someone to stand beside you and chop some parsley.


Um Hana's Chicken Gratin
This is very rich but undeniably good. Yufka is sort of a thicker version of phyllo dough, if you use phyllo, look for the thicker type (there is usually a note on the side of the box), and make sure to leave time to thaw it if frozen.

6-8 sheets yufka or phyllo dough
4 tbl butter
4 tbl flour
3 cups warm milk
pinch nutmeg
1 cup chopped mushrooms
250 g (~1/2 lb) cooked shredded chicken
1 cup grated mild cheese, such as Kashkeval or mozzarella
4 tbl melted butter

In a large pot, melt 4 tbl of the butter over medium heat. Whisk in the flour and cook until paste is thick but not brown, only a few minutes. Whisk in the warm milk, and continue to stir as the mixture thickens. Lower the heat, add the nutmeg, salt, and 1/4 cup of the grated cheese, and stir until thick and smooth, 2-3 minutes more. Remove from heat and set aside to cool.

In a small saucepan, saute the mushrooms in a bit of butter until they are just softened. Add the mushrooms to the white sauce along with the chicken.

Preheat the oven to 350. Brush a casserole dish or large round baking pan with some of the melted butter. Layer 3-4 sheets of the yufka or phyllo dough in the bottom and sides of the pan. Stir the remaining cheese into the white sauce, then pour into the casserole. Layer the remaining dough sheets on top, brushing each with melted butter. Bake until firm and golden, about 20-25 minutes. Serve warm in small squares.

24 January 2007

Winter Fruit Salad


Why is it I always think of fruit as a summer thing? If the recent California freezes weren't a reminder, many fruits reach their peak in the cold season. Every Christmas, courtesy of my uncle, a large box arrives on our porch full of beautiful ruby red grapefruits to sustain us through the frigid month of January. And just when I have succumbed to winter doldrums, with a Greenmarket of root vegetables in varying shades of brown and grey, bright persimmons beckon from deli displays.

I let the soft hachiya persimmons ripen to a water-balloon like state, then cut of the tops and eat the soft pulp with a spoon. Firm persimmons are great for making salsas and fruit salads. A fruit salad of persimmons, grapes, and pomegranates was positively jewel-like on my table. I imagine it would be the perfect thing on a brunch table, next to nice crispy waffles, or to put out after a nice lunch. Any variety of fruits would work, so I've simply offered some suggestions below.

Winter Fruit Salad (a sketch)

fruit suggestions:
chopped Fuyu persimmons
grapes
pomegranate seeds
citrus fruits (grapefruit, clementines, mandarin, navel oranges)
kumquats

extras:
orange zest
honey
chopped crystallised ginger

21 January 2007

Curry Me a Salad


A standard of every deli counter, picnic basket, or luncheon spread, there are as many varieties of chicken salad as there are cooks, but the standard relies on chicken and mayonnaise. Now, as someone who doesn't particularly like either chicken or mayonnaise, you may be wondering why I am writing about a chicken salad recipe. Because it's that good.

It's good even if you switch up the ingredients a bit, like by using smoked tofu instead of chicken, or tossing in a handful of celery for extra crunch. But it's delicious as written, whether sandwiched between toasty bread or arranged artfully over a bed of lettuce leaves. The sweet-spicy aromas of curry (which are worth the extra step of heating the curry powder) combined with juicy grapes and toasty walnuts- I was convinced.


Curried Chicken Salad with Grapes and Walnuts
This recipe is the perfect use for leftover roasted or grilled chicken, as the deep smoky flavors compliment the spicy curry, with the pop of the juicy grapes and crunch of the walnuts. For vegetarians, tofu works great here too, especially the prepared smoked tofu now available.

3 cups cubed cooked chicken
1/2 cup mayonnaise
2-3 tsp Madras curry powder
1/2 tsp salt
1 tsp lemon juice
1 cup red grapes, halved
1/2 cup walnuts, toasted and chopped
2 tbl chopped cilantro

In a large bowl, combine the mayonnaise, curry powder, salt, lemon juice, and cilantro and season with salt. Stir in the chicken, grapes and walnuts and stir to coat.

Tip: to boost the curry flavor, heat 1 tbl of oil in a pan, then stir in the curry powder, heating briefly to release the aromas, then use in the recipe as written.

19 January 2007

Banana Cupcakes with Mascarpone


"I bought too many bananas, will you make cakes?" my friend Sara asked. Of course, I said, delighted at the invitation to bake and loving that I have great friends who ask me to do so. Sara has a wonderfully enthusiastic way of doing things, including buying groceries, giddily sweeping up kilos of "fruit and vege" in the markets. A peak into her fridge would reveal a huge bunch of mint popped in a vase and leaning wiltedly, pounds of fat green beans, some beginning to brown on the edges. She also has an attitude to cooking like I have to doing laundry- she'll do it when she has to.

But back to the cakes. Since that first request I've made any combination of banana cupcakes, muffins, even cookies. I never used a recipe, there was nary a measuring cup in sight, and using the antiquated oven with no temperature markings was always an adventure. Best of all was the smell of the cakes as they baked- we often huddled near the oven, in part to keep an eye on its temperamental behavior and in part because of the warmth which was much lacking in the cold and drafty Damascus apartment (yes, it gets cold in Syria, and no, the houses are not insulated).

On chilly afternoons we break open the little cakes with our tray of hibiscus tea, look out on the view of the city, and just relax.


Banana Cupcakes with Mascarpone Frosting
These are easy cupcakes, the kind you could imagine whipping up for an afternoon treat. Cream cheese frosting would be just as good or forgo the frosting altogether and call them muffins.

2 1/2 cups flour
1 tsp baking soda
1/2 tsp baking soda
pinch salt
1/2 cup (1/4 lb) butter
2/3 cup sugar
2 eggs
2 large bananas, mashed very well
3/4 cup buttermilk

- Preheat the oven to 350. In a bowl combine the flour, baking soda, baking powder, and salt. In a large bowl cream together the butter and sugar until pale and light. Add the mashed banana, stirring to smooth, then beat in the two eggs. Add half the flour mixture to the bowl, then add the milk and the remaining flour mixture. Stir just to combine.
- Pour the batter into greased muffin tins. Bake until risen and golden, about 20 minutes. Let cool, then frost with mascarpone frosting (recipe below).

This also makes great banana bread, bake in a loaf pan for one hour.
If you don't have buttermilk, stir a teaspoon of lemon juice or vinegar into regular milk.


Mascarpone Frosting

8 oz mascarpone
1/2 cup powdered sugar
1 tbl vanilla extract
1/2 cup whipping cream

- Combine all the ingredients and beat on high speed until the mixture is thick and smooth.

16 January 2007

Chicken Tikka Momma

I grew up in a house where most things were homemade, and while I am now grateful to my mother for an early introduction to good quality butter and soft-shell crabs, this also led to some good-natured teasing during my school days. I suspect it had more to do with jealousy than hostility: "What's for your gourmet lunch," my friends would ask as they opened their Lunchables and dug into their cafeteria-purchased tater-tots. (I begged for Lunchables and when I finally got that little plastic box, I quickly discovered they were terribly bland.) Then there was the time I came back from a friend's house asking my mother for ketchup, to which she replied "you don't really want any of that bourgeois sauce." The next day, in the grocery, I innocently asked if we could get "that bourgeois sauce."


However, my mom was a busy working mom, and during my high-school days it was an occaisonal treat to rent a movie and order a pizza. It may sound cliche now, but in our far-from-typical household, this was an exciting symbol of normalcy, and I remember waiting in anticipation for the pizza delivery man to pull up and ring the doorbell. But the real reason for my peering out the window in excitement was the pizza- good enough to warrant mouth-salivating anticipation.

The pizza place carried some generic Italian name like DiPaulos, but had always been run by a smiling Indian family as long as anyone could remember. About half the pizzas on offer were of the classic Italian variety while the other half had names like 'curried prawn' and other Indian-leaning specialties. My mother’s favorite pizza was the chicken tikka, topped with hunks of alarmingly red spiced chicken and drizzled with chutney. It was my mother’s first introduction to the now ubiquitous chicken tikka masala.

I myself don’t care for chicken, but my mother loves it, and I always enjoy the opportunity to cook it as a way of expanding my culinary repertoire. I made these chicken tikka skewers while visiting my mother, and they were a hit. Marinating the chicken in the yogurt mixture tenderizes the meat and the spices are just enough to add interest without overwhelming. I like the skewers because each piece has lots of flavor and you can serve them as is (good for buffets), or use the chicken to top a salad or noodles. “If I had known it was so easy, I would have done this earlier,” my mother exclaimed. “And it’s not that funny red color.”


Chicken Tikka Skewers
I made these under the broiler but they would probably be great in the summer on the grill. Using freshly ground spices instead of dried makes a big difference in the flavor.
You could also adapt this to chicken pieces (breasts or drumsticks), baking them longer in the oven.


2 pounds skinless boneless chicken breast halves, cut into 1-inch pieces
2 tbl cup fresh lemon juice
1/2 teaspoon salt
1 cup plain yogurt
4 garlic cloves, minced
1 1/2 teaspoons coriander seeds, toasted
2 teaspoons cumin seeds, toasted
1 teaspoon ground turmeric
1/4 teaspoon grated ginger
Pinch of dried crushed red pepper
pinch of garam masala, if you have it
2 tablespoons vegetable oil.

- Combine all ingredients except chicken in the blender and puree until the spices are well ground. Combine yogurt mixture with chicken and stir until chicken is well coated. Refrigerate chicken (covered or in ziplock bags) at least 3 hours or overnight.
- Preheat broiler (or barbeque on medium-high heat). Discard excess marinade and thread chicken on skewers, dividing equally, and place on a greased baking sheet. Broil the kebabs, about 4 inches from heat, for about 9-12 minutes, turning occaisonally, until lightly browned in spots and just cooked through.

If you use bamboo skewers, make sure to soak them in water about 1/2 an hour so they don’t ignite!

09 January 2007

On Seasonality and Scallops


I am fascinated how things come into season in winter. And by into season, I don't mean the strawberries they've trucked up from Guatemala or another warmer clime. Unfortunately, we have all gotten used to being able to buy whatever produce we want when we want it, at the sacrifice for taste and flavor. Living the past year in Damascus, fruit was only available in season, which meant if you wanted strawberries in July you were out of luck. However, no one was thinking about strawberries in July because we were busy gorging ourselves on the glorious peaches whose juice would roll down our chins daily until we moved on to pears, then figs, and so on. The seasons may be shorter, but I can tell you that you haven't tasted sweeter fruit or better tomatoes and squash in your life.

But back to New York, where it is winter, and you can have all the strawberries you want. But winter doesn't mean things are out of season, round globes of persimmons beckon from vendors and scallops and shrimp glisten in the market. Isn't it amazing that little bay scallops somewhere in the frigid waters off of Nantucket, reach maturity just now as winter slides into lifeless doldrums- Nature, my friends, provides for us.

I adore scallops of any type, so I scooped up these little beauties while they were fresh. A small amount goes a long way, so I hope you will forgive me if we go a bit scallop-crazy here for a moment. Here's the first of our installments, the scallops nestled in an artichoke cup making a perfect first course.

Bay Scallops in Artichoke Cups

2 tbl olive oil
1/2 lb bay scallops
2 leeks, root and green parts trimmed and finely chopped
1/2 cup white wine
2 tbl minced parsley plus more for garnish
4 artichoke bottoms*

- Place the artichoke bottoms in a small pan of simmering water and let simmer while you prepare the scallops.

- Heat the olive oil in a saute pan over high heat. Add the scallops and toss until one side is seared, only 1-2 minutes. Removee the scallops and set aside. If necessary, add some more oil to the same pan, add half the leeks and saute until softened. Deglaze the pan by pouring in the white wine, scraping up any brown bits. Add about a cup of water (or stock), the remaining leeks, the chopped parsley, and season with salt and pepper. Simmer for about 5 minutes. Add the scallops and their juices back to the pan and toss to combine. Remove pan from the heat.

- Place a warm artichoke bottom on a serving plate. Place some of the scallop mixture onto the artichoke bottom and spoon some of the sauce over. Garnish with parsley. Repeat with remaining four plates.

* I use canned artichoke bottoms, such as Roland brand, for convenience. If you prefer, you can prep fresh artichokes: trim away the leaves and scoop out the furry choke to reveal the meaty bottom, you will need to cook the bottoms for about 45 minutes until they are tender.

Sincerest apologies for the delay in posting- I even planned out posts ahead of time, but I have been travelling and the server would not support blogger, despite many frustrated attempts, including yelling at the computer screen.

Scallops Take Two


I am a consumate researcher, call it left-over from my academic days, but I like to know as much as possible about ingredients before I prepare them. I probably single-handedly made 'Google' a verb. Naturally, faced with my bounty of bay scallops, I was quickly shuffling through my cookbooks, searching online, for just the right recipe. Or at least an interesting recipe.

A recipe for scallops with Champagne grapes caught my eye, but I neither had, nor could afford, those little tiny grapes. A scan of my cabinets came up with some Goji berries that my mother had given me over the holidays. Goji berries are dried berries from the Himalayas and their crunchy brown packaging screams trendy health food. I have to admit, the first time I tried them, I pictured the frozen mountains and thought 'this is probably something I would eat if I were some starving mountain climber.' But as I continued to snack on them, I will admit their slightly sweet wild flavor grew on me.

So, peering into my cabinet, I thought why not? And you know what, tossed into a little red wine sauce and accented with the crunch of hazelnuts, the little berries were down right delectable. Not too sweet and just complex enough, the berries proved that taking a little leap of faith is worth it once-in-a-while.

Bay Scallops with Goji Berries and Hazelnuts
Serves 2

about 16-20 bay scallops
2 tbl butter
2 tbl minced shallot
1/2 cup red wine
2/3 cup Goji berries (or Champagne grapes or dried cherries)
1/3 cup hazelnuts, toasted
2 tbl parsley

- Put the dried berries in a bowl with 1/2 cup warm water to plump.
- Heat 1 tbl of the butter in a saute pan, add the scallops and sear on high heat, only 1-2 minutes. Remove scallops. Melt the remaining butter in the same pan. Add the shallot and saute over medium heat until softened. Deglaze the pan by adding the red wine, scraping up any brown bits. Add the berries and their liquid and the hazelnuts, stirring over medium heat. Return scallops and their juices to the pan, tossing to coat. Divide the mixture between two serving plates, arranging scallops on top. Garnish with parsley, serve.

07 January 2007

Chocolate for Kings


Believe it or not, I am rather ambiguous about chocolate. I know, some of you out there are crying heresy, but let me confess. I don't dislike it, but I primarily prefer chocolate as a vehicle for peanut butter or caramel, both of which I would prefer on their own. And chocolate cake? It's always sort of disappointing, isn't it? Not dense and fudgey like a brownie, not as satisfying as yellow butter cake.

But this is not chocolate cake, it is fallen chocolate soufflé cake, and it is oh-so-good. I am a sucker for a souffle, both sweet and savory, with that luxurious texture from the beaten egg whites. But the fallen part is what makes this cake so good- there's no worrying about rushing the dish to the table just in time, this cake is actually supposed to deflate. And as it does so, the top crackling, all those wonderful layers fold in on each other to make a pleasingly rich-yet-light cake.

I made this cake for our Epiphany celebration- it is certainly not the traditional king cake, but I wanted to use up those holiday sweets and gifts lurking about, and we had some nice Christopher Norman chocolate bars. I have made this cake before with an average chocolate, and I would have thought the main difference would have been in deeper flavor. However, the surprise was the difference in texture: I think finer quality chocolate results in a smoother, more unctuous texture in baked goods. Call me a convert, from now on it's better quality chocolate in my baking forays. Who knows, I might even start liking the stuff?

Fallen Chocolate Soufflé Cake
The top of this cake may be crackly and light, but it hides a dark luscious interior. I wish I had a photo for you all, but I'm afraid we ate it too quickly.

1/4 cup flour
1 tbl cocoa powder
1 tsp instant espresso powder
8 oz bittersweet chocolate
8 tbl (4 oz) butter, cut into chunks
5 large eggs, seperated
3/4 cup sugar
1 tsp vanilla extract or liquer

1. Preheat the oven to 350 F. Grease and flour a 9 inch springform pan.
2. Combine the flour, cocoa powder, and espresso powder in a small bowl.
3. Prepare a double boiler. Place the chocolate and butter in the top of the double boiler and stir until melted, set aside.
4. In a medium bowl, beat the egg yolks and the sugar until light and thickened (the mixture should be ribbony), about 3 minutes. Stir in the melted chocolate and the vanilla extract.
5. In another clean bowl, beat the egg whites until they form stiff peaks. Fold 1/3 of the egg white mixture into the chocolate mixture to lighten it, then fold in the rest of the egg whites until just combined.
6. Pour the batter into the prepared pan. Bake about 35-40 minutes, until well risen and the top is crusty. Remove from the oven and let cool, it will fall. Remove the sides of the pan and transfer to a serving platter. Serve dusted with powdered sugar and with whipped cream, if desired.

For an 8 inch pan:
3 tbl flour, 1 tbl cocoa powder, 1 tsp instant espresso powder, 6 oz bittersweet chocolate, 6 tbl butter, 4 large eggs, 1/2 cup sugar, 1 tsp vanila extract or liquer

Bake as above in an 8 inch pan, baking time should be 35 minutes.
_______________

06 January 2007

Provencal January Summer


As the holidays came to a close, I was musing about a cold January of soups and stews, thinking that the planet might actually kick itself into gear and throw us a bit of winter. Not that I mind, of course, being notoriously cold-blooded, and having thoroughly enjoyed a post-Thanksgiving turkey sandwich picnic al fresco.

But as the temperatures in New York climbed to above 70 F on January 6, things are beginning to feel a bit weird. One can't help but wonder what will happen with the life cycles of our plants, with cherry trees blossoming in the Brooklyn Botanic gardens, and if we are going to have winter at all. Concern for our planet may make us take all the "eat local, eat seasonable" advice to heart, but what season is it, exactly?

After playing in the park and sitting outdoors at a cafe, I was dreaming of Mediterranean breezes, which inspired this simple dinner. It turned out to be a perfect light dish, a simple sauce accented with just the right bite of salty olives and herbs to compliment the tender fish. A satisfying start to a healthy New Year, no matter what the weather brings us.

P.S. To those celebrating Epiphany, I wish you a happy holiday!

Provencal-Style Tilapia
This is a perfect easy dinner, served with good crusty bread or some basmati rice.

1-2 tbl olive oil
2 small shallots, chopped
1 tin chopped tomatoes
1 handful flat-leaf parsley, chopped
1/4 cup black Nicoise olives
2 medium Tilapia fillets
fresh black pepper

- Heat the olive oil in a wide deep saute pan. Add the shallots and cook until softened, about 5 minutes. Add the tin of tomatoes and about 1/4 to 1/2 cup water, depending on how juicy your can of tomatoes was. Reserve a bit of the parsely for garnish and add the rest to the sauce pan with the olives. Let the sauce come to a simmer, it should only take a couple minutes. Reduce the heat to low and carefully slide the two fillets into the sauce so they are submerged. Simmer until the tilapia is opaque and flakes easily, about 10 minutes.
- Carefully lift the fillets with a spatula onto plates and spoon some of the sauce over top. Sprinkle with the reserved parsley and season with fresh black pepper.

04 January 2007

Coconut-Chocolate Tarts


Last time we talked about those New Year's festivities, with their lovely bite-sized nibbles and its air of abandon. Undoubtedly some of you are regretting all those many glasses of Champagne that made the beginning of 2007, well, less than pleasant. But we never got around to talking about dessert, and this one is a good one. I mean, it's even seasonably black and gold, though these little bites would be good for any season.

These are like chocolate-dipped macaroons in reverse- a crunchy coconut shell with a luscious dollop of ganache filling. This is a recipe I love because they are fast and simple to make yet come out looking professionally elegant and tasting great. The first time I made them, to my delighted surprise, they looked just like the photo in the cookbook (I mean, when does that ever happen?). The tiny tartlets are eaten just as easily, only leaving you with the problem that you probably won't have any leftovers to snack on the next day.

Coconut-Chocolate Tarts
from Gale Gand

3/4 cup sugar
3 egg whites
2 1/2 cups sweetened flaked coconut
8 oz bittersweet chocolate
1/2 cup cream

Preheat the oven to 350 F. Stir together the sugar, egg whites, and coconut. Grease very well 24 mini-muffin cups, silicone molds, or tartlet pans. Place a dollop of coconut mixture in each cup and gently press up the sides of the muffin cups. Bake the coconut shells 12-25 minutes, until golden. Run a knife around the edges of the shells and let cool completely in the pans, then carefully remove them (they will stick a bit).
Chop the chocolate and place it in a medium bowl. In a saucepan, heat the cream to a simmer, then pour over the chocolate. Stir until melted and smooth. Using a pastry bag or a spoon, place a bit of chocolate in each coconut shell.
You can use the coconut scraps that will inevitably have broken off some of your shells for garnish, or garnish with some toasted almonds.