Whew, you all, it is AUGUST?! I know, I'm going to say that thing every other person in North America is saying right now, which is where on earth did summer go? Maybe because it's been cooler than normal, or maybe because we continue to live in the land of furniture-less limbo, but I feel like summer should only be just be beginning. It seems like just a short while ago I was shivering in a hotel in Fez in the cold and being lectured by a lady named Fatima about how I shouldn't be afraid of dough (لا تخفي من العجين).
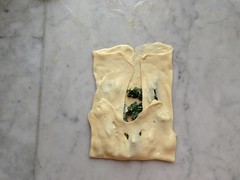
Mhajeb (mahjab, mhadjeb, etc) is a stuffed flaky bread that is uniquely Algerian, and it's probably the number one thing any Algerian abroad would miss, followed by proper couscous and kesra bread. To make mhajeb you take the flaky flat bread known as msemmen and then you stuff it with chickchouka, a spicy pepper mixture. Mhajeb are great for breakfast or for a snack, but they are also really tough to make. For about a year in Algiers I had been trying to make them, following recipes on various Algerian blogs, with little to no success. A mhajeb should be wide and flat and soft and flaky, and mine were routinely lumpy and leaden.
When I started asking around, saying I wanted to learn to make msemmen dough, I initially got some quizzical responses. (Msemmen dough is the base for msemmen bread, mhajebs, and some kinds of steamed pasta doughs in Algeria.) Oh, that's very hard, one man said, wouldn't you rather make a chicken tagine? I also annoyingly got the response, "oh it's just grandma's and women who make that," clearly implying that I shouldn't bother learning. Luckily, enter Fatima.
Fatima didn't speak French or English, and I didn't speak much southern Moroccan dialect, but we managed to work around that. I'm at whiz at hand gestures! She gave me several tips that make msemmen dough a lot easier. While very traditional grandmas make the dough using all semolina and no yeast, and spend hours kneading and working the dough to get the right elasticity, for novices like myself adding some flour and yeast makes the dough a whole lot easier. Letting the dough rest in the refrigerator also makes it easier to work with and gives you more flexibility as to when you want to make the bread.
Tutting at me unapprovingly when I was kneading the dough, Fatima demonstrated the force with which I had to knead the dough to get it to be supple and stretchy. You look like you are afraid of it, she exclaimed! Ashamed of my wimpy American dough-making skills, I quickly straightened up and began beating the dough with all the force my chattaranga-toned arms could muster. "Better," she nodded.
Back at home, while my mhajebs still aren't perfect, they are a very good approximation. Every time I make them, Paul usually pops his head in the kitchen and says,"don't be afraid of the dough!" Then we laugh, and then we eat a bunch of fresh-off-the-griddle mhajebs, because they are pretty addictive.
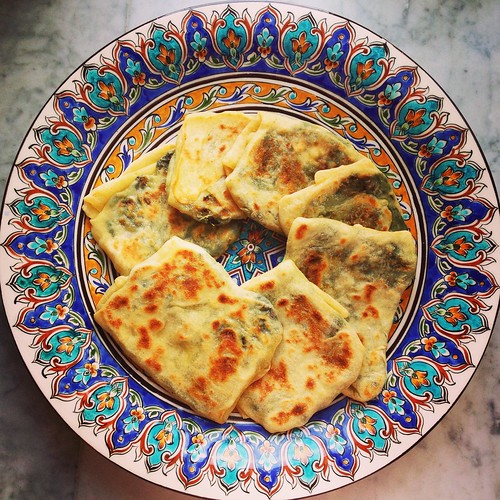
Spinach and Goat Cheese Mhajebs
Spinach and goat cheese is not a traditional filling, but it got an approving nod from some Algerian friends, which is all I can hope for when messing with other people's traditional foods. See the notes below for tips on the dough and semolina. You can also find the more traditional chakchouka filling recipe here. Or use another filling of choice (merguez with tomatoes is another good one).
for the filling:
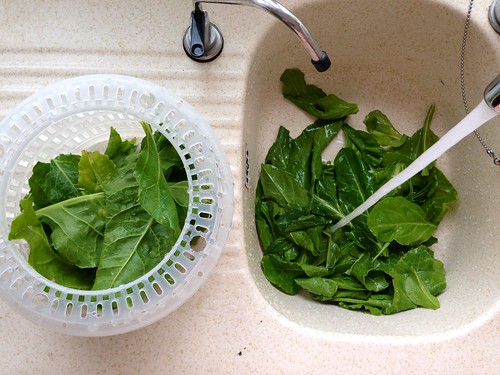
1 large bag of spinach, washed and sliced into strips
2 cloves of garlic, sliced
1 pinch of red pepper flakes or Aleppo pepper
4 ounces goat cheese
salt, olive oil
for the dough:
1 1/2 cups fine semolina (also sold as semolina flour, see note)
1 1/2 cups all-purpose flour
2 teaspoons salt
1/8 teaspoon SAF instant yeast
4 tablespoons butter
1/2 cup neutral cooking oil
water, approximately 1/2 to 3/4 cups, plus more for your hands
1. Melt the butter in the oil and stir gently to combine.
2. Mix together the flour, semolina, salt, and yeast in a large wide bowl (traditionally a g'sa). Scoop out 2 tablespoons of the oil butter mixture and add it to the semolina mixture. Rub the fat into the semolina mixture until it is distributed. Very slowly add the water to the dough, pouring it through your fingertips, then swirling your fingertips through the mixture, until a shaggy loose dough is formed. Knead this dough a few times so that is comes together. Cover with a damp towel and let rest for 15 minutes.
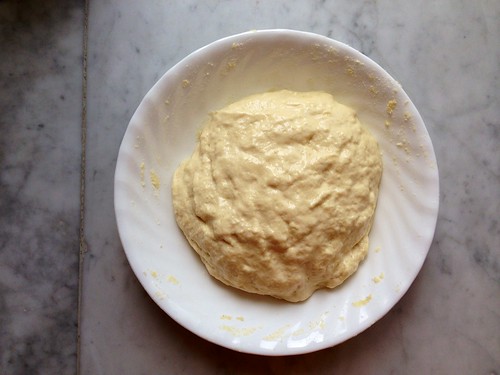
3. Place a small bowl of water near your work surface. Working in the g'sa or on your countertop, dampen your hands with the water, and then begin to knead the dough. You want to gather the dough into a ball and then use the heel of your hand to stretch the dough away from you against the countertop. Then with your opposite hand gather the dough back into the ball, and then stretch it out away from you again, it's a sort of push-pull method. You want to be very forceful with the dough and really knead it hard. Do this for about 8 minutes, or about 4 minutes past the point when your arm muscles are exhausted. Keep moistening your hands as necessary. See Note 2 for extra pointers.
The dough should be stretchy and elastic, like this:
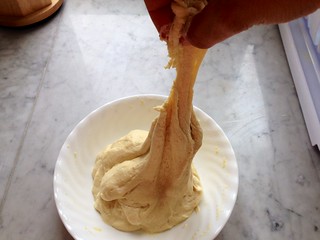
4. Coat a bowl and the dough ball with some of the oil mixture, and then cover with plastic wrap and place in the refrigerator. Let rest in the fridge for a minimum of 1 hour or up to 12 hours. (if you're in a rush, just let it sit on the counter covered for 30 minutes.)
5. Meanwhile, make your filling: Heat some olive oil in a sautee pan. Add the garlic and pepper flakes for one a minute, until softened, and then add in all your spinach. Season with salt and turn the spinach until it is all wilted and cooked. Set aside to cool. Once the spinach is cool, stir in the goat cheese.
6. Back to the dough: Take the dough out of the fridge and let warm up for about 30 minutes.
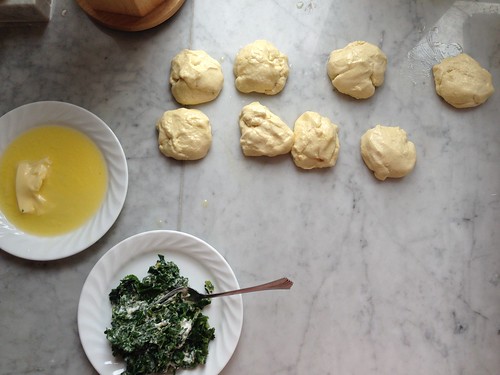
7. Pinch of balls of the dough, smaller than your fist, roll each ball in the butter/oil mix, and place on the counter. Cover the dough balls with a damp cloth and let rest 10-15 minutes.
8. Have a greased griddle or heavy-bottomed greased pan ready and heated to medium heat. Also place a mesh colander or cooling rack nearby.
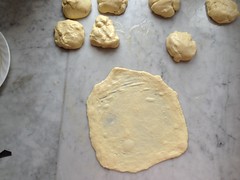
9. Oil your countertop with some of the oil/butter mixture, and oil your fingers. Then take a dough ball and gently press and stretch it out with your fingertips into a flat wide circle. Add extra oil to the dough to make working it easier. The dough should be thin enough to read a newspaper through it. It is okay if you get little tears along the edges of the dough, but try not to get any tears in the middle. (If you do get tears, just patch them with a spot of dough.)
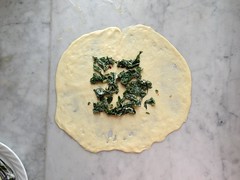
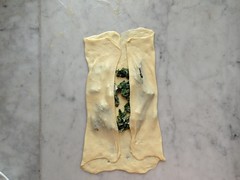
10. Place a small amount of the spinach filling over the middle of the dough. Do not overstuff!! Then fold the edges of the dough up and rub with with a bit more oil. The mhajeb should be wide and flat and thin, not over stuffed and bulky. Immediately transfer the mhajeb to the griddle and cook for about 2-4 minutes on the first side, until browned in spots. Flip over and cook on the second side until lightly browned in spots, about 1-2 more minutes. You want the mhajeb dough to be cooked but you don't want to it to become stiff or rigid, it should remain supple. Transfer to a cooling rack or colander.
11. Repeat rolling out and frying the remaining mhajebs. The more practice you have, the better they will be! Mhajebs are best eaten on the day they are made or the day after.
Note 1: Many groceries, like Whole Foods, sell the Bob's Red Mill brand of semolina flour, which will work well here. A Middle Eastern grocery should sell many grades of semolina (smeed), you want the finest grain.
Note 2: There is a great video here of an Algerian lady making traditional mhajebs. It is in Algerian, but you can really see the technique for how to knead and stretch the dough from minute 1:30 to 5:00. She also makes the traditional chikhchouka stuffing, and sits at a traditional table for making dough called a maida. I totally want this lady to be my Algerian grandma.

No comments:
Post a Comment