30 April 2014

Local Ingredient Spotlight: Making Warka Pastry

DSC_0357
Warka dough, also known as waraka or feuilles du brik, is the dough used to make North African pastries and the fried stuffed packets known as brik and briouat. Many people think warka dough is just another version of fillo dough, and while the applications are quite similar, the dough techniques themselves are very different. Unlike fillo, which is a thin flour-water dough rolled with a rolling pin, warka dough is a very sticky dough that is rubbed directly onto a griddle to cook. The result is a very thin but pliable and almost rubbery dough that is very easy to work with.

My husband was able to get this video of warka being made in the market in Fez (thanks to the kind lady for tolerating us!).


In Algiers freshly made feuilles du brik are always found in butcher shops, where they will be piled atop the counter along with freshly made rechta noodles. The picture up top is of a batch I picked up at my local butcher the other day.

If you are reading this entire post saying to yourself, "what on earth is a brik, and since when was brik a food group?" Fear not, my friends! Brik is basically just the North African version of spring rolls, and a cousin to Turkish bourek, and I'll have a recipe for a simple cheese brik coming up soon!

24 April 2014

Harira in the Style of Oran

DSC_0325
Hello from America, dear readers! I confess, I have been traveling like crazy these days, and while I want to write a long post about our Morocco adventures or give you all a great spring recipe with cardoons, I've been stuck on planes and trains and airports. (Speaking of travelogues, I want to do a site redesign over the summer when I have a bit of time off, and I want to start including some travel guides or write-ups with a Middle Eastern bent to them. Would that be of interest to you readers? Where to find good amlou in Morocco or fresh anchovies in Istanbul? Let me know in the comments.) In the meantime, today we're going to talk harira!

Harira is the traditional soup served in North Africa to break the fast during Ramadan. It is also just a stand-by soup, a delicious, reliable, and cheap option for dining in Morocco and Algeria. Traditionally, harira is a tomato-based soup, with a little bit of meat and some onions, legumes, and herbs. Harira is a soup that is very much about the broth, richly flavored from the bones used to make the soup.

DSC_0317
I'd read on several Algerian cooking blogs (great resources for my culinary research, not to mention linguistic FrArabic oddities), about the harira from Oran. Oran (wahran, in the Arabic spelling), Algeria's second largest city, is on the coast close to Morocco. It was home to Camus and often pops up in American tales about WWII, as a base of the North African front.

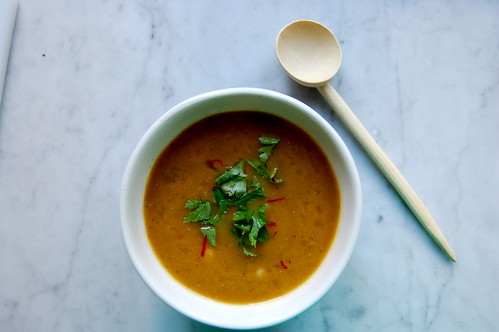
Anyway, harira in the style of Oran is unique for its 
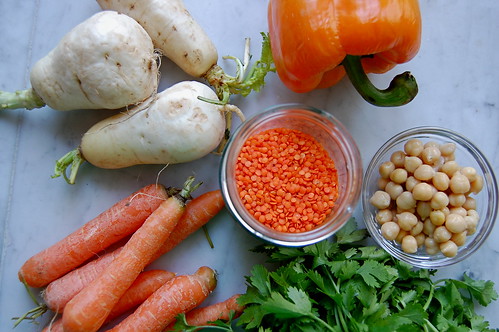
golden color, imparted by luxurious saffron. The sunny hue also comes from the vegetables used (usually carrots, sometimes pumpkin) as well as tomato paste. You see the Moroccan influence in the spices of the soup, warm with ginger, cumin, and paprika.
DSC_0321
DSC_0324DSC_0330
 In researching the harira, I found several recipes that called for thickening the harira soup with levain (bread starter), a very old technique for thickening a soup. Other recipes called for thickening the soup with dchicha, a generic term for grits, like wheat, barley or freekah grits. Several versions called for a bit of lentils to thicken the soup, which I liked the best. The red lentils also preserve the color of the soup.

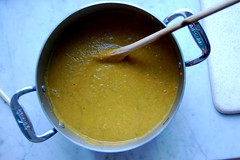
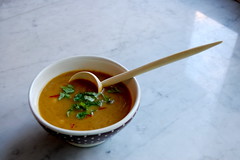
This soup is made the way most hariras are made, cooking the vegetable-broth mixture and pureeing it, then adding back in the chickpeas, herbs, and meat. This version is vegetarian (in all honesty, most harira has so little meat it's practically vegetarian anyway). The soup is brothy, cheerful in color, and you always brighten it at the end with some good doses of lemon juice.

About harira spoons: I got these harira spoons from the kindest old man in the souq in Marrakech. Harira spoons are carved by hand from a single piece of lemon tree wood. When the lemon tree branches become old and stop producing fruit, they are trimmed and used for spoons and small spice servers. They cost about 50 cents a piece in the souq.
DSC_0328
Harira in the Style of Oran (Harira Wahrani)
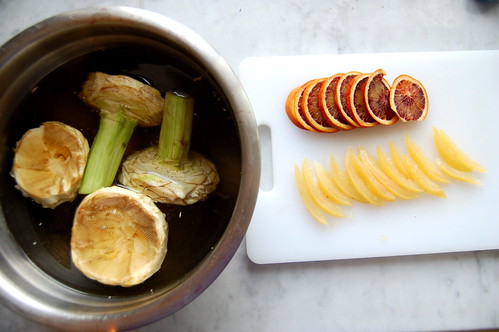
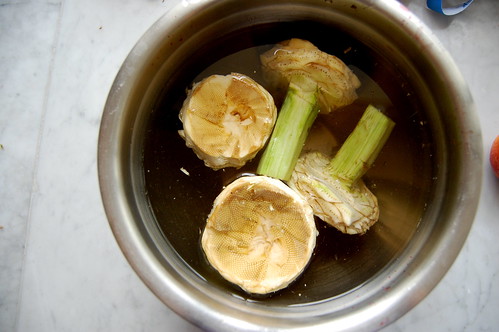
You can play around with different orange-colored vegetables here, try substituting squash for the carrots and turnips. I originally thought about including a yellow bell pepper (pictured above) but changed my mind at the last minute, though I imagine its sweetness would go nicely with the ginger. 

1 small onion, chopped
2 cloves garlic, sliced
1/4 inch piece fresh ginger, peeled and diced
1 tablespoon tomato paste
4 medium-sized carrots, chopped
2 small turnips, peeled and chopped
3 tablespoons red lentils
1 teaspoon cumin
1/2 teaspoon sweet paprika
1/2 teaspoon ras al hanout spice mix (if available)
salt, black pepper
saffron, if available
1 bouquet of cilantro
a few pieces of parsley
6 cups rich chicken or beef broth, plus more for thinning the soup
2 cups cooked chickpeas
3 lemons

1. Heat some olive oil in a soup pot. Add the onion and cook, stirring occasionally, until soft, translucent, and starting to caramelize in places. Add in the garlic and ginger and let cook a few minutes, until fragrant. Add in the tomato paste and let toast for a minute. Stir in the lentils, carrots, and turnips and stir everything around the coat. Add in 1 teaspoon of salt, the cumin, paprika, ras al hanout, a few cracks of black pepper, and a few threads of saffron, crumbled. Stir everything around to coat and let cook a few minutes, until the spice are fragrant.
2. Add in the broth. The liquid should just cover the vegetables. If it doesn't, add water until you have enough liquid. Cover the pot and let simmer for 20 minutes.
3. Meanwhile, chop your bouquet of cilantro and the parsley. Set aside several pinches of cilantro to use as garnish. Juice two of the lemons. Chop the 3rd lemon into wedges and set aside to serve with the soup.
4. Puree the soup. If you don't have an immersion blender, don't forget to let the soup cool before blending. The soup should be brothy and not too thick (it's soup, not potage or puree). Adjust the thickness of the soup with any reserved broth or water.
5. Return the soup pot to the heat and add the cilantro/parsley, the chickpeas, and another large pinch of salt. Let the soup simmer for another 10-15 minutes. Add the lemon juice, stir to combine and taste for seasoning.
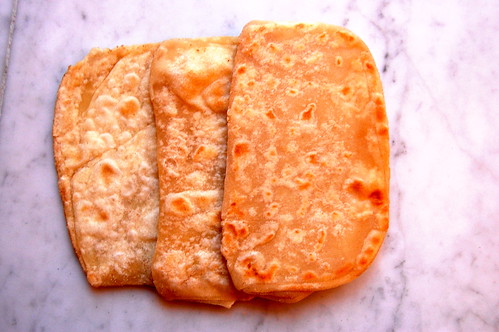
6. Ladle the soup into bowls and garnish with the cilantro and, if available, a few crushed saffron threads. Serve with the lemon wedges and good bread.

18 April 2014

Artichokes with Oranges and Preserved Lemon

DSC_0355
Like fennel and oranges, artichokes and oranges are one of the traditional North African pairings that is so classic you've probably come across it before (even if you didn't know its provenance). I've written about it before, and I find it is one of those pairings I turn to again and again. It bridges the funny pre-spring, post-winter season, the last of the oranges, the first of the artichokes.

DSC_0335
DSC_0338 DSC_0352
I learned this particular recipe in Fez, and quickly recreated it when we got home, obviously a good indicator of how much we enjoyed it the first time. Originally it was done with sweet large navel oranges, but this time I used some blood oranges intended for juicing. (Algerians take their oranges seriously, there are those for juicing, those for eating, those for cooking, etc.)

The orange here is quite sweet, but I find the bit of preserved lemon gives it just enough sharpness to prevent it from being cloying. I was trying to do a bit of research regarding the origins of this salad, if it was from a particular part of Morocco, but it seems to be rather ubiquitous. And now that you know how to prep artichokes, maybe it can be ubiquitous in your home too!
DSC_0364
Artichokes with Oranges and Preserved Lemon

1 tablespoon butter
1 small sweet white onion, diced
1 clove garlic, sliced
5 large artichokes (or 8-10 small artichokes), prepped
4 navel oranges or 6-8 blood oranges
2 tablespoons sugar
1/2 a preserved lemon, rind sliced

1. Slice one navel orange or 2 blood oranges into slices and set aside. Juice the remaining oranges until you have 1 generous cup of juice. Stir in the sugar to the juice and set aside.
2. In a pot melt the butter over medium heat. Saute the onion until soft and translucent. Add in the garlic and stir to combine. Place the artichokes in the pot, turn the heat to low and cover the pot. Let the artichokes steam in the pot for 5 minutes.
3. Add in the juice and the lemon rind. Place the orange slices over top. Cover the pot again and cook for another 15 minutes, checking the pot once or twice, until the artichokes are tender when pierced with a knife.
4. Turn the mixture into a serving dish, arranging the orange slices on top. Serve warm.

15 April 2014

How to Prep an Artichoke


1. Prepare a bowl of acidulated water, this will prevent the artichokes from discoloring.
2. Peel away the lower leaves with your hands until the whole base of the choke is exposed. (Save the leaves, you can steam them and serve them with dip, or use them to make a vegetable stock.)
DSC_0342
DSC_0343
DSC_0350

3. Cut off and discard the top of the artichoke, You want to cut right along where the top of the fleshy choke is, which is usually lower than where you think it is. Knowing where to cut takes a bit of practice, but you'll get the hang of it.
DSC_0345

4. Also trim the base stem. If you plan to stuff the artichoke bottoms, you should discard the whole stem. For other artichoke dishes or you can leave about 1-2 inches of the stem on, it is tender and edible.

5. Use your knife to trim away any green spots from the base (underside) of the artichoke bottom. Also peel the outer layer of the stem, if you left the stem on. It doesn't have to be perfect or smooth, but you want to get rid of the green bits some they will be tough.
DSC_0348

6. Now, with your knife or a sharp-edged spoon, trim away the inner fuzzy choke. I like to do this part last since it discolors quickly. Again, it doesn't have to be perfect, just trim away the sharp and fuzzy parts of the choke.
DSC_0346

7. Place the artichoke in the water and repeat with remaining. 
DSC_0351

Artichoke recipes: Artichokes with Meat and Tahini Sauce, Artichokes with Peas and Favas, Artichokes with Oranges, Saffron, Almonds and Olives

01 April 2014

Turkish Tahini Flatbread

DSC_0024
We have just returned from two amazing weeks traveling through the Moroccan countryside, and I have SO MANY exciting food things to share with you (and other adventures, like driving through river beds in a crappy rental Peugeot)! But before I can get all my thoughts and pictures organized, we have to talk about this tahini bread that I made before we left.

As you can imagine, and I hope many of you readers share this obsession with me, the phrase "tahini bread" is music to my little ears. I still love this flaky tahini bread I made many years ago. Naturally, when I wanted to make one of the breads from Classical Turkish Cooking, of course I settled on the tahinli recipe. I read over the recipe, where I learned this was not the traditional flaky rolls (tahinli ekmek or tahinli corek) but a tahini flatbread (tahinli katmer).

DSC_0016DSC_0018
DSC_0020DSC_0021
DSC_0022

I am a really strong believer that, when making a recipe you've never made before, you should always read the recipe through thoroughly, preferably twice. But, we don't all always follow our own rules now, do we?? (I certainly hope not, life would be so boring if we did.) So in this case, reading the recipe through meant sort of skimming the one page of dense text. "Yeah, yeah, roll, layer dough with tahini filling, roll, fold, roll. That's it," I thought.

DSC_0023
Fast forward to me in my kitchen, staring at the recipe in disbelief, thinking, "wait I have to fold AGAIN?" ... "the dough has to rest AGAIN??" ... and the sudden realization that I had endeavored upon making an item that was akin to making PUFF PASTRY. Now making puff pastry is all fine and good when you actually plan to be making puff pastry. Realizing you're unintentionally half way through making puff pastry on a weekday night when you just wanted to get dinner on the table is another matter altogether. (As my friend says, I need to know if we're going to do the hard workouts at least one day in advance, gotta psyche myself up!)

However, the upside to all this is that the idea of making puff pastry with tahini is pretty darn cool right?! It's not a true puff pastry, but I like the idea of a flaky tahini-embedded dough to use as a crust for a savory pie or tart. It's something I'd like to play with in the future, provided I have some time to psyche myself up for it. In the meantime, these breads are delicious, nutty and rich with tahini. If you plan some extra time to make these, they are quite rewarding.

P.S. Culinary nerd note: In making these I couldn't help notice a similarity in the technique between the Turkish katmer bread and the North African msemmen bread. Perhaps an old Ottoman influence? Then again, layered flaky flatbreads are traditional in many ancient cuisines.

DSC_0027DSC_0028
DSC_0030

Turkish Tahini Flatbread
The original recipe actually had one additional fold before rolling and cooking the breads, but I've eliminated it because I felt the final fold smooshed out the tahini too much. (Yes, smooshed is a technical term). You want to handle the dough both gently and firmly, like good parenting, to preserve the individual tahini layers.

2 cups all purpose flour, plus more for rolling
1/2 teaspoon salt
2 tablespoons unsalted butter, cold and cut into small pieces
3/4 cup milk

1/2 cup tahini
4 tablespoons unsalted butter, room temperature
oil or clarified butter for cooking the breads

1. Combine flour and salt in a medium sized bowl. Add in the butter pieces and rub with your fingertips until the butter is distributed like small pebbles in the dough. Make a well in the center of the dough and pour in the milk. Mix in the milk to form a dough, knead the dough for five minutes until it is very smooth. Place the dough in a buttered bowl, cover with plastic wrap, and let rest for 1 hour.
2. Meanwhile, mix together the tahini and butter, pressing with the back of a spoon until well mixed.
3. Divide the dough into 8 balls and cover with a damp towel, let rest 20 minutes.
4. On a floured work surface, roll out one ball of dough to a 7 or 8 inch circle. Spread some of the tahini-butter mixture over the dough circle and set aside. Roll out another dough circle, place that circle over the first circle, and spread with more tahini mixture. Continue rolling and stacking the dough circles, coating each layer with the tahini mixture, until you have 4 dough lyers stacked (do not coat the fourth dough layer with the tahini mixture). Crimp the edges of the 4-layer dough/tahini stack to seal. Repeat with the next four balls of dough. You will not use up all the tahini mixture. Cover your two stacks with the damp towel and let rest 15-20 minutes.
5. Again working on a floured work surface, take the first dough stack and, working gently at first, roll it out into a wide circle. The dough should be about 1/4 inch thick. Spread with some more tahini mixture and roll up like a jelly roll. Repeat with the second dough round. Cover the two jelly rolls with a damp towel and let rest 15 minutes.
6. Cut each jelly roll into 4 sections, and pinch the edges of each section to seal in the tahini.  On a lightly floured work surface, roll out each section gently until just flat, you should have a medium sized (about 6 inch) square or rectangle.
7. Heat some oil or clarified butter in a skillet or griddle until hot. Cook the breads, about 1 minute each side, until brown blisters appear on the bread and the dough is cooked. Regulate the heat as you work so that the pan is not too hot or too cool. Serve the breads warm.