28 April 2009

Homemade Burger/Sandwich Buns

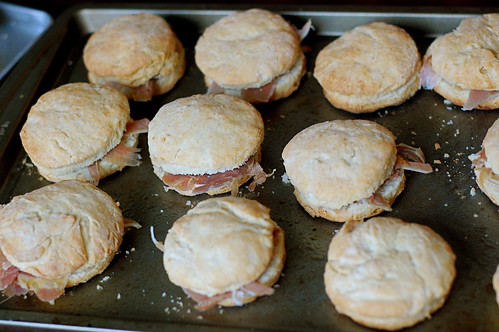
I know, homemade burger buns sound awfully pretentious, don't they? But you know what, they're way better than store bought, and if you're not intimidated by yeast, they're very easy to make too. They have the rich yeasty-ness of a good bread and soak up the juices of a grilled burger or a batch of barbeque just right. They're good enough that I've eaten them toasted, with butter, for breakfast.

If you don't have a stand mixer, I've made these by hand without a problem, just a little more of a bicep workout. Adapted from Gourmet.


ingredients:
2 cups whole milk, scalded and cooled (105–115°F)
1/4 cup warm water (105–115°F)
2 (1/4-oz) packages active dry yeast
1/4 cup plus 1/2 teaspoon sugar, divided
1/2 stick unsalted butter, cut into Tbsp pieces and softened
2 large eggs, lightly beaten
1 tablespoon salt
6 cups all-purpose flour, divided
1 large egg mixed with 1 Tbsp water for egg wash
sesame seeds for dusting (about 1/4 cup)
Equipment: a stand mixer with paddle and dough-hook attachments; a 3-inch round cookie cutter (an overturned small bowl or large cup also works)

1. Stir together warm water, yeast, and 1/2 tsp sugar in mixer bowl until yeast has dissolved. Let stand until foamy, about 5 minutes. (If mixture doesn’t foam, start over with new yeast.)
2. Add butter, warm milk, and remaining 1/4 cup sugar to yeast mixture and mix with paddle attachment at low speed until butter has melted, then mix in eggs until combined well. Add salt and 4 cups flour and mix, scraping down side of bowl as necessary, until flour is incorporated. Beat at medium speed 1 minute.
Switch to dough hook and beat in remaining 2 cups flour at medium speed until dough pulls away from side of bowl, about 2 minutes; if necessary, add more flour, 1 Tbsp at a time. Beat 5 minutes more. (Dough will be sticky.)
3. Transfer dough to a lightly oiled large bowl and turn to coat. Cover tightly with plastic wrap and let rise in a warm draft-free place until doubled, about 2 1/2 hours. (If you run out of time here, you can let the dough rise in the refrigerator overnight, or let it rise partially on the counter and then refrigerate it until you are ready to continue. Allow to come fully to room temperature before continuing.)
4. Butter 2 large baking sheets. Punch down dough, then roll out on a lightly floured surface with a floured rolling pin into a 14-inch round (about 1/2 inch thick). Cut out as many rounds as possible with floured cutter and arrange 3 inches apart on baking sheets. Gather and reroll scraps, then cut out more rounds. Loosely cover buns with oiled plastic wrap and let rise in a draft-free place at warm room temperature until they hold a finger mark when gently poked, 1 1/2 to 2 hours.
5. Preheat oven to 375°F with racks in upper and lower thirds.
Brush buns with egg wash and sesame seeds and bake, switching position of sheets halfway through baking, until tops are golden and undersides are golden brown and sound hollow when tapped, 14 to 20 minutes. Transfer to racks to cool completely.

Cooks’ notes: If you don’t have a stand mixer, stir ingredients together in same sequence with a wooden spoon until a dough forms. Knead dough on a floured surface, incorporating just enough flour to keep dough from sticking, until smooth and elastic, 7 to 8 minutes. Buns can be frozen, wrapped well, up to 1 month.

18 April 2009

Mississippi Mud Pie

If you could combine the richness of a brownie with the crunch of cookie, the homeliness of a slice of pie, the lightness of whipped cream all laced with a splash of rum, than this would be it. I had a Southern-themed dinner the other day: North Carolina-style pulled pork, coleslaw, and I decided on Mississippi mud pie for the chocolate-loving guest. But then, what is Mississippi mud pie? It seems everyone has a different definition. It should have chocolate and probably pecans, but from there it's anyone's guess. Some make it with a pudding filling, some with a baked custard, some insist it should be all filled with ice cream, while others say it must be served with ice cream. It should have a cookie crust, but should it be made with graham cracker, chocolate cookies, or pecan sandies? Should it have whipped cream? Should there be pecans on top or on the bottom, or none at all.

I found no consensus when searching online for recipes, where most of them called for things like instant pudding and cream cheese and store-bought crusts. My Southern cookbooks were devoid of Mississippi mud pie recipes, perhaps fearing the controversy. So I simply gave up and just made up a recipe of my own, collected from some of the recipes I had read. Also, I was tired of typing "Mississippi" into search engines.

I'm not much of a chocolate fan, but I don't care, this pie rocks. It's rich and sweet and crunchy and creamy all at once. There hasn't been anyone around to help with leftovers, and I don't mind working away at them, all by myself. Which is what I think I'll do right now, if you'll just excuse me for a moment.


Mississippi Mud Pie

for the chocolate cookie crust:
8 tbl butter, 9 ounces chocolate cookies or 1 1/2 cups cookie crumbs, 1/2 teaspoon salt

6 tablespoons butter
3 ounces bittersweet chocolate
3 eggs
1 cup sugar
3 tablespoon corn syrup
1 teaspoon vanilla

1 quart heavy cream
1/4 cup powdered sugar
2-3 tablespoons good dark rum
16-20 whole pecans, toasted

1. Preheat oven to 350 F. Make crust: combine chocolate cookies and salt in food processor and grind to crumbs. Melt the butter and then drizzle it into the food processor, pulsing occasionally until clumpy and combined. Press crumbs into pie pan. Bake 7-10 minutes until just firm but not darkened in color.

2. Combine butter and chocolate in a saucepan and melt over moderate heat until combined, stirring occasionally alternately, you can do this in a large bowl in the microwave). Remove from heat and let the mixture cool slightly (about a minute), then beat in the eggs until combined. Beat in the sugar, then the corn syrup and vanilla. Pour into pie crust and place in the oven. Bake 35-40 minutes, until the filling is set and cackled on the top. Watch that the pie crust edges don't burn.

3. Let the pie cool completely to room temperature. In the meantime, chill the cream, and if you'd like chill the bowl and the beaters (this will help the cream whip-up faster). Whip the cream to stuff peaks, then beat in the sugar and the rum, taste to see if it needs more sugar or more rum.

4. Spread whipped cream over pie, decorate with pecans. Serve at room temperature (leftovers straight from the fridge are good too).

12 April 2009

Maqloube (Upside-Down Lamb and Eggplant Casserole)

We marked the end of my mom's 6 week radiation and chemo treatment last week, which is certainly cause for celebration. We had invited a few people and I had intended to just order some platters from our local Lebanese Taverna, just to make my life easier. But then the cook in me, seeing the price for a simple platter of fattoush, kicked in and I thought I could just put everything together myself. Somehow, between going to radiation treatments, work and meetings, and driving the joys of every beltway and interstate in Maryland, I managed to convince myself it would be easier to also cook for 20. Yes, easier, of course.

Lebanese food was on order from mom, so I chopped miles of tabboule and poured pounds of butter into baklava, cursing the whole time and regretting my decision. Part of my impetus to coking everything myself was that I wanted to make a lamb and eggplant casserole called maqloube. It was something my family in Syria always made for special occasions, it's big and showy, and what better chance than this to cook it for my mom.

Maqloube means "over-turned" because the dish is cooked in a pot and then flipped over onto a platter. This of course, is where the danger is, as part of the dish usually sticks to the pot and it takes skill to get it to come out in one presentable piece. I do not yet possess this skill. Anyway, many people say maqloube is a dish of Palestinian origin, but my family, who hailed from northern Iraq and Syria, claimed they had also been making it for generations.

Basically, a decorative layer of eggplant and tomatoes is arrange in a dish, topped with chunks of lamb, a good amount of spiced rice, and then the whole thing is cooked in lamb stock. Some people place the chunks of lamb (or beef) on top, since in the Middle East they like to show off their meat, and there are variations that include chickpeas and other vegetables.

Unfortunately, the maqloube I made for the party was particularly un-pretty, I tried to fix it up with a drizzle of yogurt and pine-nuts, but nothing much could be done. The maqloube was so good it disappeared in minutes at the party, and my craving went unsatisfied. So, I made it again later that week, to test the recipe for you all, and to see if I could get a nicer picture. And then I forgot to take a picture, and that one was gobbled up too. So, maybe you will have better success at a prettier maqloube, but I'm sure it will be just as delicious.

Maqloube (Upside-Down Lamb and Eggplant Casserole)
Try to look for eggplants and tomatoes the same diameter. Good thick yogurt with a touch of lemon juice is an excellent, and I would say almost essential, accompaniment to this dish.

4 medium-size Japanese eggplants (the long skinny kind)
6 plum tomatoes
oil for frying, such as grapeseed or canola oil
1.5 lbs lamb, cubed (I used part of a top round)
1/2 a beef bouillon cube or beef broth
2 cups Jasmine rice
boiling water
1/4 tsp cardamom
1/2 tsp cinnamon
salt, pepper
butter, for greasing the pan

1. Slice the eggplants. If you are one of those people who are adamant about salting eggplant, do so. I don't. Pour oil about 1/4" deep into a wide frying pan and heat. Fry the eggplants in batches in the hot oil until golden on both sides. Drain on paper towels. The eggplant absorbs quite a bit of oil so you will need to add more oil to the pan as you go. Pat eggplants with paper towels and set aside.

2. In the same fry pan, heat a little more oil if the pan is dry. Saute the lamb cubes in the pan until opaque and browned in spots. Add water to the pan to cover the lamb and add the bouillon cube (alternately, add beef stock to the pan). Bring to simmer and let cook gently for 35-40 minutes. You will have to top up the water in the pan occasionally.

3. Meanwhile, bring a large kettle of water to boil. Place the rice in a bowl, and pour boiling rice over the water to cover. Let the rice soak for 30 minutes. Drain the rice, mix in the cardamom, cinnamon, salt, and pepper.

4. Choose a medium-size heavy-bottomed pot and grease heavily with butter. Layer the eggplant and tomato slices in concentric circle in the bottom of the pan. Line the edge of the pan with a circle of overlapping tomato slices. sing a slotted spoon, ladle the lamb cubes over the bottom of the pan. Spoon a thin layer of rice over the lamb. If you have leftover eggplant or tomato slices, layer them in the pan here. Spoon in the remaining rice and pt down gently, do not pack. Pour the reserved lamb stock over the rice. Cover the pan and bring the mixture to a simmer, then immediately turn the heat down to the lowest setting and cook, covered, for 45 minutes. Check the pot occasionally towards the end of cooking to make sure it still looks moist (I usually poke around with the end of a spoon). Add more water if it seems dry. Be careful the bottom doesn't burn.

5. Remove from heat and let stand 5 minutes. Uncover the pot and place a large plate or platter on top of the pot, then carefully but swiftly invert the rice pot onto the plate. Let the pot sit over the plate for a moment so all the rice can shift downward, then remove the pot. Inevitably, some of the rice/eggplant will have stuck to the pot, simply arrange it on the platter as best you can.

31 March 2009

Kunafe and Aish al-Saraya

There are some dishes that just never seem to reach across cultural divides. If you didn't grow up with it, cold squid salad for breakfast, like they serve in Japan, is something that's pretty hard to get used to. I'm an adventurous eater, I'll try anything once, but there are some things I think I'll never quite catch on to. I lived in Lebanon and Syria for years, I ate bowls of fetteh served with cows hooves on top, tried flatbreads cooked on dusty roadside grills, and discovered grains I'd never heard of. But one thing, one thing everyone seemed to love, I could never get used to.

Kunafe has as many different variations and definitions as there are cooks in Jordan. Basically, a crust of either buttery semolina, bread crumbs, or shredded phyllo is spread in the bottom of the pan, then some kind of cheese is layered on top, and then topped with more of the crust mixture. This is baked and then covered in sugary syrup. Traditional Palestinian kunafe is made a with a crumbly semolina crust, often dyed a fake orange, while in Syria you're more likely to see the kind made with shredded phyllo curls billowing like big hair. Usually the cheese is something chewy like halloumi or akkawi, and sometimes it's sweeter and softer like ricotta or clotted cream ('ashta).

My main problem with kunafe is that it sits in your stomach like a ten pound dumbbell, and my other problem is that I really don't like stringy melted cheese covered in syrup. Something about it is just kind of wrong to me, a clash of savory and sweet I can't stomach. In Lebanon, they serve kunafe for breakfast by plopping the whole sugary cheesy slice in the pocket of a pita bread. My friends in college swore by it as a hangover remedy, but I'm pretty sure it would make me queasy even on a sober stomach.


There is, however, a very similar desert called aish al-saraya or "bread of the mansion." In it, bread is soaked in a syrup mixture until soft and moist, and served cold with a big dollop of clotted cream ('ashta) on top. I always think of 'aish el saraya, sometimes translated as Middle Eastern bread pudding, as Egyptian, but you're just as likely to find it in Lebanon or elsewhere. My recipe, taught by a 2nd generation Lebanese friend, is sort of like a cross of aish el saraya and kunafe. The bread crumbs are moistened with syrup but not made heavy with butter, and the cheese is not stringy but a light and fluffy whipped ricotta. It's layered like kunafe but served cool, not warm, and very easy to make ahead of time.

A friend of mine swears her mother makes a version of kunafe even I would like, and another friend just back from Jordan says I have to try the new trend of "rolled kunafe," which she claims is lighter than the traditional version. But I've heard these claims before, so until a kunafe wins me over, I'll stick with my recipe.


Middle Eastern Bread and Cream Pudding

12 slices white bread or challah bread, something soft and mild
1 1/2 cups fragrant syrup, recipe follows
16 oz ricotta cheese
1 cup heavy cream
1/4-1/3 cup sugar

1. Preheat oven to 425F. Lay bread slices on two baking sheets and toast in the oven until golden brown. Process the bread in a food processor until you have fine textured crumbs.
2. Beat together the ricotta and 1/4 cup sugar. Add in the heavy cream and beat the mixture with an electric mixer until smooth and thick. Taste for sweetness- it should be pleasantly sweet with a hint of tang. Adjust sugar if necessary.
3. In a bowl mix the bread with the 1.5 cups syrup till you have a crumbly loose sticky mixture.
4. In a round 9 inch cake pan or spring-form pan, layer half the bread crumb mixture and pat with your hand to compact a little. It should not be as compact as pie dough.
5. Layer the cream on top of the bread crumbs. Add the rest of the bread crumbs on top of the cream and pat them down as much as possible without squashing the cream.
6. Refrigerate for at least 2 hours before serving and serve it cold, with an extra drizzle of syrup if desired.

for syrup:
2 cups sugar
1 cups water
1 tablespoon lemon juice
1 tsp rose water
1 tsp orange blossom water

1. Mix the sugar, water and lemon juice in a saucepan and heat until it boils and all the sugar dissolves. Let it simmer for 5 to 10 minutes till a little syrupy. Remove from heat, add the rosewater and orange blossom water, cool and store in a jar.

26 March 2009

Ham Biscuits

In the radiology waiting room a man stands, with trouser socks pulled up to his calves and shiny leather loafers, wearing nothing other than a droopy hospital gown. He has a laptop in one hand and a cell phone in the other, and he paces back and forth furiously, determined to do work up until the last minute he has to enter the radiation room. These are the prostate cancer patients.

There is a very pretty young woman, head wrapped in an elegant scarf with thick blush on her cheeks, sitting while milky white liquid drips into her veins. She has shiny silver flats that match her silver bag. There are middle-aged women too, many walking about slowly, many flat-chested, waiting outside radiology. These are the breast cancer patients.

There is a young man with a brace like my mom's, he has multiple myloma, with tumors along his spine. His mother comes each day in a different shalwar kameez, tunic and scarf perfectly placed, a perfect shade of sunset orange one day, a black and gold embroidered ensemble the next.

There are patients who carry buckets for vomiting in their laps, and those with perfect hair and those with none. These are the cancer patients.

No one looks like the brain cancer patients. No one has to be arranged on the table just so, wincing as their disabled body is laid on the hard surface. No one has to have a wire mesh mask clamped over their entire head and shoulders so tight that they can barely breathe or talk. No one else has the mask's "waffle face," the indentations that last for an hour after the mask has been released.

My mom has maintained a good appetite through her treatment, a side effect of the steroids, she happily eats most anything we put in front of her. Starches are best: pizza, mashed potatoes, pie, and pudding. Nothing too acidic or vegetal, the wine aficionado has lost her taste for anything except half glass of Lillet.

My aunt sent Tennessee country ham, super-salty thinly sliced cured ham, and I made biscuits for serving. Ham biscuits are less of a recipe and more of a Southern tradition. My grandmother called them "hambiscuit," one word and always in the singular. They are found at every family party I ever attended, and these days they are pretty comforting, wrapped in foil and tucked in your bag, snacked on in the sterile halls of the radiology waiting room.

Ham Biscuits

thinly sliced country ham (I recommend these guys)

2 1/4 cups all-purpose flour
2 teaspoons baking powder
1/2 teaspoon baking soda
1 teaspoon salt
1 stick unsalted butter—chilled and cut into small cubes
1 cup buttermilk, chilled
additional melted butter for brushing the tops

1. Preheat the oven to 425° and position a rack in the lower third of the oven. In a large shallow bowl, whisk the flour, baking powder, baking soda and fine salt. Add the chilled butter and use a pastry blender or 2 knives to cut the butter into the flour until it is the size of peas. Stir in the buttermilk just until the dough is moistened. Lightly dust a work surface with flour. Turn the dough out onto the surface and knead 2 or 3 times, just until it comes together. Pat the dough into a 1/2-inch-thick disk.

2. Using a floured 2 1/4-inch round cookie cutter, stamp out biscuit rounds as closely together as possible. Gather the scraps and knead them together 2 or 3 times, then flatten the dough and stamp out more biscuit rounds. Pat the remaining scraps together and gently press them into a biscuit.

3. Transfer the biscuits to a large baking sheet and brush the tops with the melted butter. Bake the biscuits for 20 minutes, or until golden. Let the biscuits cool slightly on the baking sheet.

4. Split biscuits, fill each with a nice, but not too thick, pile of country ham. Serve as soon as possible.

19 March 2009

Broccoli Bacon Cheddar Tart

I've been able to cook a little bit this week, which is refreshing. Yesterday I made this orange-olive oil cake, only with grapefruit instead of orange. It came out beautifully, burnished brown on the edges, with this perfect golden crack down the middle. I made a ginger-lemon snow pea stir fry the other day that was good enough to make you forget everything else on the table, and I made rice mixed with black sesames, sesame oil, and crumbled nori.

Cooking is a good grounding point in my day not rushing around nibbling this or that, a time to stop and actually prepare a meal for yourself, something all too infrequent in my life these days. I've had this hunk of chipotle gouda in my fridge that was on its last legs, entering the mold danger zone, for quite a while now. But while it's good, it's so spicy that I can only handle a few pieces in a sitting.

I was a going to make a quiche, but my pie pan being otherwise occupied (I made a chess pie for a party), a tart pan would suffice. So the spicy gouda got tossed in with some broccoli and crumbled bacon in an eggy bath for a tart.

This tart is fabulous, plenty of green broccoli fills it up, but then with smoky bacon and that warm heat of spicy cheese. A pepperjack would be great here or, if you are wary of spicy cheese, a nice sharp cheddar would do equally well. Cut into a large wedge, with some salad and a handful of grapes on the side, it is an imminently transportable lunch. If you can find the time to sit down and eat it.

Broccoli Bacon Cheddar Tart

one pastry crust, prepared a fitted into an 8" tart pan and chilled
1 large head broccoli, just the florets
4 strips bacon
1/2 cup small cubes of sharp cheddar, chipotle-gouda, pepper jack, of cheese of choice
2 large eggs plus one egg white
1/2 cup whole milk
1/2 teaspoon salt

1. Preheat oven to 425 F. Saute the bacon in a pan until crisp, drain on paper towels and let cool. Crumble the bacon.
2. Prepare a steamer. Steam the broccoli florets until just barely tender- remember you don't want mushy broccoli and it will cook more in the oven. Rinse broccoli under cold water to stop cooking. Break into even smaller florets.
3. Scatter the bacon, broccoli and cheese in the tart shell. In a bowl beat together the eggs, white, milk, and salt. Pour the egg mixture over the tart filling.
4. Place the tart on a baking sheet and place in the oven. Bake 30-35 minutes, until the top is slightly golden and the center only jiggles slightly when shaken. Allow to cool before cutting. Serve at room temperature or slightly warm.

06 March 2009

Apricot "Sunny-Side Up" Pastries

I guess I thought this would be easier. The surgery is one thing - long, scary, difficult, but in the end it ends. And mom gets moved out of intensive care and the scar heals and I think my life can resemble normalcy again. Only it can't. This long haul part- the weeks of chemo, the 24 hour nursing, the constant complications and medications, I don't know how to do this. I don't know how to support my mom, work at my job, maintain my household and some semblance of my own life, while constantly commuting between two cities. If I'm not with my mom consistently, I'm out of the loop, I hear about doctors visits only after they happen and crises only after they're fixed. But I can't just abandon my job and my friends because I'm afraid when I need them they might not be there.

So I'm not good at this. I'm trying but I'll be the first to admit I haven't quite found a balance that's working. And in the meantime, the little things I am good at - my job (hopefully), feeding people, knowing about obscure spices, those little things help remind me that I'm competent at something.

I made this recipe for my office the other day, after a rare weekend when I had time to bake. They're very simple little pastries with apricots placed over puff pastry so that they end up looking like sunny-side eggs. They're very easy and I think quite cute. When so many things in your life are disappointing, there is something so satisfying about watching people enjoy something you made, and even ask you for the recipe. So here you go:

Apricot "Sunny-Side Up" Pastries
Extrapolated from something I saw Julia Childs make once.

1 box puff pastry, thawed
1 recipe vanilla pastry cream, recipe follows, (or substitute prepared/purchased vanilla pudding)
2 cans apricot halves or 16 poached halved fresh apricots
1/4 cup apricot jelly

1. Preheat oven to 400 F. Use an overturned glass or circle cutter to cut the pastry into rounds. Use a rolling pin press down on the center of each circle so that it is more of an oval shape (the edges will be thicker than the center of the pastry, this will enable the pastry to puff up around the apricots.

2. Place rounds on a greased or lined baking sheet and top with a dollop of pastry cream/pudding, spreading the cream slightly into a circle. Top each round with one apricot, cut side down, or two apricots for bigger "double-yolk" pastries. (at this point assembled pastries can be refrigerated, covered, overnight). Bake 25-35 minutes, or until puffed and golden and brown on the bottom.

3. Warm the apricot jelly in the microwave/small saucepan until warm and liquid. Use a pastry brush to brush the top of the apricots with jelly so that they remain moist and shiny. Serve warm or at room temperature.

Pastry Cream:
2 cups milk
1/2 cup sugar
2 tablespoons unsalted butter
Pinch salt
1/2 vanilla bean or 1 teaspoon pure vanilla extract
3 tablespoons cornstarch
2 eggs, beaten to combine

1. Bring the milk, 1/4 cup of the sugar, butter, salt and vanilla bean to a gentle boil in a medium saucepan. Remove from heat.
2. Whisk together the cornstarch and the remaining 1/4 cup of sugar. Add the eggs to the cornstarch and mix into a smooth paste.
3. Slowly, and in small amounts, whisk a little of the hot milk into a the egg mixture. (this is called tempering the eggs, which you need to do to get them to the same temperature of the hot milk in the pan, so they won’t curdle.) Once the egg mixture is warm to the touch, pour it back into the milk in the pan.
4. Return the custard to the stove and bring to a boil, whisking continuously for 2 to 3 minutes, so that the custard is thick and does not taste grainy. Optional: press pastry cream through a sieve for ultimate smoothness.
5. Refrigerate with plastic wrap pressed directly on the surface until ready to use.