04 April 2007

Roll, Angel, Roll


Isn’t it great when something exceeds your expectations? I’ll admit that I made this recipe purely because it was “light.” I was going to say healthy, but I mean, who am I kidding, it’s a cake after all. I had been remembering how my mom loves a jelly roll, and I’d also gotten the idea of angel food cake sort of stuck in my head, and there it was, an angel roll cake. Something light but satisfying to throw together on a weekend afternoon.


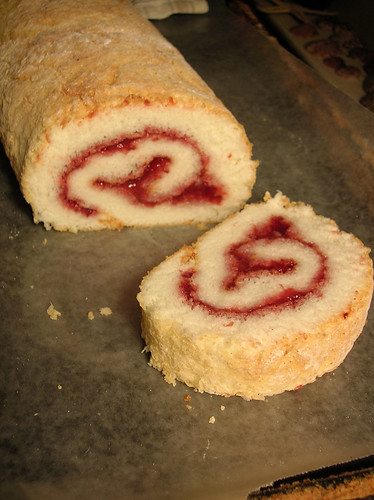
But the shocker was how good this was, not that I expected it to be bad or anything, I knew it would be enough to curb the after-dinner sweet craving. But, fight-over-the-last-crumb good? No way. And yet it was, the soft, pillowy texture of the sweet cake with the lightly tart homemade fruit filling, just right. After finishing our first slices, we looked at each other, and went and cut two more big pieces.


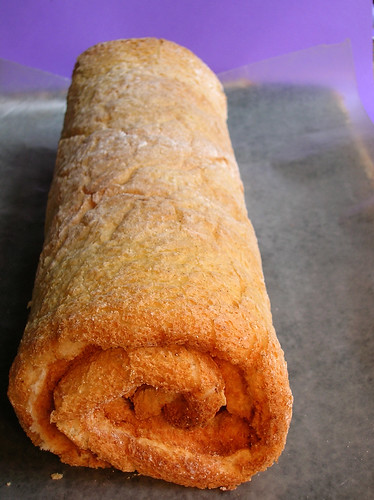
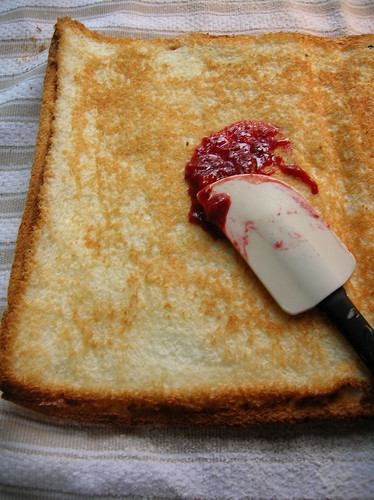
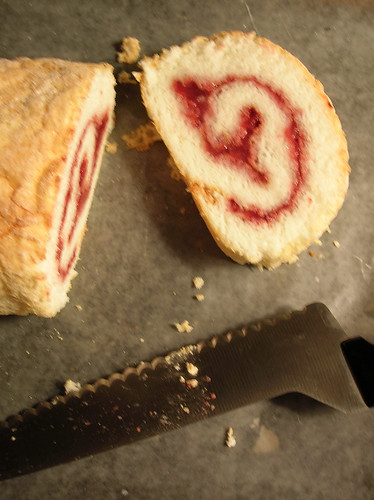
There is something very homely about making a roll cake, the way you get to wrap it in a towel, all warm and sugary, the tender act of spreading it with jam. Even it’s presentation is somehow simple, the basic geometry of its inner spiral. I served it with whipped cream but I think you could dress it up a little by spreading a light whipped cream or meringue frosting over the surface of the roll. It’s also wide open to possibilities, using whatever fruit is in season, and I am already dreaming up the next incarnation, maybe a cocoa roll, or a rose-flavored one.


Angel Jelly Roll
I like to make my own fruit filling for this, which gives control over the texture and amount of sugar, I find a less-sweet filling compliments the sweet cake. However, you could also use store-bought jam if you prefer. Rolling the cake in the towel prevents cracking.

for the cake:
1 3/4 cups superfine sugar
1/4 tsp salt
1 cup cake flour, sifted
12 egg whites, at room temperature
1 tsp vanilla
1 1/2 tsp cream of tartar
for the filling:
3 cups strawberries (or other berries)
2/3 to 1 cup sugar, to taste depending on the berries
1 tsp lemon juice
optional: meringue frosting

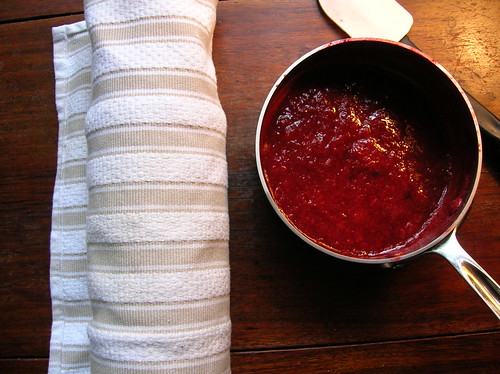
1. For the filling: Place the berries in a saucepan and add the lemon juice and sugar to taste. Simmer the mixture oer medium heat, mashing the berries with the back of a spoon, until jammy and thick. Let cool.
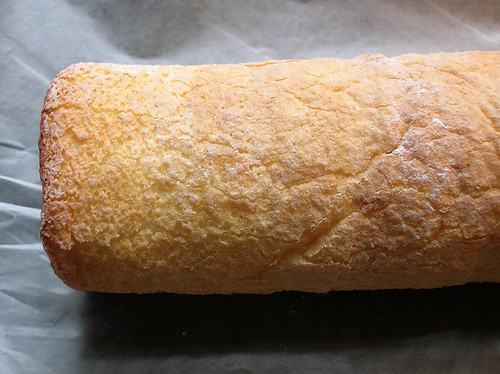
2. For the cake: Preheat the oven to 375, line a jelly roll or baking pan with wax paper, do not grease it. Sift together 3/4 cup of the sugar, the salt, and flour into a bowl. In a clean bowl combine the egg whites, vanilla, and cream of tartar. Beat the egg whites with an electric mixer until they begin to hold soft peaks. Gradually add the remaining 1 cup of sugar, a few taablespoons at a time, while beating, until the whites hold stiff peaks. Gently fold the flour mixture into the egg whites in two additions. Spread the batter in the prepared pan and bake for 18-20 minutes, or until golden, risen, and a toothpick inserted into the center comes out dry.
3. Get a clean kitchen towel and sift some powdered sugar lightly over it’s surface. Invert the warm cake onto the towel and peel off the wax paper. Sift some more powdered sugar over the cake. Roll up the cake in the towel into a roll. Leave to cool for 10-15 minutes.
4. Assemble the cake: Unroll the cake. Spread the inside thickly with the jam, leaving a half-inch border around the edges. Using the towel as a guide, roll up the cake. Place seam side down on a serving platter, frost with meringue frosting or sprinkle with powdered sugar if desired.

_

02 April 2007

Spring in a Blanket


I am a warm-blooded creature. I spend most of winter huddled in front of a heater, counting the days until warmer weather arrives, and Sunday afternoons often see me swaddled in a blanket, the blanket dragging behind me as I pad from couch to kitchen. When spring finally peaks its head in crocus blossoms, it never seems to come fast enough, its promises of warm breezes tampered by chilling rains and cool evenings. Maybe I’m impatient but spring always seems awfully late to live up to its potential.

The spring markets are much the same, we start talking about all that spring fare long before it actually arrives. When those early stalks of asparagus and tender carrots crop up, they still need a little bit of coddling, something to coax out their delicate nature. That is just what this dish is, a vegetable pot pie to bridge the season’s gap. It’s the sort of warming dish I imagine eating seated on someone’s patio, tulips in bloom. Throwing off our winter coats in a celebration of clean bright flavors, but still with a sweater of a pie shell to ward off the chill.

Because everyone’s favorite part about pot pie is the crust, I like to make these in individual soup bowls or ramekins, preferably ones deeper than those pictured here. As with any seasonal recipe, feel free to add any vegetable or herb that looks good in the market, baby turnips instead of potatoes, or pearl onions or fava beans. The patio is optional.


Spring Vegetable Pot Pies
If you have the time, I highly recommend making your own vegetable stock, though this dish will still be good without it. Making it in individual bowl means everyone gets a good amount of crisp buttery crust.

1 pie crust
4 tbl butter
6 baby potatoes, cut into 1/2 inch pieces
6-10 thin spring carrots, peeled and chopped
1 pound thin aspapragus, ends trimmed and cut into 1 inch pieces
12 small mushrooms, such as cremini or morel
1 bunch scallions, bottoms sliced and and about 1/4 cup of green parts sliced
1 cup baby peas, thawed if frozen
2 tbl snipped chives
1/4 cup chopped parsley
1 tsp chopped tarragon
2 tbl flour
3 1/2 cups vegetable stock
3-4 tbl cream, optional

1. Preheat the oven to 400°. On a lightly floured surface, roll out the chilled pie crust. Using a 6-inch bowl or plate as a template, cut out 6 rounds. Transfer the rounds to a large baking sheet and refrigerate them until well chilled.
2. Melt 2 tablespoons of the butter in a large, deep skillet. Add the potatoes and carrots and cook over moderate heat until softened, about 10 minutes. Add the asparagus and mushrooms, season with salt and pepper and cook over moderately high heat, stirring frequently, until the asparagus is crisp-tender, about 3 minutes. Add the scallions and cook, stirring, for 2 minutes. Stir in the peas and cook just until heated through. Season the vegetables with salt and pepper and transfer to a large bowl. Stir in the snipped chives and chopped parsley and tarragon.
3. Return the skillet to moderate heat and melt the remaining 2 tablespoons of butter. Add the flour and cook, stirring, until pale golden, about 1 minute. Whisk in the vegetable broth and cook over moderately high heat, whisking constantly, until thickened, about 2 minutes. Add the cream, then stir the vegetables into the sauce, season with salt and pepper, and let cool slightly.
4. Spoon the vegetable filling into six ovenproof bowls. Top each bowl with a pie crust round, pressing around the edges to seal. Set the bowls on a large rimmed baking sheet. Bake the potpies for 30 minutes, or until the tops are golden brown and puffed and the filling is bubbling.

_

31 March 2007

In My Easter Basket


Easter is my mother’s favorite holiday. Weeks before it arrived, she would be working on the perfect Easter dress for me, shopping for terribly uncomfortable shiny white shoes, and dying eggs. In my closet, there are still boxes of the dresses my grandmother made every year, with handmade smocking and painstaking embroidery of little ducks and chicks. There is a photo of me on our front porch in an Easter dress and hat, squinting in the sun and looking positively miserable. Needless to say, I didn’t much like Easter, it meant itchy stockings and being forced to wear a hat and a fancy brunch where my mother’s friends ooh-ed and awed over how cute I was.

There at least was the promise of candy, in the form of an Easter basket, and the excitement of waking up to a surprise. It was always fun to dig around that funny plasticy nesting to see what was in there: one of those crafted sugar eggs, a chocolate bunny, and plenty of jelly beans. My mother had a couple notorious incidents of forgetting the basket until the last minute, hurriedly putting me to bed and then running out to the local drug store in the middle of the night. Though I was fully aware of all this, I never let on, and the basket always managed to arrive in the morning.


These days, I’m too old for Easter baskets, but I’ve been eyeing these cute little nest cupcakes since I saw them a couple years ago. Luckily, I have a precious three year old cousin, and though I’m sure his parents will not forget his Easter basket, I’m happy to contribute. I placed the little coconut nests on cupcakes and also on cocoa cookies, since the ccokies can be wrapped up and travel more easily. Unlike so many Easter confections, the pairing of chocolate and coconut means these actually taste pretty good too.


Easter Nests
These are easy and fun to decorate with kids. I’ve provided my basic cupcake recipe below, but you can use any cupcake or cookie recipe you like.

vanilla cupcakes (recipe follows) or cocoa cookies
chocolate frosting (recipe follows)
1 1/2 cups shredded coconut
chocolate eggs, jelly beans, or candy chicks

1. Preheat the oven to 350 degrees. Spread the coconut on a baking sheet and place in the oven to toast for about 8 minutes, until light brown.
2. Spread a small amount of chocolate frosting on a cupcake or cookie and arrange some of the coconut on top to form a nest. Place another small dollop of frosting in the center of the nest and nestle the eggs in the middle.

Vanilla Cupcakes
1 1/4 cups flour
1 tsp baking powder
1/2 tsp salt
6 tbl butter
1 cup sugar
2 eggs
1/2 cup milk
1 tsp vanilla

1. Preheat the oven to 350 degrees;. Line a cupcake pan with paper liners; set aside.
2. In a medium bowl, sift together flour, baking powder, and salt. Using an electric mixer or with a fork, cream butter and sugar until light and fluffy. Add eggs, one at a time; scrape down bowl, and beat in vanilla.
3. Add flour mixture and milk alternatively, beginning and ending with flour mixture.
4. Divide batter evenly among liners, about three-quarters full each. Bake until golden and tops spring back to touch, about 20 minutes, rotating pan once if needed. Transfer pans to wire rack; cool completely.

Chocolate Frosting
6 oz semisweet chocolate, roughly chopped
4 tbl butter
1 tsp vanilla
4 cups (1 box) powdered sugar
1/2 cup milk

1. Melt the chocolate, either in the microwave or using a double boiler.
2. In a mixer or with a fork, cream the butter until pale and fluffy. Add the vanilla, then beat in half the powdered sugar. Fold in the melted chocolate until smooth. Add the remaining powdered sugar, alternating with the milk, until the desired consistency of frosting is reached.

_

30 March 2007

Beet Ravioli in Poppy Seed Butter


If you think ravioli is cheesey, bland, and heavy, or that it is very difficult to make, than I have the recipe for you. Many raviolis are unfortunately leaden or labor-intensive, but this one is neither. With bright red beet filling and bathed in a swath of poppy seed butter, these are positively ethereal. Each time I make these, I think I don’t make them nearly often enough. And the thing is, they’re not that difficult. You can certainly make your own pasta dough, if you’re into that sort of thing. Me, I’m perfectly happy using one of two shortcuts: purchased fresh pasta dough from my local pasta shop, or wonton wrappers. My only word of advice would be that these are light, so if you plan on serving them as a main course you may want to plan another hearty dish alongside. That doesn’t mean these little raviolis won’t steal the show, though.


Beet Ravioli with Poppy Seed Butter
These would make an elegant first course or light lunch.

2 large red beets (about 14 ounces)
1/2 cup fresh ricotta cheese
2 tablespoons dried breadcrumbs
1 1/4 pounds fresh egg pasta or wonton wrappers
4 tbl (1/2 stick) butter
2 tablespoons poppy seeds
Freshly grated Parmesan cheese

1. Preheat oven to 400°F. Wrap beets individually in foil; place on baking sheet. Roast until tender when pierced with knife, about 1 hour. Open foil carefully (steam will escape). Cool. Peel beets; finely grate into medium bowl. Add ricotta cheese and season to taste with salt and pepper. Stir in breadcrumbs.
2. If necessary, roll pasta dough into thin sheets. Place 1 dough sheet on work surface. Using 3-inch round biscuit cutter, cut sheet into 7 rounds. Transfer rounds to lightly floured baking sheet; cover with plastic wrap. Repeat with remaining dough.
3. Place a few of the pasta rounds on your work surface, keeping remaining dough covered with plastic. Place a small bowl of water nearby. Spoon 1 teaspoon beet filling onto half of each round. Dip fingertip into water and dampen edge of 1 round. Fold dough over filling, pushing out as much air as possible and pressing edges firmly to seal. Repeat with remaining rounds.
4. In a wide skiillet, melt the butter with the poppy seeds, keep warm over very low heat. Working in batches, cook ravioli in large pot of boiling salted water until just done, about 2 minutes. Using slotted spoon, transfer to skillet with melted butter; toss to coat. You may need more butter. Place ravioli on plates; sprinkle with Parmesan if desired.

29 March 2007

Skillet Required


My family may well disown me if I don't get a cornbread recipe up here 'right quick,' so here we go. There have certainly been enough diatribes on cornbread to make it worthy of a UN peace treaty, so I’ll spare you any rhetoric except to say a few key things.

My cornbread is of the Southern variety, meaning it has no flour and barely any sugar. I can appreciate those sweet Northern varieties well enough, but to me they are more like muffins, and are too rich and sweet to be a side dish at dinner, much less dunked in a bowl of chili. Second, cornbread must be baked in a cast iron skillet because of the way the skillet retains heat which helps form the crispy crust. Finally, my grandmother and my mother have always insisted on white cornmeal, with no reason other than that’s the way it was always done. My mother says it gives a more tender crumb, and the cornbread still comes out yellow from the egg yolks and the toasting effect of the oven.

Skillet Cornbread
I was told that the key to remembering this recipe is that everything is in two’s. However, I find that two extra large eggs will make the batter too liquidy, so use two smaller eggs or one extra large.

2 tbl bacon drippings or shortening
2 cups cornmeal, we prefer stoneground white
2 tsp baking powder
1 tsp baking soda
1 tsp salt
1 tbl sugar
2 eggs (not extra large)
2 cups buttermilk

1. Preheat the oven to 450. Place the 2 tablespoons of fat into a 9 or 10 inch cast iron skillet and place the pan in the oven to heat.
2. In a bowl, stir together the dry ingredients. In a seperate bowl, mix together the eggs and buttermilk. Combine the wet and dry ingredients.
3. Remove your preheated skillet and swirl it to distribute the fat. Pour the batter into the skillet (it should sizzle), and place in the oven. Bake for 20 minutes, until risen and golden.

Mix It Up: chopped scallions, bacon crumbles, a can of creamed corn, or chilis and cheese are possible additions to play around with.

_

27 March 2007

Big Hair, Big Welcome


A few weeks ago, I boarded a plane out of the cold, snowy, still winter-laden northeast, and headed south. My trip to Houston was two-fold in it’s purpose, a bit of business, but mainly a good visit to my uncle and his sunny welcoming home. Emerging from the plane, I felt a strange chill in the airport: ah, yes, airconditioning, they already need airconditioning. The rodeo was on, the sun was shining, and it was perfect for playing in the backyard with the dogs and walking around the museums. We had a great time, and I was once again reminded that cold, gritty, expensive cities (ahem, ny) are not the only way to go in the U.S.

There was sunny weather and Live Oak-lined boulevards, art galleries and live jazz, good food, good wine, good friends and even a baby in a Mexican sombrero. There were discusions of making homemade baking powder and my grandfather’s love of all things cornbread (recipes to come soon!), and there was red velvet cake. Yes, Red Velvet Cake. I don’t want to overshadow the Blue Bell ice cream, chicken fried steak, tortilla soup, bbq, fig jam, Vietnamese food, pecans, and Brown Paper Chocolates that I should be telling you about, but let’s talk about that Beauty Queen of a cake.


Being a girl of Southern roots, I’ve always had a thing for red velvet cake. Maybe it’s the shocking hue, but I think it’s more about the tender-crumbed cake paired with delectable cream cheese frosting. And while red velvet has gradually been gaining popularity in the northeast (often with unfortunately insipid icing), it was recently catapulted to stardom with a feature in the New York Times. I had, of course, clipped the recipe and filed it away, but you can’t imagine how pleased I was when I arrived in Texas to find my uncle had beat me to it and already made the thing.

If the pictures of the towering three-story beauty aren’t evidence enough, let me tell you that this is the real stuff. Moist, flavorful, good cake. And that mascarpone frosting? As my uncle said, "we had to pour the extra down the disposal so we wouldn’t eat the whole bowl." So if you were thinking (as I had thought when I clipped the recipe) of substituting your usual cream cheese frosting, I’m here to tell you to take the dive into caloric excess. It’s worth every bite.

To wrap things up, my uncle also took me to Central Market one evening so I could cook dinner, and I made a nice little saute of Shrimp and Snow Peas in Spicy Black Bean Sauce. This comes together quickly and has a satisfying bite to it, I served a simple red-wine braised cabbage on the side.


Red Velvet Cake
This has a surprising amount of red food coloring in it, so make sure you have enough on hand before proceeding.

3½ cups cake flour
½ cup unsweetened cocoa (not Dutch process)
1½ teaspoons salt
2 cups canola oil
2¼ cups granulated sugar
3 large eggs
6 tablespoons (3 ounces, 1/4 cup plus 2 tbl) red food coloring
1½ teaspoons vanilla
1¼ cup buttermilk
2 teaspoons baking soda
2½ teaspoons white vinegar.

1. Preheat oven to 350 degrees. Grease 3 round 9-inch layer cake pans and line bottoms with parchment.
2. Whisk cake flour, cocoa and salt in a bowl.
3. Place oil and sugar in bowl of an electric mixer and beat at medium speed until well-blended. Beat in eggs one at a time. With machine on low, very slowly add red food coloring. (Take care: it may splash.) Add vanilla. Add flour mixture alternately with buttermilk in two batches. Scrape down bowl and beat just long enough to combine.
4. Place baking soda in a small dish, stir in vinegar and add to batter with machine running. Beat for 10 seconds.
5. Divide batter among pans, place in oven and bake until a cake tester comes out clean, 40 to 45 minutes. Let cool in pans 20 minutes. Then remove from pans, flip layers over and peel off parchment. Cool completely before frosting.

Whipped Mascarpone Frosting for Red Velvet Cake
2 cups heavy cream, cold
12 ounces cream cheese, at room temperature
12 ounces mascarpone
½ teaspoon vanilla
1½ cups confectioners’ sugar, sifted.

1. Softly whip cream by hand, in electric mixer or in food processor. Cover in bowl and refrigerate.
2. Blend cream cheese and mascarpone in food processor or electric mixer until smooth. Add vanilla, pulse briefly, and add confectioners’ sugar. Blend well.
3. Transfer cream cheese mixture to bowl; fold in whipped cream. Refrigerate until needed.

Shrimp and Snow Peas in Spicy Black Bean Sauce
I do the snow peas seperately because I like them to be well-cooked and don’t want to risk over cooking the shrimp. If you’re not worried about your snow peas being on the crunchy side you can saute them at the same time with shrimp.

1/2 lb snow peas
2 tbl each minced garlic
1 tbl minced ginger
1 lb shrimp, peeled and deveined
2 tbl peanut or vegetable oil
1/4 cup fermented black beans*
3 tbl soy sauce
1 tsp sugar
1 tsp arrowroot powder or cornstarch
3/4 cup broth or water
1 pinch red pepper flakes
sliced green onions for serving

1. In a wok or large saute pan, heat 1 tbl of the oil. Add the snow peas and cook over high heat until they are softened and just beginning to show some color. Add 1/2 cup of water and continue to cook over high heat until the snow peas are softened and the water has evaporated, about 5 minutes. Transfer the snow peas to your serving platter.
2. Combine the soy sauce, sugar, arrowroot, broth or water, and red pepper in a small bowl and stir to dissolve completely.
3. Heat the remaining tablespoon of oil in the same pan. Add the garlic and ginger and saute about 1 minute. Add the shrimp and cook, stirring constantly, until they are just beginning to color, a few minutes. Add the black bean sauce and stir to combine and coat the shrimp. Add the soy sauce mixture and cook until the shrimp are pink and opaque and curled only 3/4 of the way closed and the sauce is thickened.
4. Pour the shrimp and their sauce over the snow peas in the dish, garnish with a few chopped green onions, and serve immediately.

*Fermented black beans are avilable in Chinese markets, if you can’t find them you can substitute a bottled black bean sauce which is available in the Asian section of most supermarkets, but look for one that doesn’t have too many added ingredients.
_

25 March 2007

Repeat Offender


It is rare that I make any recipe twice in a row- part of the problem with my curious cooking mind is that I am always ready to move on to the next thing, tackle the next recipe in the pile. A good recipe gets checked and neatly kept for the future, while a bad one is shoved aside in an attempt to forget it’s failures, either way, I’m on to the something new.

So it’s pretty unusual that after we gobbled up the first far breton I made, that I turned around and made another one, exactly the same. That first one was so good, we just hadn’t had our fill yet. And when having brunch the following weekend, I pulled it out again, tried, true, and soon devoured. Luckily, this is also an easy one, a simple batter that bakes to custardy smooth perfection, studded with plump, juicy prunes. I did find refrigerating the batter overnight made a difference in the smooth texture, and I’ll have to ask that you do the same. This actually makes your life super-easy if you are planning to serve this for brunch; and if you’re serving it for dessert, you can give it a few good hours rest while you are preparing dinner. And if you find yourself making it again when you’ve finished the first one, well, don’t say I didn’t warn you.


Far Breton
Sort of like a custardy pancake, this is equally good for breakfast or dessert. Adapted from Dorie Greenspan.

3 large eggs
2 cups milk
1/2 cup sugar
1/4 teaspoon pure vanilla extract
1/8 teaspoon salt
4 tablespoons unsalted butter, melted and cooled, plus more for pan
3/4 cups all-purpose flour
1 cup pitted prunes
1/4 cup Armagnac or 1 cup hot tea, such as Earl Grey
Confectioners' sugar, for dusting

1. Place eggs, milk, sugar, salt, vanilla, and melted butter in a blender or food processor and blend for 1 minute. Add flour, and pulse several times. Pour batter into a pitcher, cover, and refrigerate for 3 hours, or preferably overnight.
2. Meanwhile, place prunes, 1/4 cup water, and Armagnac in a small saucepan over medium heat. Simmer until prunes are plumped and the alcohol no longer smells pungent, a few minutes; set aside to cool. If using tea, place prunes in a heatproof bowl and pour tea evenly over fruit. Let cool to room temperature, cover, and set aside.
3. Place rack in center of the oven and preheat to 375°. Butter an 8-by-2-inch round cake pan; or use an 8 inch skillet. Place the pan on a baking sheet.
4. Remove batter from refrigerator and whisk to reblend. Forcefully tap the bottom of the pitcher on your work surface to break any top bubbles. Pour batter into prepared pan. Add the prunes, evenly distributing them within the batter; discard any remaining soaking liquid. Bake until top of the cake is puffed and brown and a thin knife inserted into the center comes out clean, 50 to 60 minutes. Transfer pan to a wire cooling rack and cool to room temperature. If desired, dust with confectioners’ sugar just before serving.

*My notes: Dorie says to use whole milk but I've used lowfat and produced very pleasing, if slightly less rich, results. Also, look for good quality plump prunes, I used ones that come vacuum sealed to help keep them moist.

_