Showing posts with label Sweets. Show all posts

28 February 2012

Amaranth Almond Cookies

DSC_0025

Since we are moving, one of my many (many!) pre-moving goals is to use up as much of our pantry as possible. After all, all those tins of grains and jars of condiments (freekiah from Jordan, Turkish aci biber, honey from Senanque Abbey in Provence) cannot come with us. And while using up that whole bottle of sriracha before we leave is a bit too ambitious, I can easily tackle some of our other pantry staples, even though it might mean we eat a lot of bulgur pilafs in the coming months.

One of the things in the pantry is amaranth flour. I always like to have one or two unusual flours around to play with, things like sorghum, graham, teff or dark rye. Amaranth is a gluten free flour that has a slight sweetness to it (it is a grain, but its leaves can also be cooked and eaten). Amaranth is often used in cookies and cakes, though it is usually mixed with other flours since amaranth alone can have a slightly over powering taste. One of the really nice things about baking with amaranth is that it seems to absorb and hold a lot of moisture, which means that cookies don't spread too much in baking and that flavors like vanilla extract, coconut extract, or liqueurs shine through really brightly.

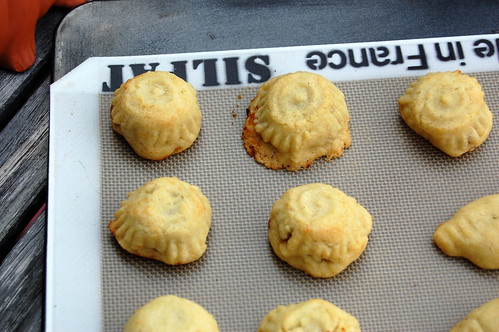
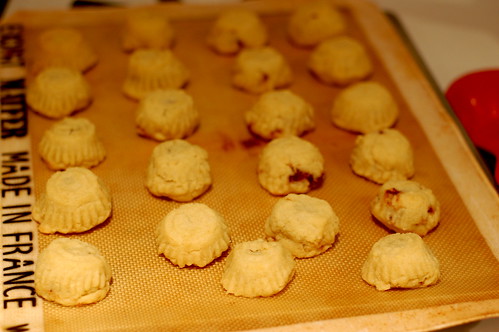
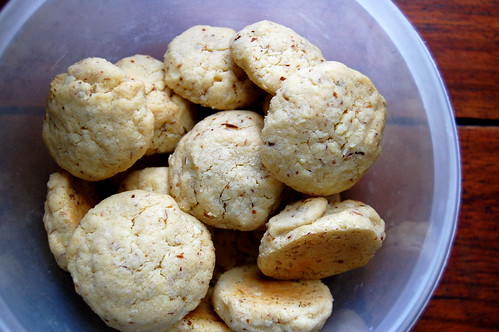
This particularly recipe incorporates almond flour and amaretto, and the liqueur taste really adds a depth of flavor. This is the perfect snack cookie or lunch box addition, and they keep particularly well.

DSC_0024


Amaranth Almond Cookies

This recipe is a great chance to break out your scale if you have one. You can substitute a gluten-free flour mixture for the pastry flour to make these gluten free.

4 ounces almond slivers
1/2 cup sugar
3/4 cup whole wheat pastry flour (3 1/8 ounces)
1/4 cup amaranth flour (1 ounce)
1/4 teaspoon fine sea salt
7 tablespoons unsalted butter (3 1/2 ounces), softened
1 large egg yolk, at room temperature
1 tablespoon amaretto, rum, or brandy
1 teaspoon vanilla extract

1 Place the almonds and 2 tablespoons of the sugar in the bowl of a food processor. Process until the mixture looks sandy and the nuts are roughly ground, about 15 seconds.

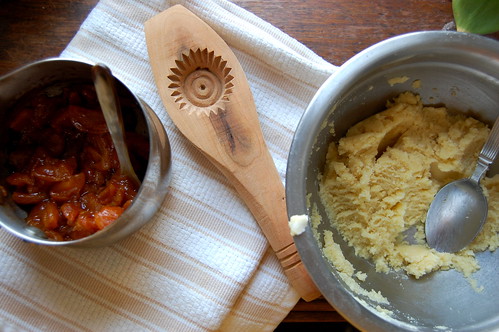
2 Whisk together the two flours and salt in a medium bowl. In a large bowl, cream the butter using either a fork or an electric mixer, until smooth. Gradually add the remaining sugar and beat until fluffy and smooth. Add the egg yolk, liquor, and vanilla and beat until well blended, about 30 seconds. Reduce the speed to low and beat in the nut mixture, then gradually add the flour mixture until it is just incorporated. Cover the bowl with plastic wrap and chill until the dough is firm, at least 90 minutes or overnight.

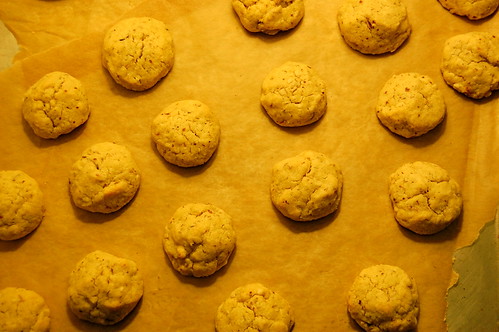
3 Preheat to 350°F. Line 2 large baking sheets with parchment paper. Pinch off walnut-size pieces of the firm dough and roll them between your palms into smooth 1-inch balls.

5 Bake, 1 sheet at a time, until the cookies just turn golden brown around the edges and firm up but still yield to gentle pressure, 17 to 18 minutes. Remove from the oven and carefully slide the parchment paper with the cookies onto a wire rack to cool. The cookies will crisp as they cool.

31 July 2011

Frozen Yogurt with Sour Cherry Compote

DSC_0023
The title of this post should really be, "the easiest thing you will make all summer." Because it is. I have a thing for frozen yogurt, I always have. It's cold, it's tangy, it's light, and it satisfies my continual obsession with ice cream. The proliferation of frozen yogurt places in the U.S. (Sweetgreen, Yogenfruz, Pinkberry, etc) is great in my book because the frozen yogurt is tart and tangy and not overly sweet. There is one such place between my house and my yoga studio, and it taunts me every time I walk past, trudging home sweaty and tired. I have a rule limiting myself to one visit per week.

A few weeks ago I made the vanilla ice cream from David Leibovitz's ice cream book. (PS- For ice cream makers, this is the best ice cream recipe, and it even stays perfectly in the fridge for weeks without getting icy or anything, virtually unheard of in the land of homemade ice cream). Anyway, as I'm flipping though the book I alight (alighted? alot? ugh, you know what I mean) upon a recipe for tangy frozen yogurt. The recipe said stir together yogurt and sugar, process though ice cream machine.

DSC_0017

With some amount of skepticism as to the simplicity of this endeavor, I whipped up a batch. The unfrozen mixture tasted exactly as delicious as I'd hoped it would. Surely, I thought, it couldn't be this easy? But it was, delicious, homemade frozen yogurt in literally a matter of minutes. My only qualm is that it does get rock hard and icy in the freezer after a few days, which is good news for my local frozen yogurt shop, because I'll still be keeping them in business.

P.S. Ramadan Kareem to all those observing!


DSC_0018


Frozen Yogurt

It's optional if you want to add a splash of vanilla extract or other flavoring (Cointreau, orange flower water, almond extract, etc). I used good quality low-fat local yogurt for this. You can make a richer version by using thick Greek yogurt, but really whatever kind of yogurt you'd like, so long as it's plain, will work.

3 cups plain yogurt, cold
3/4 cup sugar

1. Stir together yogurt and sugar. Process through an ice cream maker according to the manufacturer's instructions. Transfer to the freezer to harden for about 1 hour. Best served fresh.

Sour Cherry Compote
1 1/2 cups pitted sour cherries
1/2 cup sugar
1/4 cup water

1. Combine in a saucepan. Boil until mixture is thick and syrupy and cherries have collapsed. Set aside to cool.

23 June 2011

White Peach Crisp with Cardamom and Orange Blossom Water

DSC_0134

We welcomed summer with a picnic in the park marked with cheap Prosecco and homemade sourdough and stinky cheese, cute babies on blankets, a game of wiffle ball, and everyone dashing home just before the thunderclouds broke. My cooking recently has been much the same - impromptu, simple, easy. Sliced summer tomatoes. A bowl of peaches. Summer squash tossed in a crust with eggs, cream, cheese, and breadcrumbs. Nothing measured. Crusts made by the feel of the dough, the crumbliness of butter. Ratatouille made with the end of the week's vegetables.

DSC_0123

It makes for good eating but it certainly doesn't make for good blogging. There was one thing though - a white peach crisp. I have a thing for white peaches. They are delicate and floral, and they blush pink. They are almost too precious, but when baked they develop a bit of uumph, topped with a crumbly crust of brown sugar and accented with cardamom and orange blossom water. Those last two ingredients add an extra touch to this dish, but it would be perfectly delicious without them.

peaches


White Peach Crisp with Cardamom and Orange Blossom Water

Ripe peaches are sweet enough that I don't think they need extra sugar. You can peel the peaches with a knife or blanch them to remove the skin.

12 white peaches
3 tablespoons flour
1 tablespoon orange blossom water
1/8 teaspoon cardamom

1 cup brown sugar
1/2 cup flour
1/2 cup oats
1 pinch salt
8 tablespoons (1 stick) butter

1. Preheat oven to 415 F. Combine the crisp topping dry ingredients. Cut in the cold butter with a pastry blender until small crumbs form. Refrigerate crumble topping.
2. Peel and slice peaches into a bowl. Add the 3 tablespoons flour, cardamom, and orange blossom water. Toss together and place in a baking dish. Scatter the crumble over top. Bake 20 minutes, turn the temperature down to 375F and bake another 15-20 minutes, until peaches are soft and topping crisp.

17 May 2011

Apricot Ma'amoul

apricot ma'amoul
There is a beautiful pastry shop in the bottom of one of the hotels in Damascus, I can't remember its name but somewhere near Sepky Park, that sells the most refined versions of Arab sweets. The tiniest baklava you've ever seen, cookies filled with date puree so light it was almost like custard, and the most elegant ma'amoul in a variety of seasonal flavors - plum, peach, apricot, fig. I was inspired by those to make my own apricot ma'amoul, though much more rustic and humbling in appearance.

But the flavor is there, tart, tangy. I miss good fresh apricots, the kind that would arrive in Damascus on trucks everyday, just picked, dripping the moment you bite into them. They are hard to find like that farther away from the Mediterranean (goal: move back closer to to the Med). So this time I used dried apricots, just re-hydrated and simmered in a bit of honey and cinnamon and allspice. I'm pretty sure Paul ate most of them, which has to be a good sign.
apricot ma'amoul

Apricot Ma'amoul

Ma'amoul molds, like the one pictured above, are available at Middle Eastern groceries or can be ordered online. Depending on the size and style of your mold, you may need more or less filling for the recipe (it depends on how thin you make the crust). Makes about 40 small size cookies.

crust:
1/2 cup solid shortening
8 tablespoons or 4 ounces butter
1 cup flour, all purpose
2 cups semolina
1/4 teaspoon salt
1/4 teaspoon baking power
1/4 cup granulated sugar
1 teaspoon rose flower water and
1 teaspoon orange flower water
7 tablespoons water

filling:
1 cup chopped dried apricot (chop into small pieces)
4 tablespoons honey
1/4 teaspoon each cinnamon, allspice

1. Bring 2 cups of water to a boil, pour over apricots, let stand to soften while you prepare the crust.
2. Prepare crust: Melt the shortening and butter in the microwave in a large bowl. Add the flour, semolina, salt baking powder and sugar and stir to combine. Add the rose and orange flower waters and gradually add the water, stirring to make a crumbly dough. Put the dough in the fridge to rest while you make the filling.
2. Filling: Scoop out apricots and place them in a sauce pan with about 2 tablespoons of their water (reserve remainder of soaking water in case needed). Ad remaining filling ingredients in a saucepan and cook over low heat for 10-15 minutes, adding water as necessary, until the apricots are very soft and mashed together.
3. Preheat oven to 325 F. Flatten a tablespoon of the semolina dough in the palm of your hand. Add a small amount of filling. Fold up the semolina around the filling, adding a little more dough to enclose the ball. Roll into a ball and press into a mold, or simply place on a greased baking sheet and decorate the top with the tines of a fork.
4. Bake 12-15 minutes until solid but not darkened in color. Let cool, then shift powdered sugar over top.

15 November 2010

The Month of Eating French

DSC_0014
Well, I had a fish tagine recipe all ready to go for you all, but it seems my computer ate it, and then I decided to give up and go to Chicago to eat delicious food at Topolobampo and Blackbird. I'm kidding, but I highly recommend some margaritas the next time your computer goes on the fritz.

Besides, ever since we got back from France I've been on a full-on French cooking kick. First I made pain d'epices (from this recipe), which is deceiving because you expect it to be a sweet and it's really just a bread.
DSC_0007

Then there were stuffed poussins with pearl onions and a fabulous cream sauce (adapted from this recipe). Damn, poussins are expensive in the U.S., but they were delectable.
DSC_0019

There were two attempts to recreate the fabulous gratin dauphinois we had, trying both Julia Child's and Anthony Bourdain's recipes. Bourdain won, for what it's worth.
DSC_0060

And by the time I got around to making a chicken liver pâté, I think Paul was about to call the psych consult. "You don't even like pâté," he said. Luckily, the guests at our party did.

But all this was not before I made, not one, not two, but three tarte tatins. What can I say? Tarte tatins are pretty damn awesome. We made one with pears and cardamom, and two with apples. Despite many people's fear of caramel, tarte tatin is much easier than you'd think, and you don't even have to make a true caramel. Afterward the oven should do the work for you. Even if you aren't in French cooking madness mode, it's worth a try.

DSC_0001
(Lentil de Puy Salad with Pomegranate and Fennel)

Tarte Tatin
Though puff pastry is 100% traditional, I confess that I also like to make this with a nice thick pie dough. The crispiness of the pastry stands up nicely to the apples. Can be made with pears, make sure to used firm pears.

5-6 large cooking apples (we used staymans)
juice of 1 lemon
1 ½ cups granulated sugar
4 Tbl unsalted butter
14 ounces puff pastry (or pie crust)

1. Peel and quarter the apples, removing the cores such that each quarter has a flat inner side. Toss the apple quarters in a large bowl with the lemon juice and ½ cup of the sugar. Set aside while you start the caramel, about 30 minutes.

2. In a 9-inch cast-iron skillet melt 4 tablespoons of the butter. Add the remaining 1 cup sugar, mixing with a fork or flat whisk. Cook the mixture over medium-low heat, stirring regularly, for about 15 minutes, or until the mixture has come together in a smooth, bubbly, pale caramel color. Do not let it get too dark.

3. Turn the heat off and carefully add apple quarters, arranging them rounded-side-down in a decorative pattern. Arrange a second layer of apples on top wherever they fit, closely packed. I usually cut up any larger ones for smaller pieces in the second layer.

4. Preheat the oven to 375 degrees Fahrenheit.

5. Cook the apples over medium-low heat for about 20 minutes, occasionally spooning the bubbling caramel liquid over them. Press them down gently with the back of a spoon — don’t worry if they shift a bit in the liquid; just move them back to where they were. Shift the pan as necessary so that the apples cook evenly. They are ready when the liquid in the pan has turned to a thick, amber ooze. The apples should still be slightly firm. Do not allow them to get entirely soft.

6. While the apples are cooking, roll out the pastry. Cut out a circle about 10 inches in diameter (1/2 inch wider all around than the skillet), and trim away any excess. When apples are ready, carefully lay the pastry circle over the apples in the skillet, tucking the overlap down between the apples and the inside of the pan.

7. Place the skillet on a rimmed baking sheet, and bake for about 30-35 minutes, until the pastry has risen, and is dry and golden brown. Remove the skillet from the oven, and let it to rest for a minute or two. Tilt the pan and look down inside the edge: if there is a lot of juice, pour most of it off into the sink. [Do not pour it all off, or the apples may stick to the pan.] Place a serving platter upside-down over the skillet and, working quickly and carefully, invert the tart onto the platter. Rearrange any apple slices that may have slipped or stuck to the skillet.

12 October 2010

Sort-of Mohnkuchen

DSC_0124
I made this cake for a party we had at the tail-end of summer, and it got completely over-shadowed by the sour cherry pie Paul made. I don't blame them, it was a damn-good sour cherry pie, but I still like this cake, even if it's not the most popular girl in the room. There's something delectable of the soft souffle-like cake made with ground poppy seeds and topped with tangy cream cheese frosting.

DSC_0116DSC_0127

This cake is something I invented many years ago (years!), inspired by the Austrian sweet mohnkuchen. Mohenkuchen is a poppy seed cake, made with a crumbly shortbread bottom, a sweet pure-black poppy seed filling, and a streusel topping. This cake takes it inspiration from that poppy-seed filling, but turns to a French technique and a bit of my own improvisation.

DSC_0131

To make the cake a bit healthier, I substitute prune puree for some of the butter. The prune puree also adds a depth of flavor and sweetness to the cake. If you don't feel like making the puree yourself, baby food work perfectly. This sounds odd, but if you think of baby food as just small jars of fruit purees, they're actually great for use in baking to add moisture and flavor to cakes.

Anyway, I don't mind if this isn't going to be the stand-out cake in the room, it's subtle and complex (and frankly rather expensive to make). But it's sort of a stealth favorite, sneaking up on you slowly until it takes a place in your repertoire.

DSC_0142
Poppy Seed Cake (Inspired by Mohnkuchen)

6 tablespoons butter, softened
1/2 cup prune puree (I use prune baby food)
1 cup sugar
1 1/4 cups poppy seeds, coarsely ground in a spice grinder
1/2 cup flour
4 eggs, separated
1/4 teaspoon cream of tartar (optional)
zest of 1 orange or lemon
1 teaspoon vanilla or almond extract
1/2 recipe cream cheese frosting*
candied walnuts for topping

1. Preheat oven to 350 F. Grease a springform tin and line with parchment paper, grease parchment paper.
2. Cream butter and sugar. Add in egg yolks and extract. Add in prune puree. Stir in the ground poppy seeds and flour.
3. Beat egg whites with a pinch of cream of tartar to stiff peaks.
4. Gently fold egg whites into cake batter in batches using a spatula until the mixture is just combined. Transfer to prepared pan. Bake 40-45 minutes, until puffed and browned on top. Let cool completely.
5. Top the cake with cream cheese frosting and candied walnuts as desired.

* Cream cheese frosting - beat together 1/2 lb cream cheese, 1/2 stick (4 tbl) butter, 2 cups confectioners sugar, 1 tbl vanilla extract.

31 July 2010

Semolina Cake (Old Fashioned Sfouf)


There are several semolina-based cakes in Middle Eastern cuisine that go by a variety of names. Basbousa, also known as namoura, is a dense semolina and yogurt cake which is soaked in syrup. Sometimes it has coconut added as a variation. On the lighter end of the spectrum is the Lebanese cake sfouf, which is a fluffier semolina cake that's barely sweet. It's mildly reminsicent of a slightly sweet Southern-style cornbread.

I was reading recently about how sfouf was originally made with carob molasses, one of the original natural sweeteners in the region. It is a molasses made from the pods of the carob tree, carob may also be familiar to you as a chocolate substitute. So, I thought I'd give the recipe a try with a jar of carob molasses we picked up on the Mediterranean island of Gozo.

As, I mixed the cake, I realized something was terribly wrong. Carob molasses is horribly bitter, and with that as the only sweetener, the cake batter actually tasted bad. Worse, the batter looked curdled. I started over, this time with half the amount of carob and good splash of honey and brown sugar.

I was still skeptical about the whole endeavor, but went ahead trepidatiously with the baking. Paul was the first to taste it, and without knowing the history, pronounced it to be quite good. And indeed, it's caramelly and not too sweet, crumbly and simple. It's not as fluffy as modern versions of sfouf, but its denseness lends itself nicely to a scoop of ice cream or some cooked fruit. I'm all for authenticity and old traditions, as long as it tastes good first.

Semolina Cake (Sfouf)

1 1/2 cups semolina
3/4 cup flour
1 teaspoon baking powder
1/8 teaspoon ground anise, optional
1/2 cup butter, softened
3/4 cup milk
1/3 cup carob molasses
1/3 cup honey
2 tablespoons brown sugar
pine nuts for decoration

1. Preheat oven to 350 F. Grease an 8x8 inch baking pan with butter or tahini.
2. Mix semolina, baking powder, anise, and flour in a large bowl. Add the butter and using a pastry blender or two forks, mix until crumbly. Stir in the milk, carob molasses, honey, and brown sugar to make a smooth batter. Pour into the prepared pan, dot the top with pine nuts if desired. Bake for 30-40 minutes, until firm and golden.

16 July 2010

Apricot Pie with Pistachio Crust


I was trying to think of a kind of pie I hadn't tried before (you know besides mango, butterscotch, pecan, chamomile, blueberry crumble, and chess). I'd never made an apricot pie before, and given that it is currently the 2.4 seconds that apricots are in season, it sounded pretty good. I love apricots, but it's terribly hard to find a good one around here, they're often too tart or mealy.


I also decided to stick with the classic pairing of apricots and pistachios by making a pistachios crust. A word of advice dear friends: if you ever see a package of blanched pistachios in the store, just buy them. I don't care where you are, heck you may even want to go ahead and order them now. Because one day, along will come an occasion when you need blanched pistachios- say to scatter over a pilaf, or to make a vibrant green tart dough (non-blanched pistachios make the dough brown), and you will be cursing yourself not only shelling the pistachios, but dunking them in boiling water and then plying off their little papery skins. Save yourself this trouble before you could ever encounter it.

But in the end the tart dough was lovely, the apricot bright and punchy, and the whole thing with a big scoop of homemade vanilla ice cream on top was messy and delicious. The fruit was a bit tarter than I would have liked, so if your fruit is on the tart side I'd recommend using the full cup of sugar.


Apricot Pie with Pistachio Crust
I didn't bother peeling the apricots, but the texture is probably better if you do. If you have proper ripe apricots the peels should just pull right off with your fingers.

5 cups apricots
3/4 - 1 cup sugar, depending on tartness of apricots
3 tablespoons cornstarch
1/8 teaspoon cardamom
1 teaspoon vanilla

12 tablespoons butter
1 1/4 cups flour
1 cup ground pistachios, made from 1 1/2 cups blanched pistachios
2 tablespoons sugar
3-4 tablespoons ice water

1. Make the dough: Place the whole blanched pistachios in a food processor and pulse until finely ground. Do not grind them to a paste. Add the flour, pieces of butter, and sugar, and pulse in the food processor until the mixture is crumbly. Add the cold water with the processor running, 1 tablespoon at a time, until the dough comes together. Gather up dough, pat into 2 disks and refrigerate until ready to use.

2. Roll out the two dough disks on a lightly floured surface. Fit one disk into the pie pan, reserve the second dough disk, wrap them in plastic and place them in the fridge to chill.

3. Preheat oven to 350 F. Meanwhile, pull apart the apricots, discard the pits, and slice the fruit. Combine in a bowl with the sugar, vanilla, and cardamom, and let macerate for about 15-20 minutes.

4. Scrape the fruit into the prepared pie dough, leaving behind any juices that accumulate. Cut out shapes or latticework out of the remaining pie dough and arrange over top. Sprinkle top with a bit of sugar if desired.

5. Bake for 50-60 minutes, until crust is lightly browned and filling is soft and bubbly. Let cool slightly before serving.

19 May 2010

Blood Orange Creamsicle Pie


Moving in together is a funny thing. No matter how much time you've spent together before, there's always an adjustment to be made. You'll argue over whose bed stays or goes, discover his secret stash of books on game theory (I'm not kidding people). You learn things like never, never disturb Paul while he's napping. Trust me, a man awoken from a nap prematurely is not a good thing for anyone involved. I want to hide under the covers just thinking about it. But at the end of it all, if you're lucky, you'll discover that you get to come home to that person everyday, and that in itself is pretty awesome.

With Paul, I discovered that all of a sudden there is this person here who wants to cook with me, and whom I can cook for. Cooking for two is way more fun than cooking for one, and Paul is always asking questions like, "why is this considered a ragu," and "what's the difference between fennel and anise." I like this because it challenges some of my assumptions about cooking.


We were discussing key lime pie, and how you could make it with any citrus, say lemon or blood orange or yuzu. I like doing this a lot, taking a base recipe and changing the flavoring ingredients. So I decided to try the blood orange version, only using a classic French technique, and made a lose custard that could be turned into a frozen pie. And it's delicious, it cool and creamy and a little bit tangy. It's almost as good as a nap, just don't disturb me while I'm eating it.


Blood Orange Creamsicle Pie

1 graham cracker crust, baked
1 cup sugar
finely grated zest of 2 blood oranges
4 large eggs
3/4 cup freshly squeezed blood orange juice
1 1/2 sticks (12 tablespoons) unsalted butter, at room temperature and cut into tablespoon-sized pieces

1. Put the sugar and zest in a large metal bowl that can be fitted into the pan of simmering water. Off heat, work the sugar and zest together between your fingers until the sugar is moist, grainy and very aromatic. Whisk in the eggs followed by the juice.
2. Set a pan of water to boil. Fit the bowl into the pan (make certain the water doesn’t touch the bottom of the bowl) and cook, stirring with the whisk as soon as the mixture feels tepid to the touch. (if you're using a thermometer 180°F). As you whisk the cream over heat—and you must whisk constantly to keep the eggs from scrambling—you’ll see that the cream will start out light and foamy, then the bubbles will get bigger, and then it will start to thicken and the whisk will leave tracks. Heads up at this point—the tracks mean the cream is almost ready. Don’t stop whisking and don’t stop checking the temperature. And have patience—depending on how much heat you’re giving the cream, getting to temp can take as long as 10 minutes.
3. As soon as you reach 180°F, pull the cream from the heat and transfer it into the container of a blender (or food processor); discard the zest. Let the cream rest at room temperature, stirring occasionally, for about 10 minutes.
4. Turn the blender to high and, with the machine going, add about 5 pieces of butter at a time. Scrape down the sides of the container as needed while you’re incorporating the butter. Once the butter is in, keep the machine going—to get the perfect light, airy texture you must continue to beat the cream for another 3 minutes. If your machine protests and gets a bit too hot, work in 1-minute intervals, giving the machine a little rest between beats.
5. Transfer the orange cream to the refrigerator and let cool completely. It should set up considerably in the fridge. Pour until the crust and place in the freezer for several hours, until frozen.
6. To serve, remove the pie from the freezer about 15 minutes before you want to serve it (depending on the outdoor temperature, more or less time may be needed). Serve in wedges, store in the freezer.

14 February 2010

Linzer Tart


I am not one of those people who always keeps bread in the house. I also don't freak out and a run to the store when the weather forecast says snow. I actually like walking the 4 blocks to my little local grocery in the snow.

But last week with three feet of snow on the ground, not only did I not have bread, I didn't even have any flour. I trudged to the store only to find no bread, and no flour (for the record the store had just about everything else you could want). So, I trudged several more blocks in white-out conditions only to find the same situation at the next store. At this point icicles were forming on my eyelashes, so I resigned myself to going back to my sadly starch-less home. The thought of being stuck at home for days without even a baking project to entertain me was making me pretty desperate, as I contemplated grounding my remaining almonds into flour, or making a flourless cake.

And that was when I realized that I should make a linzer tart.

Back at home, warm and with my boots dripping by the front door, I found a lonely half cup of pastry flour lingering in the back of my pantry. I painstakingly picked all the hazelnuts out of a bag of mixed nuts (hey, there wasn't much else to do), and ground them with some almonds into a rough flour. Adding butter, flour, and spices, and voila, a dough was made. A few slicks of homemade jam, and a stint in the oven, and two sweet little tarts were there to see my sugar-tooth through the storm.

Just in time for Valentine's (or Chinese New Year, or the Olympics, or whatever you want to celebrate this week).

Linzer Torte
This classic Austrian pastry hails from the town of Linz. You may also find it is very reminiscent of the Pepperidge Farm linzer cookies your mom put in your lunch box as a kid.

1 cup flour
1/2 cup ground almonds (about 2/3 cup before grinding)
1/2 cup ground hazelnuts (about 2/3 cup before grinding)
1/3 cup sugar
1/4 teaspoon cinnamon
1/4 teaspoon baking powder
1/4 teaspoon salt
a sprinkling of lemon zest
8 tablespoons softened butter
1 egg, separated
3/4 cup raspberry jam

1. Combine the dry ingredients for the dough, plus the lemon zest, stirring to combine. Using a pastry blender, food processor or two knives, cut in the butter until the mixture is crumbly. Add the egg white and mix until the dough comes together (if the dough is dry add a splash of water). Flatten the dough into a disk, wrap in plastic wrap, and chill for an hour.
2. Preheat oven to 350F. Let the dough come back to room temperature, then roll the dough out and fit into an 8" tart pan. Cut remaining dough into shapes as desired. Spread jam inside of tart, decorate with cut-out shapes. Beat the remaining egg yolk with a bit of water and brush over the pastry.
3. Bake 35 minutes or until deeply golden and firm. Cool completely before serving. Dust with powdered sugar if desired.

13 December 2009

Ma'amoul

It is time, my friends, for that time of year. The time for cookie baking. There are currently boxes for 3 pounds of butter and 2 pounds of powdered sugar sitting in my recycling bin. The time for powdered sugar to fly and to use butter as a moisturizer, hand salve, packing material, and maybe for all those baked goods.

I've got bourbon balls and of course my mom's sugar cookies, and currently sitting on my counter are a lovely batch of ma'amoul. Ma'amoul are one of the most traditional of Middle Eastern cookies, made of a buttery semolina exterior and a date filling, they are shaped by pressing them into decorative molds. They are traditional for both Ramadan and Easter, and great for Christmas too.

The recipe comes together very quickly, with a dough with those whiffs of rose water and spices. The problem, at least in my case, was the molds. The first four or five cookies came out perfectly, and then they started to stick. I mean really stick, and fall apart, and there was a lot of damning and cursing and things that should not be said in the spirit of baking. Eventually I figured out that forming a ball of dough, filling it with the stuffing mixture, and then pressing it into the mold was the best technique. And if you don't have molds, you can always just use mini-muffin cups or simply do without.

So in addition to the family traditions, the requisite doses of chocolate and alcohol, my cookie assortment with have a little Middle Eastern flair this year.

Ma'amoul
While dates are traditional, you can experiment with different dried fruits. In this particular batch I used a mix of dates, dried figs, and hazelnuts for some added texture.

crust:
1/2 cup solid shortening (preferably a non-hydrogenated variety)
8 tablespoons or 4 ounces butter
1 cup flour, all purpose
2 cups semolina
1/4 teaspoon salt
1/4 teaspoon baking power
1/4 cup granulated sugar
1 teaspoon rose flower water and
1 teaspoon orange flower water
7 tablespoons water

filling:
1 1/2 cups chopped dates (or other mixed dried fruit)
4 tablespoons butter

1. Prepare crust: Melt the shortening and butter in the microwave in a large bowl. Add the flour, semolina, salt baking powder and sugar and stir to combine. Add the rose and orange flower waters and gradually add the water, stirring to make a crumbly dough. Put the dough in the fridge to rest while you make the filling.
2. Place dates and butter in a saucepan and cook over low heat, mashing the dates with a fork. Cook about ten minuted, until dates are soft and mashed together. If the pan gets dry then add a splash of water.
3. Preheat oven to 325 F. Flatten a tablespoon of the semolina dough in the palm of your hand. Add a small amount of date filling. Fold up the semolina around the filling, adding a little more dough to enclose the ball. Roll into a ball and press into a mold, or simply place on a greased baking sheet and decorate the top with the tines of a fork.
4. Bake 12-15 minutes until solid but not darkened in color. Let cool, then shift powdered sugar over top.

17 June 2009

Umm Ali (Egyptian Bread Pudding)

There are so many iterations of Middle Eastern desserts that involve pastry, cream, and sugar that after a while they start blurring together. Myriads of types of kunafe, aish el saraya, shaaibiat, baklava muhallabia, othmallia, halawet el jibn, and on and on it goes until I stop paying attention. I'd heard of an Egyptian bread pudding recipe called Umm Ali (literally, Ali's Mother), but I'd never investigated. But when someone raved about a version they had recently, I thought I'd try my hand at yet another Middle Eastern bread and cream iteration.

Umm Ali (the dish) dates back to Ottoman era Egypt, when legend has it the sultan stopped in a poor village looking for something to eat and the village's best cook, named Umm Ali, made something akin to this dish. There are other legends too, about a British nurse named O'Malley who may have invented the recipe.


History aside, do not be off-put by the "bread pudding" label, I almost never like bread pudding since many versions are eggy and rich and about the weight of small livestock. But this is just the opposite- light fluffy pastry bathed in sweet milk, sprinkled with tangy dried fruits and nuts. Many versions include toasted coconut but I prefer it without. It's good enough not to get lost in the shuffle of all those other Middle Eastern desserts.


Umm Ali (Egyptian Bread Pudding)
You can choose to stuff the pudding full of dried fruit, nuts, and coconut, or you can have a more simple version with just a slight scattering of fruit and nuts. I prefer the latter, but many people prefer the former. You could also use 3 cups half-and-half in place of the milk/cream.

1 sheet puff pastry, thawed
1/3 cup mixed fruits and nuts (such as raisins, dried cherries, chopped dried apricots, pistachios or pine nuts)
1 1/2 cups whole milk
1 1/2 cups heavy cream
1 tsp vanilla extract
1/4 cup sugar
slivered almonds for serving

1. Preheat oven to 425F. Spread pastry on a greased baking sheet. Bake for 15 minutes until puffed and golden. Set aside.
2. Meanwhile, heat milk, cream, sugar, and vanilla in a saucepan until small bubbles form around the edge of the pan. Turn off heat and let sit while you proceed with the next step.
3. Raise oven heat to 475F. Grease a baking dish, crumble/tear apart the pastry and scatter in the baking dish. Scatter the dried fruit and nuts over the dish. Pour the milk/cream mixture over the dish. Bake for 15 minutes, or until golden on top and set. Let cool somewhat before serving.
4. Lightly toast almonds and scatter over top before serving.

09 May 2009

Hot Pink Raspberry Cake

I saw this awesome hot pink cake and immediately planned to make it this weekend. I should point out that this never happens- recipes often sit in my cue for months, dare I admit years, before I get around to making them. But somehow this big puffy pink raspberry cake wanted to be made. Mother's day is tomorrow, and we've got spring flowers finally coming up everywhere, and I don't really need and excuse to bake a cake.

The cake calls for a packet of raspberry jello, and I'm sure purists could find a natural substitute for this, but I'm not that scared of gelatin although I only used half the package to keep it from being too sweet. You might try adding some of the liquid from defrosted raspberries to the cake in place of some of the milk for a more "natural" raspberry element. But the best thing about this cake, the this-is-going-into-the-recipe-files part, is the raspberry buttercream. Just three simple ingredients (butter, sugar, raspberries) the work perfectly together. The raspberries make it perfectly pink and add tartness and crunch to what would otherwise be a cloying frosting. I imagine it would go perfectly on your favorite chocolate cake recipe.

Then again, if hot pink isn't really your thing, there's always this blue cake for a more boyish note. What can I say, I think I have a problem with colorful cakes.


Hot Pink Raspberry Cake
Makes 2 9" round layers. Adapted from Apartment Therapy: The Kitchn.

1/2 cup unsalted butter, softened
1 1/4 cups sugar
3 eggs
2 1/4 cups flour
1 teaspoon salt
3 1/2 teaspoons baking powder
1 cup milk
1/2 a red raspberry Jell-O packet, (this would be 1.5 oz, I just eye balled the half packet but you could measure)
1/2 cup raspberry jam, for between the layers

1. Preheat the oven to 325°F. Grease two 9" round cake pans with butter or baking spray. Combine the flour, baking powder, salt, and half-packet jello in a bowl.
2. Cream the softened butter and sugar until light and fluffy. Beat in the eggs until combined. Add half the flour mixture stirring to combine, then add the milk, then the remaining flour mixture. Beat everything together for about 3 minutes until well combined.
3. Immediately pour into the prepared pans and bake for 25-30 minutes, or until the tops spring back slightly when pressed.
Let cool on wire racks for at least 15 minutes, then flip each pan over onto the rack and tap gently all over. Lift the pan slightly. If the cake doesn't feel like it's falling out smoothly, lay a slightly damp kitchen towel over the pan and tap again. If necessary, let the cakes cool more. If they have been baked thoroughly, however, they should fall right out of the pans once they've cooled a little and the sides of the cake have shrunk back from the pan.
Cool completely before frosting, otherwise the frosting will melt everywhere.

Hot Pink Raspberry Icing
1 pound confectioner’s sugar, sifted!
1/2 cup (1 stick) butter, softened
5 ounces raspberries, thawed if frozen

1. Beat the butter with an electric mixer until soft, then radually dd the powdered sugar until it is encorporated. Add the raspberries and mix well. Spread on cooled cake.

01 January 2009

Bourbon Buttercreams

Mom: Do you have my buttercream recipe?

Me: No.

Mom: I can't find it. Are you sure you don't have it?

Me: No mom, I don't have it. But I know the recipe, do you want me to tell it to you?

Mom: I'm sure you have it.

Me: No, I don't. But listen, it's one box of powdered sugar, one-

Mom: No I want my recipe, you know, the one George Beechner wrote out.

Me: I know mom, I don't have it. It's probably in that cabinet of yours. But it's really easy, it's just...

Mom: I looked all through the cabinet, it's not there, and we have to have the bourbon buttercreams for Christmas...

Well, the original recipe was never found, but I've made these so many times I really know the recipe by heart. This makes about 40 buttercreams, and we almost always end up making a second batch. I brought some to my office last week and they were gone in under an hour.

An attempt by a less experienced buttercream maker- the buttercream balls should be rolled until smooth.

Bourbon Buttercreams
In my opinion, there are few things better than a bourbon buttercream. And I generally dislike bourbon (heresy for someone with a Tennessean mother). But you can also flavor them with lemon, orange, vanilla beans, and a myriad of other flavors. The mixture will seem dry at first but do not be tempted to add more butter- if you do they will be too soft at room temperature.

1 1/4 sticks (10 tbl) butter
1 box (1 lb) powdered sugar
3 tbl bourbon
10 ounces bittersweet chocolate

1. Cream the butter until smooth. Cream in the powdered sugar until the mixture is crumbly. Add the bourbon, then continue to cream the mixture until it comes together in a ball. It may seem like the mixture is too dry but don't worry, it will come together eventually. The mixture should be somewhat stiff and fluffy, you should be able to knead it with your hands. If it is too wet, add some more powdered sugar. Taste it to see if the bourbon is to you liking. I almost always add more :-)
2. Pinch off small pieces of the buttercream and roll into balls, about 1/2 tablespoon size (they are rich, so the size of about two small nibbles). Place on wax-paper lined baking sheets. Refrigerate the balls until firm and dry.
3. Meanwhile, prepare a double boiler. Place the chocolate in the top of the double boiler and melt, stirring until smooth. When the chocolate is melted, turn the heat to the lowest setting, so the chocolate just stays warm. Coat the chilled buttercreams in the chocolate. I use a spatula and a fork for this- drop a buttercream in the chocolate, use the spatula to turn the buttercream in the chocolate to coat, then lift the buttercream out with a fork and transfer to wax paper.
4. Transfer to the fridge to chill until firm. Buttercreams are best stored in the fridge and served chilled.

21 September 2008

Winemaker's Grape Cake

It is known simply as the incident of the grape pie in my family. Whenever anyone asks my mother about my cooking abilities, she can always say, "well there was that grape pie she made." You see, as a kid, the very first thing I learned how to bake was pie. And I was home alone one afternoon, locked in the house while my mother gone somewhere, and making a pie seemed like a good way to pass the time. The only fruit we had in the house was a big bag of grapes, but I enterprisingly found a recipe for "grape pie" in the Joy of Cooking. So I made a homemade crust and followed the directions and baked up a homemade grape pie. With green grapes. And yes, parents, I was probably too young to be making pies unsupervised.

The pie came out looking beautiful, I remember, but it was as inedibly tart as you would imagine green grape pie to be. My mom's friend Shawn, a swim coach with the requisite eat-anything appetite, managed to struggle down a few slices, but I'm pretty sure the rest ended up in the trash. After that failure, I avowed that grapes did not belong in dessert, pair them with your cheese, add them to salads, but keep them out of the baking arena. And despite my adventurous baking nature, I stuck with this rule for years.


Until I came across a recipe for a grape cake that sounded so intriguing, and had so many positive reviews, that I just had to make it. I had a bottle of muscat wine that I had picked up on a trip to Lebanon's Chatura Vineyards, and it needed to be used up or tossed (being far past its prime for drinking), and I found this recipe. It's just the kind of cake I like, simple, only slightly sweet, and with a burst of ripe fruit. And despite my skepticism about the grapes, well, they were fabulous, just the right accent to the cake.

Don't be skeptical of the olive oil either, it works wonderfully here, just as it does in plenty of other desserts. I've made this cake many times since then, and I've even come across similar versions of the recipe elsewhere (like Patricia Wells' Winemakers' Grape Cake), which means I'm not the only one who's been enamored of the slightly unusual recipe. And so I'll amend my rule for this cake, as long as you make sure to use red grapes, and not green.


Winemaker's Grape Cake

1 1/2 cups all purpose flour
1 teaspoon baking powder
1 teaspoon salt
1/4 teaspoon baking soda
3/4 cup plus 2 tablespoons sugar
4 tablespoons (1/4 cup) unsalted butter, melted
4 tablespoons (1/4 cup) extra-virgin olive oil
2 large eggs
1 teaspoon lemon zest
1 teaspoon orange zest
1 teaspoon vanilla extract
1 cup Beaumes-de-Venise or other Muscat wine
1 1/2 cups red seedless grapes
for topping: 1 tablespoon butter, 2 tablespoons sugar

1. Preheat oven to 400°F. Brush 9-inch-diameter springform pan with olive oil. Line bottom of pan with parchment; brush parchment with olive oil.
2. Sift flour and next 3 ingredients into bowl. Whisk 3/4 cup sugar, butter and olive oil in large bowl until smooth. Whisk in eggs, both peels and vanilla. Add flour mixture alternately with wine in 3 additions each, whisking just until smooth after each addition. Transfer batter to prepared pan; smooth top. Sprinkle grapes over batter.
3. Bake cake until top is set, about 20 minutes. Dot top of cake with 1 tablespoon butter; sprinkle 2 tablespoons sugar over. Bake until golden and tester inserted into center comes out clean, about 20 minutes longer. Cool in pan on rack 20 minutes. Release pan sides. Serve slightly warm or at room temperature.