20 June 2007

There Is a Balm in Fava Beans


One of the things Umm Hana taught me was that when you have to do something laborious, go ahead and do it all at once and get it over with. A day of chopping, peeling, and cooking may seem a pain, but then you've got a year's worth of jam. One day I stopped by her house and she'd made three chocolate roll-cakes, one for her daughter's birthday, the other two for the freezer. And while you may never see me with that many cakes in my freezer, I do take a 'get it while you can' approach when it comes to seasonal produce. Like those fava beans I got last week, I shelled a huge bag, used some, and set some aside for later. The same approach can be taken for cooking dried beans: (because cooking your own dried beans is much tastier and cheaper than canned) cook a large amount, then freeze them in plastic containers.


So, I shucked in the car, I shucked on the porch, I shucked watching Free to Dance for about the fifth time (who doesn't tear up at 'A Balm in Gilead?'). Anyway, back to the favas. I love them in a simple salad with some chunks of pecorino romano and a drizzle of olive oil, with a bit of mint for accent. This time, my fridge yielded some cave aged-gruyere cheese, and I mounded the salad on top of some toasts as crostini. I ate them sitting in the midday sun of the front porch, and with the cheese melting into the still-warm toasts and the bite of fresh mint, it was the best lunch I've had in a while.


Fava, Pecorino, and Mint Salad
I love the salty chunks of pecorino romano cheese in this salad, but it's equally good with other cheeses: slivers of aged gruyere or crumbles of feta come to mind.

2 cups fava beans, shelled, blanched and peeled
2 oz pecorino cheese, broken into chunks (or substitute another flavorful cheese)
1 tbl slivered mint leaves
a drizzle of olive oil, pinch of sea salt

Combine everything and toss to coat.

Fava Bean Crostini: Toast slices of a baguette or country bread until browned on both sides. Drizzle each slice with a little olive oil, then mound some of the salad on top.
______________

19 June 2007

The Positive Side of Traffic Jams

Last Sunday threatened to be bad. We awoke early after a night of celebrating and champagne, slightly bleary eyed but relatively cheery, if that word can ever be applied to me and morning hours. I suggested we walk down to the Dupont Circle farmers market, remembering my Sunday summer routine when I had lived in Washington. However, it turned out to be further from the apartment where we were staying then I thought, as we trudged the many blocks in coffee-less silence I tried optimistically to point out that at least it was easy to take the subway back. Only a few steps from the market we stopped for that much needed caffeine only to wait for what had to be the longest to-go cup ever. The morning threatened to devolve as the coffee-devoid minutes ticked by, we exchanged terse words over breakfast pastries. Luckily, the coffees finally arrived (Italian espresso + french press!) and were delicious enough to revive us.


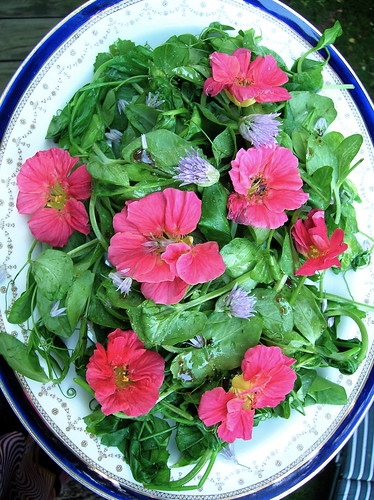
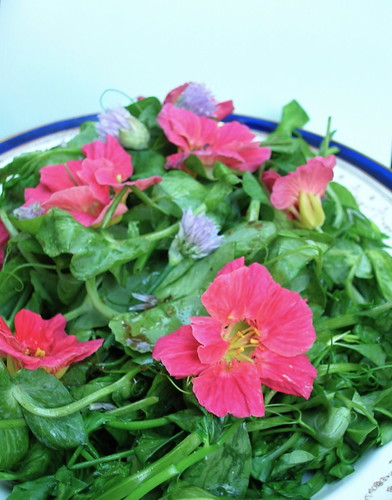
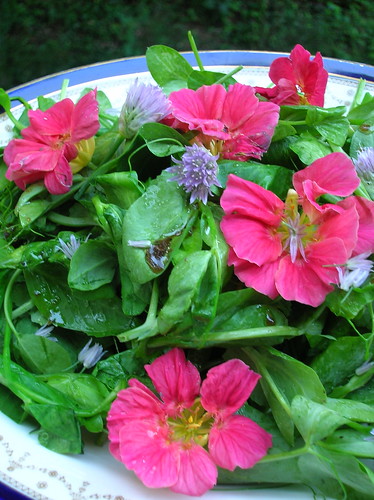
The selection at the market was beautiful, there was the same man with the gorgeous lettuces, the beautiful French tarts, the baskets of glorious strawberries. We gathered up what we could carry, and then rain threatened and we dashed to the subway. After a trip to the Corcoran, it was time to head home. Comfortably in the car, we dodged a protest and thought we’d escaped the worst traffic when, at the edge of the beltway, we came to a stand still. We inched along, realizing it would be a long trip home.

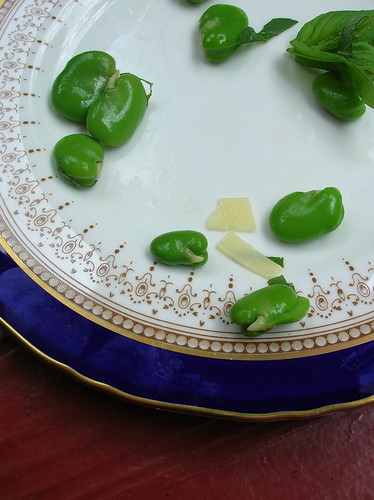
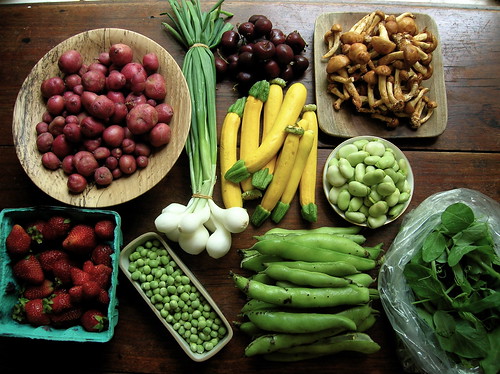
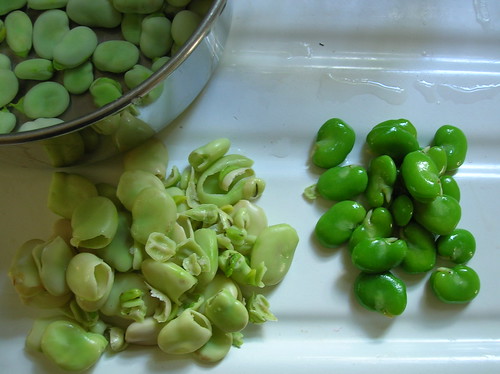
When the traffic threatened our sanity, we pulled into a strip mall for a cup of coffee, and I wandered into the neighboring shoe store and emerged with a pair of rock-bottom priced green sneakers. Back in the car, I decided to pass the time shelling the fava beans I’d purchased, pulling them from their soft green pods. I adore favas but they are a major pain, you have to shell them not once but twice, first out of their pods, then blanching them and slipping each bean out of it’s individual casing.


A few shortcuts later, we made it home, spirits and lettuce intact. As I unloaded our purchases, I realized we’d been a little overzealous in our grocery shopping as the refrigerator threatened to burst at the seams. While many people may welcome a full fridge, I see it as one big burden: all those things to be prepared, cooked, eaten! I immediately began culling through recipes, looking for a way to combine a lot of our produce into one dish. That was when I found scaffata.

When it comes to recipes for spring produce, simple asparagus or that old Roman recipe vignarola always steal the show, but I’ll admit I’m always terribly underwhelmed by vignarola. But 
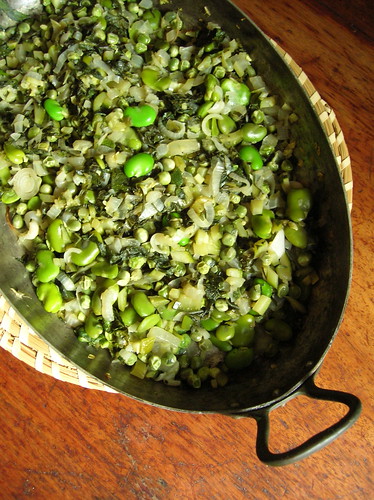
scaffata, where have you been all my life, because I’m infatuated. I even like saying it, 
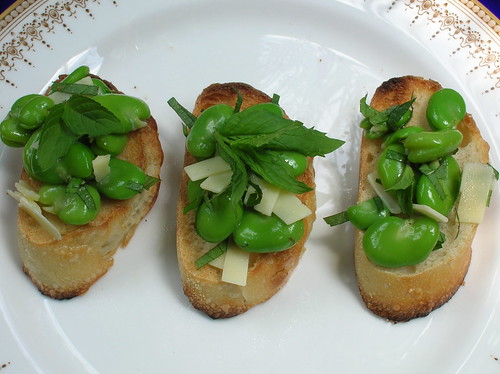
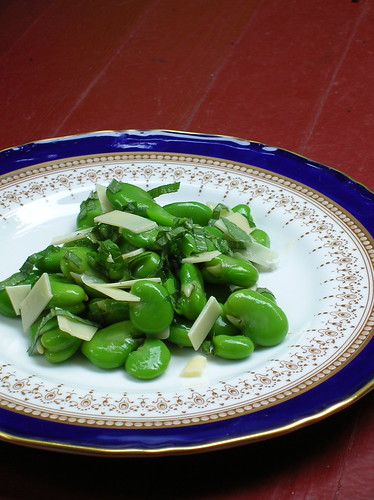
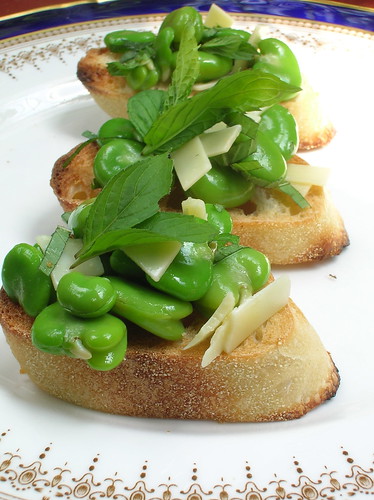
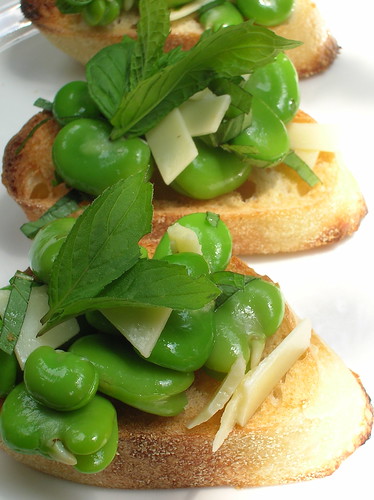
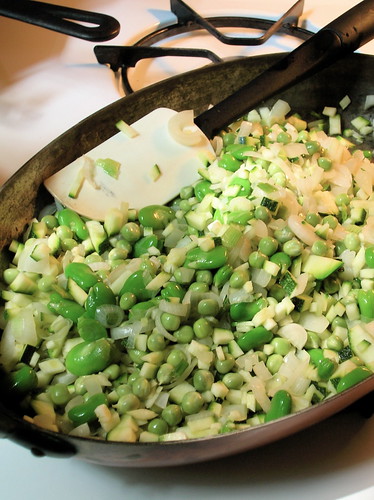
scaffata, your slow-cooked tangle of peas, beans, and onions with slivers of greens and zucchini. Like many vegetable dishes, there was a good bit of prep work involved, though nothing more complex than chopping, and I had already done most of my shelling in the car. Scaffata has already been deemed ‘a keeper’ in our house, and I can foresee a shortcut version using frozen peas and edamame in our future. With all those threats of Sunday dissipated, the potential negatives evolved to positives (good coffee, a refreshing walk, new shoes!), and we sat down to a pleasant evening and a new favorite dish.
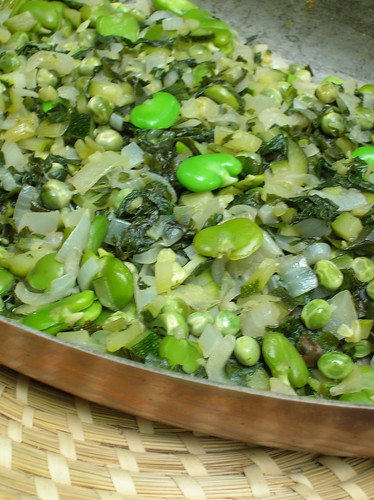


Scaffata (Braised Spring Vegetables)
The name of this Ligurian dish comes from the Italian verb scaffare, to shell.The outermost, less tender leaves of a head of greens, which you may not want to use in a salad, are perfect for this dish. If fresh favas are unavailable, substitute frozen baby lima beans or edamame. Adapted from Lidia Bastianich

3 tablespoons extra virgin olive oil
1 cup chopped scallions (white and tender parts; about 6 scallions)
1/2 cup chopped onions
2 1/2 pounds fresh peas in the pod, shelled (about 2 cups)
1 1/4 pounds fresh fava beans in pod, shelled, blanched, and peeled (about 1 cup fava beans)
1 1/2 cups finely diced zucchini
2 cups thinly shredded escarole or romaine leaves
1 tablespoon finely shredded fresh mint leaves

1. In a large, heavy casserole, heat the olive oil over medium heat. Add the scallions and onions and cook, stirring, until softened, about 10 minutes. Add the peas, fava beans, zucchini, and season lightly with salt and pepper. Stir well, reduce the heat to very low, and cover the casserole tightly with a lid or aluminum foil. Cook for 15 minutes, stirring once or twice.
2. Add the romaine and mint, cover the casserole tightly and cook, stirring occasionally, until the vegetables are very tender, about 25 minutes more. (The vegetables should give off enough moisture during cooking to prevent sticking or burning. If you find they are sticking, you can add a few tablespoons of water. Make sure the heat is very low and the pot is tightly covered before continuing to cook. It is fine, however, if the vegetables do brown a little.) Season to taste with salt and serve hot.
________

17 June 2007

Back with Blondies

Sometimes, it’s as if my brain is divided into different departments that don’t want to speak to each other. I mentioned a little while ago the constant care packages I send to a certain loved one, fueling both late nights in the law library and my own desire to bake. And then, after that initial mention, they disappeared, poof, gone, not to be heard from again. My care packages have certainly not stopped, though recently they’ve been targetted to neighbors and family members, but I’ve neglected to share those recipes with you.

I often bake at night after dinner, when there’s no natural light to take photographs, and then I quickly package up what I’ve made to be shipped off in the morning. My own dessert is the few swipes of batter I lick from the bowl and that corner piece that always looks particularly ragged. I like this routine, it’s certainly better than sitting around watching TV and I enjoy puttering about the dark evening warmth of the kitchen. But it also means I neglect to think of those routine baked goods for this blog, something that needs to be remedied.

These blondies have been in my repertoire for a while, and I’ve tweaked them here and there, but in the end I decided they’re pretty darn good as written. They include coffee, alcohol, chocolate, and toffee, so really, what’s not to love? The last time I made these I was in a rush and couldn’t find Heath bars in the grocery, so I used another type of plain toffee candies, and they were not nearly as good as usual. I took them to a friend’s house and we enjoyed them anyways, but they are best with Heath/Skor bars or another chocolate coated toffee (I think the chocolate coating prevents the toffee bits from sinking to the bottom of the pan). That said, these are a snap to make and delicious, so don’t be like me and send them away, unless it’s to someone you really, really love. Or in that case, just double the recipe.


Coffee-Toffee-Chip Blondies
The original recipe called for a double amount baked in a rectangular pan. I’d be in serious danger if I had that many of these blondies sitting around the house, so I usually bake this more modest-sized version. That said, if you have more self control or family members than I do, go ahead and double the recipe and bake in an 11x8 inch pan for 40-50 minutes.

6 tbl butter, softened
1 cup dark brown sugar
1 tbl instant espresso
1 tbl hot water
2 eggs
1 tbl vanilla extract
1 cup flour
1 tsp baking powder
1/2 tsp salt
1/2 cup chopped chocolate
1/2 cup crushed chocolate-coated toffee bar bits (such as Heath/Skor)
optional: 1/2 cup chopped pecans
3 tbl Kahlua

1. Preheat oven to 350 F. Grease and flour an 8” square baking pan (I usually line mine with foil, then grease the foil).
2. Dissolve the espresso in the hot water in a small bowl and set aside. In a medium bowl, whisk together the flour, baking powder, and salt.
3. In a large bowl, cream together the butter and sugar until light and fluffy. Add the espresso and the vanilla. Beat in the eggs one at a time. Fold in the flour mixture, stirring just until any streaks disappear. Stir in the chocolate, toffee bits, and pecans just to combine.
4. Pour into the prepared pan and bake for 25 minutes, or until a toothpick inserted in the center comes out clean.
5. As soon as you remove them from the oven, use a pastry brush to brush the Kahlua all over the top of the blondies. Cool completely before cutting into squares.

If you don't have Kahlua on hand, rum or bourbon make good substitutes.
________

15 June 2007

How to Fête a Friend for Fifty

john's bday 1
If you really want to celebrate a friend’s birthday in a big way what you need are several cases of expensive Champagne. Luckily, Monique had that covered. Apparently there really are people who drink Dom like water. I think I’ll take up the habit, as soon as I make my millions. Then I can have a few assistants, an apartment in Madrid, and access to David Beckham’s box seats, too.

Anyway, dear John was celebrating a big birthday, and personally I was shocked since he looks about ten years younger. The secrets are regular facials and honey wheat hair color number seven. Someone should have told Alan Greenspan. The party was taken care of, but I wanted to bring a little something as a favor, you know, besides the cheesy images we had printed on mugs. John loves all things Dutch, he speaks German and Dutch and we go to celebrate Flanders Day at the embassy, with Chimay on tap and freshly made waffles. He is also one of the few people I know who likes licorice, so I wanted to encorporate that into what I was making. I’ll admit I stole this idea for a movie camera made of licorice wheels from Martha, I mean no-one is actually that crafty on their own. Or at least they don't admit to it, ahem.
I put my cameras on these delicious chocolate cookie bases (you could do the same decoration on top of chocolate cake or brownies), and I took red icing to the party so I could make a little star background and write 'happy birthday' or 'you’re a star' on them. Unfortunately, I didn’t quite bring enough and I only got to “Happy B...” before I ran out. Uhhh. So the lesson is, always bring extra icing. Besides that, people might not realize these are wholly edible, in which case you’ll have to break them into chunks in front of your shocked guests. Don’t worry, the horror will fade from their faces as soon as they taste them.

It was a lovely party, and even though I was plied with way more champagne than I should have had, Monique was right when she said, “don’t worry, it’s the good stuff, you won’t feel it in the morning.” I awoke rested and skipped happily down to the DuPont Circle Farmer’s Market. You’ll hear more about that later, but for now, happy birthday to John, who really is a star.


Chocolate Cookie Movie Stars

1 recipe chocolate cookie dough
powdered sugar
2 oz melted chocolate
licorice pinwheels

1. Roll out chocolate cookie dough and cut into squares about 6-8 inches wide, you should have 3 squares. Place the squares on parchment-lined or greased baking sheets. Prick the dough in several places with a toothpick, then place in the freezer to chill for at least 10 minutes.
2. Bake the squares in a 350 degree oven for 15-18 minutes, until crisp but not darkened. Let cool completely.
3. Sift powdered sugar over the squares. Use melted chocolate the adhere the licorice pieces to the cookie base for the camera’s wheels, lens, and feet. Use the remaining melted chocolate to make a box for the camera body.
4. Use colored icing to draw stars around the edges or write a message.
________

Chocolate Cookies

Is it possible to fall in love with a dough? A dough so delicious you want to eat it all before it's even baked, a dough so beautifully black and full of rich chocolatey flavor, a dough so smooth and supple under your rolling pin, a dough that makes you want to make all your future tarts with it as a crust? I think it just might be. They make perfect chocolate cookies on their own, can be sandwiched with a cream filling for a homemade Oreo cookie, and make a great tart crust. What more could you want?


Basic Chocolate Cookies
No matter how you choose to use it, this dough makes a wonderfully dark buttery crisp confection, almost like shortbread. The dough can be a tad sticky, just make sure to refrigerate it if it gets soft.

1 1/2 cups flour
2/3 cup cocoa powder
1/4 tsp salt
12 tablespoons unsalted butter
1 1/4 cups confectioners sugar
1 large egg
1 tsp vanilla

1. In a large bowl, sift together flour, cocoa, and salt. Set mixture aside.
2. Cream together butter and sugar until fluffy. Beat in egg and vanilla.
3. Fold in flour mixture just until combined. Wrap dough in plastic. Chill at least 1 hour.
4. Heat oven to 350 degrees. On a floured surface, roll dough to 1/8 inch thick. Cut into desired shapes. Transfer to ungreased baking sheets; refrigerate or freeze until firm, 15 minutes. Bake for 10 minutes for medium-sized cookies, until crisp but not darkened. Cool on wire racks; use as desired.

For Sandwich Cookies: Combine 4 tablespoons butter and 4 tablespoons shortening. Sift in 2 cups powdered sugar until smooth. Flavor with one of the following:

- 2 teaspoons vanilla extract
- 1/2 teaspoon peppermint extract
- 2 tablespoons lemon, orange, or grapefruit zest
- 1/3 cup shredded coconut and/or 1/2 teaspoon coconut extract
- 1 tablespoon instant espresso powder

See also: Chocolate Cookie Movie Stars

12 June 2007

The Simple Life


More and more I’m beginning to appreciate the joy that comes from the small things in life. The little anticipation as I pick up the Sunday paper, waiting to see what’s inside it’s many pages. Looking forward to Fridays, or going out in the morning and checking on my tomato plants, seeing which ones have new blossoms or tiny fruits. This Wednesday is the day for newspaper recycling, and I actually got a little excited thinking about it (I know, that’s sort of pathetic, but it also means getting rid of the stacks cluttered by the stairs). It’s those small pleasures that can bring a little excitement and which carry us from day to day.

Take last week for example, we went to the farmer’s market early Saturday morning as usual, where we found our favorite greens-guys were selling pea shoots. We eagerly picked some up, and remembering a good friend who always loves pea shoots at dim sum, called her to tell her about our find. After exchanging pea-shoot news, she told us she was giving away all her vinyl (having upgraded to an iPod), and we were welcome to come over and pick out some of her old records. We took her a small bag of greens, and came home with a treasury of Persian records, Leonard Cohen, and archival folk songs. That evening, I dragged the old record player out of a closet and dug up my favorite Mercedes Sosa album that my mom bought in Argentina in 1982. It was a perfect early summer evening and we opened all the doors and cranked up the volume loud enough to annoy the neighbors, clanked wine glasses and danced on the porch. I can’t think of a better lineage for a Saturday.

The next day, I took our pea shoots and lightly steamed them with a little oil. After piling them on a platter, I went out into the garden and raided our plants for some nasturtium blossoms and got a few tiny chive flowers from the herb garden (only use the smallest youngest chive blossoms otherwise they’ll be too strong). It was a simple natural evolution of a dish, and added up to something beautiful. We had it for dinner with some buttered carrots and radishes and baked crab cakes, and after watching a DVD, indulged in one of my favorite simple pleasures. Going to bed early. The little things.


Steamed Pea Shoots with Nasturtium and Chive Blossoms
Pea shoots are the young tender vine-like leaves of pea plants. Their pea-flavored leaves are excellent in salads and stir fries; they are popular in Chinese cuisine, where they are known as dou miao. Look for pea shoots in farmers’ markets or Asian markets. You want only tender new growth: taste-test the shoots and tendrils and discard any tough or stringy bits, keeping only the tender leaves and stems.

Nasturtiums or other edible flowers make a pretty garnish. Use only the youngest smallest chive flowers or they will be too strong and pungent, or substitute a few chopped chives.


1 bag pea shoots
2 tbl sesame oil
nasturtiums
a few very young chive blossoms

1. Prepare a vegetable steamer or a colander set over a pot of boiling water. Use scissors to trim pea shoots into short segments, about 3 inches each. Trim away and discard any very thick stems or tough tendrils (I find the tendrils in particular have a tendency to be stringy, so either trim them into short lengths or discard them).
2. Toss the pea shoots with the sesame oil. Working in batches, very lightly steam the pea shoots until they are bright green but not wilted. Transfer the pea shoots to a serving platter and season with salt. Scatter nasturtiums and chives over top and serve.

More pea shoot recipes:
Pea Tendril and Daikon Noodle Salad
Strawberry and Pea Shoot Toasts with Pepper Jelly
Sesame Pea-Shoot Salad
______

11 June 2007

Raspberry-Ricotta Éclairs


One of the nice things about cooking is that it is a constant cycle of discovery and evolution. Oftentimes, I'll have bought a new ingredient to use in a recipe, and then I'm stuck with the leftovers, and in the effort to use them up, I'll try out a new recipe, and so goes a cycle of learning and trying new things. Sometimes, I end up making things I never would have tried, even dishes I thought I might not like, in a last-ditch effort not to let food go to waste. In that way, cooking is not just a process of learning new techniques and dishes, but also expanding my own tastebuds, developping an appreciation for a variety of foods and cuisines I might never have eaten otherwise.

When I made a Gateau a little while ago, I had some extra choux paste dough, so I piped them into little logs for éclairs. Now, I have to say I don't like éclairs, but I figured someone would and I couldn't bear to let that dough go to waste (especially after the arm-strength expended to stir it). I stirred up some ricotta and raspberries we had in the fridge for a filling. And I have to say those éclairs I never would have dreamed of making were pretty darn good. The filling is delicious, and would also be great sandwiched between some cookies or as part of a napoleon. These won praise from a pastry-loving friend; as for me, I'm still not a huge fan of éclairs, but hey, it's a learning process.


Raspberry-Ricotta Éclairs
I like the crunch that comes from using fresh raspberries, however, if you don't like the seeds, you can use seedless raspberry jam instead.

for the choux paste dough:
1 cup water
2 tbl butter
1 tbl sugar
1/2 tsp salt
1 cup flour
3 eggs
for the filling:
1 cup ricotta cheese, as fresh as possible
1/3 cup cream cheese
1/2 cup powdered sugar
1 tbl vanilla extract
1 cup raspberries

1. Make the éclair shells: Preheat the oven to 425. Put the water, butter, sugar, and salt in a saucepan and bring to a full rolling boil. You want the butter to be completely dispersed in the water. Turn the burner to low and sift the flour over the water. Use a wooden spoon to stir the dough together until it is smooth and pulls away from the side of the pan. Remove the pan from the heat.
2. The next step can be done by hand, but it takes quite a lot of arm-strength, so it is best done with a stand mixer. Add the eggs, one at a time, beating each one until it is fully encorporated. The dough should have the consistency of mayonnaise.
3. Transfer the dough to a piping bag, line a baking sheet with silpat or parchment. Pipe the dough into log shapes for the éclairs. Place the baking sheets in the oven and bake for 10 minutes. Turn the oven down to 350 without opening the oven door. Bake another 20 minutes, until the éclairs are golden and firm. Cool on a wire rack.
4. Make the filling: Place the ricotta in the blender and blend until smooth. Add the cream cheese, powdered sugar, and vanilla and blend until very well combined. If the mixture seems too thick you can add a little milk to thin it. Add the raspberries and pulse the mixture until the raspberries are chopped up but some chunks remain.
5. Fill éclairs: Put the ricotta mixture in a piping bag or plastic bag with the tip cut off. Slice the éclairs partways in half but don't cut all the way through. Use the bag to fill the éclairs. If desired, sift powdered sugar over the top of the éclairs, keep refrigerated until ready to eat.

Additionally: you could make a raspberry glaze or chocolate icing to glaze the tops of these.
___