13 August 2007

Day 2: Peppermint Ice Cream

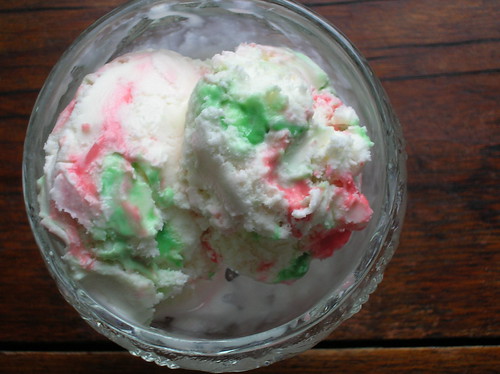
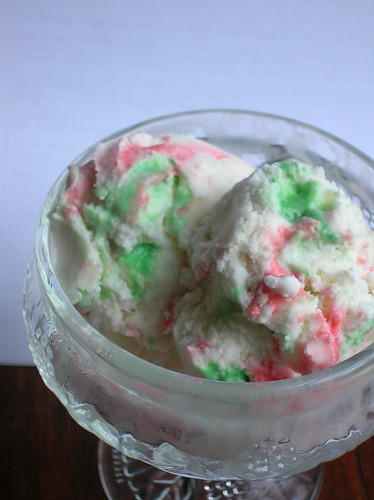
peppermint ice cream

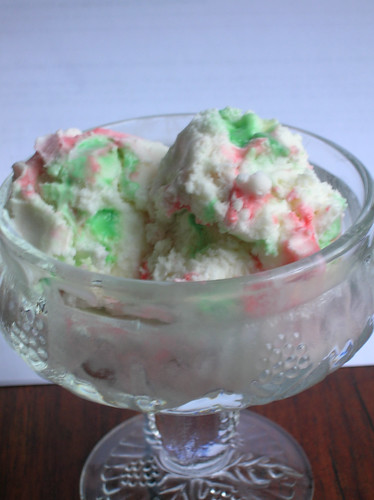
Of all the ice cream flavors to include in this project, I had to make peppermint ice cream. I’m a peppermint ice cream fanatic! Every Christmas I used to stock up on gallons of the pink Edy’s stuff, but it would only last me until about February and then what was I to do? The first thing I learned was that you can soften vanilla ice cream and fold in peppermint extract and crushed peppermint candies, but then I found this homemade version and I’ve never looked back. I like that this ice cream is very easy to make, no fussing with eggs or extracts, though if you prefer a custard style ice cream I've got my eye on Elise’s recipe. Besides, what can be better on a hot day than the cool flavor of freshly churned peppermint ice cream? I still don’t understand why peppermint ice cream isn’t available year-round, but now I can have it whenever I want!


Peppermint Ice Cream
I like that this ice cream uses crushed peppermint candies to flavor the ice cream, instead of the peppermint extract many recipes call for, which I never have on hand. Adapted from Emily Luchetti.

2 cups heavy cream
1 cup whole milk
1/3 cup sugar
1 tsp cornstarch
28 hard peppermint candies, 14 finely crushed, 14 coarsely crushed
pinch salt

1. Combine the milk, cream, sugar, cornstarch, salt, and finely crushed candies in a saucepan. Stir well to dissolve the cornstarch. Cook over low heat, stirring so that the sugar dissolves, until it begins to bubble around the edges of the pan and thickens ever-so-slightly. Remove from the heat and chill in an ice bath. Transfer to the refrigerator and chill completely (at least 2 hours).
2. Strain the custard, then churn in your ice cream maker according to the manufacturer’s directions. Add the coarsely crushed peppermint candies at the very end of churning. Store in the freezer.
____________________________________________________

12 August 2007

Day 1: Coconut Sorbet with Coffee-Simmered Dates

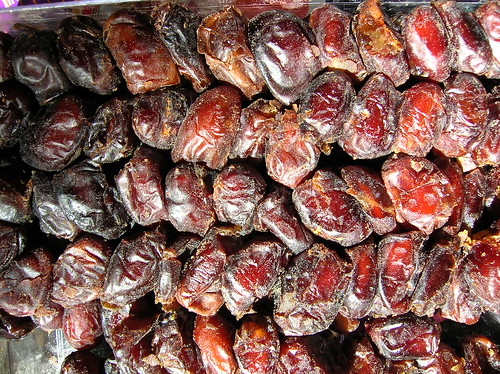
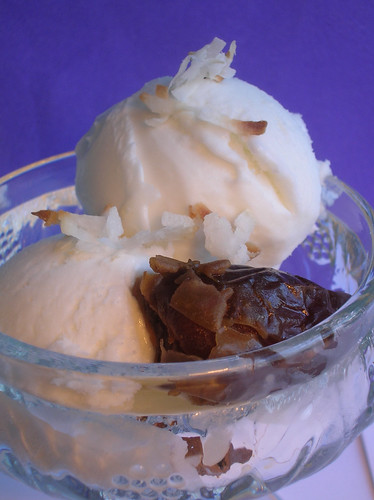
It has been way too long since dates, the namesake of this site, have been featured here on Desert Candy. In fact, aside from some delicious date bars, I’d say there’s a dirth of date recipes here that needs to be remedied. It’s not that I haven’t been eating dates, I actually eat them all the time. But I usually enjoy them unadorned, as a little afternoon snack alongside a cup of coffee or espresso. I think moist plump dates pair perfectly with coffee, so I thought I’d dress things up a little bit by making a coffee syrup for the dates, scented with cinnamon and orange. Since it’s the first day of August’s ice cream challenge, I thought I’d be a little fancy and do a pairing of coffee-simmered dates with coconut sorbet.

dates

Coconut sorbet* is one of the easiest and most satisfying frozen desserts to make. In it’s simplest form, you can just combine coconut milk and sugar and then churn it. However, I find most canned coconut milk is seriously lacking in flavor, and I rarely have it in my pantry. Infusing your own coconut milk is easy and makes an unbelievably creamy, rich flavor without added cream. Plus, this still takes minimal effort, great if you’re new to homemade ice cream making. While this is a delicious pairing, both components are great on their own, and if you're looking for a go-to coconut ice cream recipe, you've got it.

*Yes, technically this isn't a sorbet since it has milk, but it's not quite ice cream either, so I thought that sorbet was the best label.


Coconut Sorbet
Infusing your own coconut milk makes an amazingly coconutty, rich, creamy treat. Though there's no added cream, I find it has just the right amount of richness, although you could use half milk, half cream for a richer ice cream. I call for sweetened dessicated coconut because it is more readily available, but if you have access to unsweetened coconut you can use it and increase the sugar to 1/2 cup.

2 cups whole milk
1 cup shredded sweetened coconut
1/4 cup sugar
1/2 tsp vanilla

1. In a saucepan, combine the milk, coconut, and sugar. Bring the mixture to a simmer, stirring, then remove from the heat, cover and set aside for one hour to steep. Strain the mixture through a fine-mesh sieve into a bowl, pressing on the coconut to extract any liquid, then discard the coconut.
2. Chill the mixture thoroughly in the refrigerator (important!), then churn in your ice cream maker according to the manufacturer’s directions.

Variations:
Toasted Coconut Sorbet: Toast the coconut on a baking sheet until golden before infusing it with the milk.
Coconut and Lime Sorbet: Add 1 tsp lime juice and a bit of fresh lime zest when infusing the mixture.
Coconut Sorbet with Dates: Add chopped dates at the end of the churning process.
Almond Joy Ice Cream: Make coconut ice cream, add a swirl of fudge sauce and chopped almonds.

Coffee-Simmered Dates
12 Medjool dates, pitted
1 cup coffee
1/4 cup brown sugar
1 cinnamon stick
1 sliver of orange peel
2 tbl butter

1. Combine the dates, coffee, brown sugar, cinnamon, and orange peel in a medium saucepan and bring to a simmer. Simmer for about 15 minutes, until slightly reduced. Set aside the dates in a bowl and discard the cinnamon stick and orange peel. If you’re picky you can slip the dates out of their skins and discard the skins. Continue to simmer the syrup for another two minutes, then whisk in the butter until combined. Pour the syrup over the dates and serve.
_______________________________________________

10 August 2007

August Ice Cream Challenge

glace 1

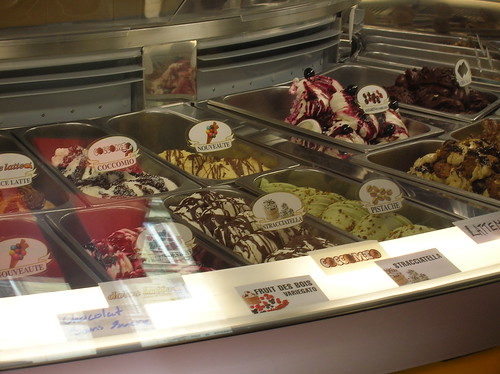
President Reagan declared July America’s national ice cream month, and while I lick my share of cones every summer, I don’t really hit my ice cream stride until August. August, when the heat settles over us in an unrelenting glare and we retreat to the beach in search of respite, clinging to those last days of vacation before we return to school and work, August is truly the month for ice cream.

I’ve been thinking about this recently, how everyone in so many cultures knows that late summer afternoon, when it’s too hot to work or even to play, when all you can do is stroll languorously and lap up a bit of cool creamy custard. I’ve also been thinking about my own love of ice cream and my rediscovery of homemade ice cream, and inventing new ice cream flavors, and I thought, why not? Why not churn up a bunch of different ice creams in August, just for fun. I could post them here on the blog, and if you’re not French and don’t get most of the month off, if you’re trapped in a cubicle, sweating as you run to work in your suit, you can tune in everyday and check out a new ice cream flavor.

damien salted butter caramel

So I’m announcing my own August Ice Cream Challenge, in which I’ll be posting a new ice cream recipe here every day for the rest of the month. Three weeks, 21 days of ice cream. It’s absolutely crazy, I know, but I think it will also be pretty fun. I’ve been doing some prep work ahead of time, and I’ve got some classic and some unusual flavors planned. If you have your own blog, I invite you to play along and post an ice cream of your own, or simply share your favorite ice cream experience in the comments section. If you’re looking for inspiration, I highly recommend David Lebovitz’s The Perfect Scoop, Bruce Weinstein’s The Ultimate Ice Cream Book, and Ice Cream Ireland. Claudia Flemming, Emily Lucchetti, and Nigella Lawson have also provided inspiration on my own recipe hunt.

Will she do it? What kind of wacky flavors will she come up with? Will she fit into her pants at the end of it?! I urge you to stay tuned and find out!

P.S. If you’re wondering where my crazy love of ice cream comes from, read this. I use an inexpensive ($50) ice cream machine with a bowl I store in the freezer. And in the interest of full disclosure, I’ve made some of the ice creams ahead of time over the past few weeks so that I could get a head start on posting them, and let me tell you we’re in for a fun ride.

glace 3

08 August 2007

Making Amends with Pavlova.

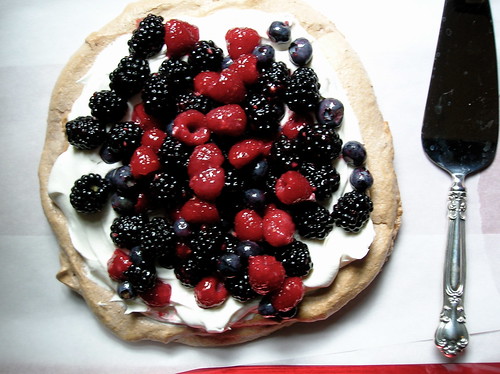
hibiscus and rose pavlova

A little while ago, I posted a cheater's version of pavlova: it was beautiful, delicious, took five minutes to make, and you all loved it. I loved it too, but I was left with a little nagging feeling. I still had yet to make a real pavlova, and if I wanted to earn my baking-stripes, this was something I needed to do.

It was only when searching around in the back of my cabinet, I happened upon some leftover hibiscus powder, and then I got excited. I could make a hibiscus meringue base, then I could scent the berries with rosewater. A hibiscus and rose pavlova, I was practically salivating at the thought of it.
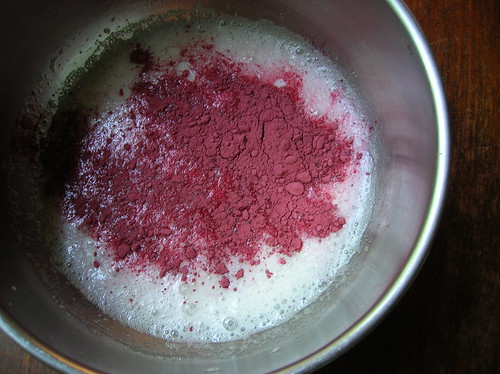
hibiscus powder + meringue

The day came: we were having six people for dinner, I was making the pavlova, I went to the market in the morning and got the berries. Did I mention the temperature that day was 100 F with 100% humidity? Any other sane person would have realized that this was not the day to attempt a delicate meringue in a kitchen with only moderate air conditioning and the prospect of guests arriving. Clearly I am not a sane person.

So, I set about the making the base, beating my egg whites, adding the sugar in a slow stream. Beating, and beating, but the egg whites did not form peaks. No matter what I did, they remained a sugary thick liquid. Hmmmph. So, I started over, fresh egg whites, a super clean bowl and beaters. And it happened again- no peaks! Now, not only was I not sane, but I was not happy. I had a growing pile of egg yolks and wasted egg whites staring at me. I've beaten my fair share of meringues and souffles, and this has never happened to me. But I was also determined. A trip to the store to get a dozen more eggs and sugar, and another go. Finally, it worked, the egg whites beat up into a stiff shiny meringue, dyed beautifully purple by the hibiscus powder. Phew.
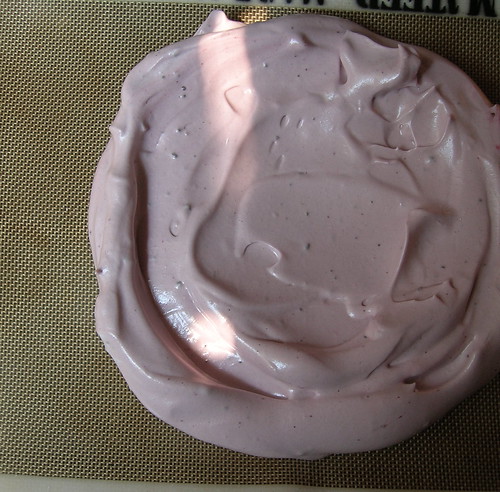
I baked the base of the pavlova and made the filling with relatively little incident. Because it was so humid out I baked it a tad longer than I should have and as a result the base browned too much, then wept a little, it wasn't perfect. Serving it at an outdoor event in the humidity probably didn't help. I think the pavlova gods are still mad at me because I cheated before. But after all that, would I make this pavlova again? Absolutely. It's beyond delicious. The hibiscus powder (available in Latin groceries, or you can make your own by grinding up hibiscus tea), adds a lovely tart element to a dish that can often be overwhelmingly sweet. The rosewater has just the right perfumed noted (I often add rosewater to fruit salads), and the texture is a marvelous combination of crunch, marshmallowy chew, soft cream, and bright berries. I'm definitely making this again, though maybe on a less humid day. Now, if someone could just tell me what to do with the 12 egg yolks I have leftover?
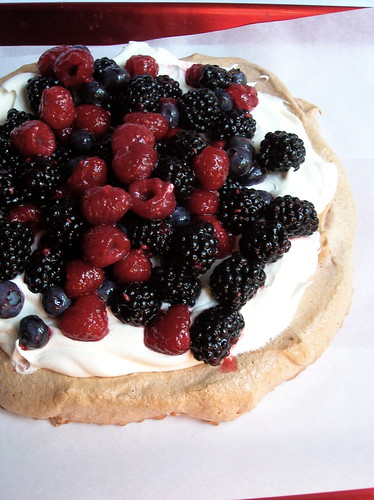
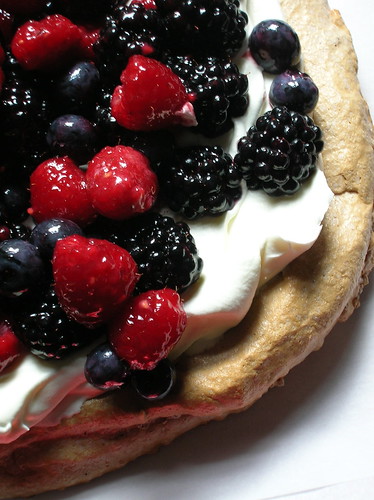

Hibiscus and Rose Pavlova
I love pavlovas, with their crunchy-chewy meringue shells and bright bursts of fruit. In this version, hibiscus powder adds a tart note to the base and rosewater adds a floral scent to the berries. Hibiscus powder is available at Latin markets, or you can make your own by grinding hibiscus tea, and rosewater is available at Middle Eastern markets. While I love these floral notes, the pavlova will still be excellent if you choose to omit them and simply make a mixed berry pavlova.

4 egg whites
2/3 cup sugar
1 tsp cream of tartar or vinegar
3 tbl hibiscus powder
2 cups whipped cream (from 1 cup heavy cream)
1/4 cup strained plain yogurt
3 cups mixed berries
1 spoonful plum jam or seedless berry jam
2-3 drops rosewater

1. Preheat the oven to 325 F. Place the egg whites with the cream of tartar in a clean bowl and beat with a mixer until the egg whites form soft peaks. Add the sugar with the hibiscus powder in a slow stream while continuing to beat. Beat until the mixture form stiff peaks.
2. Spread the meringue on a parchment-lined baking sheet, spread into a 9 inch circle, mounding the edges up. Place in the oven and immediately turn the oven down to 250 F. Bake for 1 hour and 15 minutes, the meringue should be hard on the edges, but should still give a hint of a marshmallowy-soft center when pressed. Turn off the oven, prop the door open, and leave the meringue to cool completely in the oven.
3. Fold together the whipped cream and the strained plain yogurt. In a bowl, stir together the jam and the rosewater, gently fold in the berries, stirring so that they are evenly coated.
4. Just before serving, transfer the meringue base to your serving platter. Spread the whipped cream over the meringue, then pile the berries on top. Slice into wedges and serve.
__________________________________________________

07 August 2007

An Indulgence for Fig Season


I will offer you the fact that this is technically a salad. Granted, it involves things both cheese-stuffed and bacon-wrapped, but it is a salad. And actually, I think the true object of indulgence in this dish is, that apple of my eye, the fig. Keeping my promise of more fig recipes, I offer you this salad with cheesy-bacon wrapped figs.

While it sounds terrifically indulgent, I think this dish has just the right balance of things. Figs are stuffed with cheese, wrapped in bacon and put under the broiler so that the figs warm, the cheese oozes from their center, and the bacon is crispy. Situated over a bed of greens, which absorb a bit of bacon juices, it's the perfect thing to eat with a knife and fork: each bite gets a good bunch of greens accented by a little warm, figgy bacon goodness. The portions are just right, with just enough cheese and meat for flavorful accent, but not overly indulgent. While this is good with just about any cheese, I like to use a creamy one that will melt nicely, like Camembert or Pont L'Eveque.


Salad with Cheesy Bacon-Wrapped Figs
I think just about any cheese works in this wonderful salad, I like to use a creamy cheese like Camembert, but goats cheese and blue cheese are other good choices. Inspired by Gourmet. Serves 4.

8 figs
4 oz cheese of choice
8 strips of bacon
mesclun (mixed salad greens)
lemon juice, salt

1. Preheat the broiler. In a skillet saute the bacon until most of the fat is rendered off but the bacon is still pliable, about 7-10 minutes. Drain on paper towels.
2. Use a knife to cut a small cone out of the base of a fig. Take a small ball of cheese and shove it up into the middle of the fig, then, replace the fig bottom. Repeat with remaining figs. Wrap each fig with a strip of bacon, secure with a toothpick, and place on a baking sheet. Place the figs under the broiler for 2-3 minutes, until the bacon is crispy.
3. Toss the greens with lemon juice and salt, then divide between four plates. Take a little of the bacon juice from the bottom of roasting pan and drizzle over the greens. Place two figs on each plate (removing the toothpicks), serve immediately.
_____________________________________
05 August 2007

I Should Have Warned You.


I really should have warned you. About the figs. Actually, I meant to, I was going to give you all a little heads up, that fig season was on it’s way, and what with my obsession, this blog may turn into an all-out fig-a-palooza. But I didn’t get around to it, and the other day I spied to first figs in the market and when I literally rushed over to their small baskets, the grocer actually laughed at my excitement.

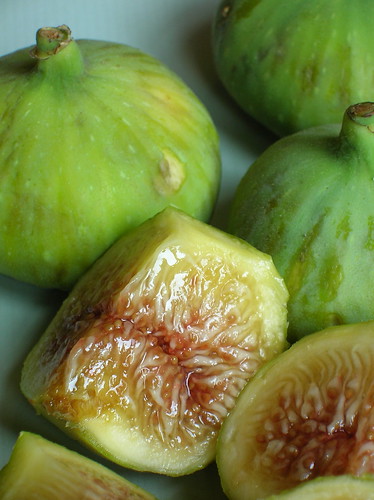
My love of figs has not always been as such. It was not until I went off to Beirut that I even remember contemplating fresh figs. There, my friend Lina, who was raised in Brooklyn but whose family are conservative Shiites from south Lebanon, told me about the figs. “They’ll be coming in soon,” she said, “any day now. My family will bring some up from the south, and I’ll eat so many I’ll make myself sick, but they are sooo good.” The next weekend, I came home to find two huge flats of figs left on the table that separated our two desks. Each flat piled high, one with light green figs and another with dark brown ones, they were a kings ransom of figs.

That night, Lina showed me how to peel the thin skins off the figs and we sat eating one after another after another (the peeling is traditional for hygenic reasons). In a matter of a few days, we’d finished off most of the two flats, and thankfully no one was ill. Since then I don't think I've turned down any fresh fig that's crossed my path, and I look forward to the rumors and anticipation of fig season each year.


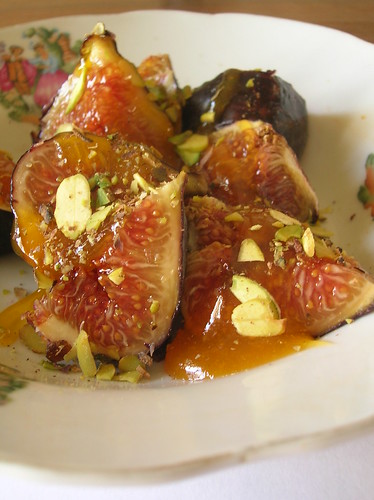
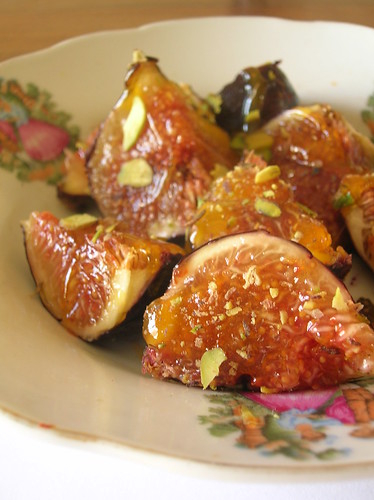
I’ve also made my fair share of fig recipes: fig salads, fig tarts, prosciutto-wrapped, goat-cheese-stuffed, bruléed with port, over yogurt, with ice cream, baked into a clafoutis. And while they have all been delicious, my absolute favorite way to enjoy a fig is to cut it into quarters and then to eat it. Simply. I like them best for breakfast, drizzled with a little apricot honey and sprinkled with some chopped nuts. It’s the ideal summer breakfast, one which should be followed by a lunch of summer tomatoes with a bit of basil, and then a dinner which might involve corn on the cob and maybe some sautéed zucchini, or some little cherry tomatoes tossed warm with pasta, or some stewy ratatouille. You know what I’m talking about, summer food.


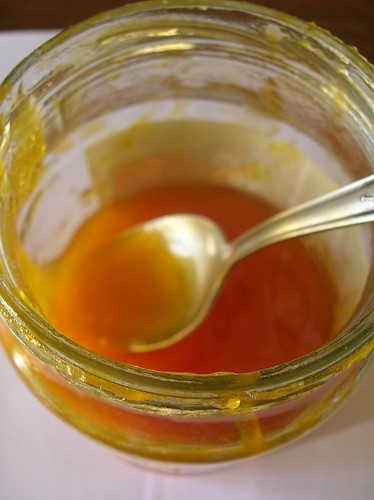
Oh wait, I said something about apricot honey, didn’t I? You didn’t think I was going to leave you without an explanation of this ambrosia that elevates my figs to heavenly heights? Apricot honey is not honey at all, but simply a name I invented for a jar of some wonderful syrupy stuff that Umm Hana shoved into my hand as I was leaving her house one day. I never quite knew what it was, except that I devoured it repeatedly, until I saw a little one phrase side-note in Claudia Roden’s “Book of Middle Eastern Food” about an apricot syrup recipe from Damascus. I immediately set to fiddling around with a recipe, and finally found one that was just right. What I love about this technique is that you can apply it to just about any dried fruit, I once made a version using dried cranberries that produced a wonderful kind of cranberry jam, and you can even do it with lemon juice.

As for the figs, quite frankly they are just as good when drizzled with regular honey and sprinkled with nuts. And though I love them for breakfast, they’re good just about any time of day. I’m afraid it’s not much of a recipe, but when figs are in season, you don’t need much else.


Figs with Apricot Honey and Pistachios
This simple preparation is one of my favorite ways of enjoying fresh figs. You can have it with yogurt for breakfast, or place on top of a bed of greens with a squirt of lemon juice as a salad. Tip: when figs are ripe there is a tiny drop of dew on the bottom of the fruit. However, eat them soon because they can quickly go from ripe to moldy.

8 ripe figs, quartered
4 tbl apricot honey (recipe follows) or regular honey
3-4 tbl finely chopped pistachios

1. Drizzle the figs with the honey and sprinkle with the nuts. Serve as desired.

Apricot Honey
Not a honey at all but a wonderful syrup made from dried apricots. This preparation can also be made using different dried fruits.

1 lb dried apricots
3 cups boiling water
1 tbl orange blossom water (optional)
1 tsp lemon juice
2 tbl sugar
2 tbl cornstarch dissolved in 1/2 cup water

1. Place the apricots in a bowl and pour the boiling water over them. Let soak overnight.
2. Drain the apricots and purée them in a food processor, add the orange blossom water, lemon juice, and sugar and purée until completely smooth.
3. Put the mixture in a saucepan and add the cornstarch mixture. Bring the mixture to a boil, then lower the heat and simmer, stirring constantly, until the mixture is very thick and syruppy. Pour into a jar and store in the refrigerator.
____________________________________
03 August 2007

A Soup Made of Ladies

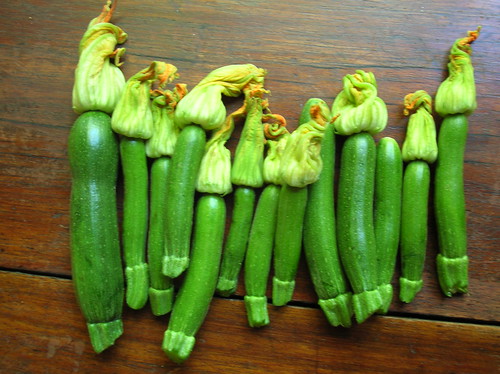
female zucchinis
Title IX: We are female zucchinis, we demand equal rights!

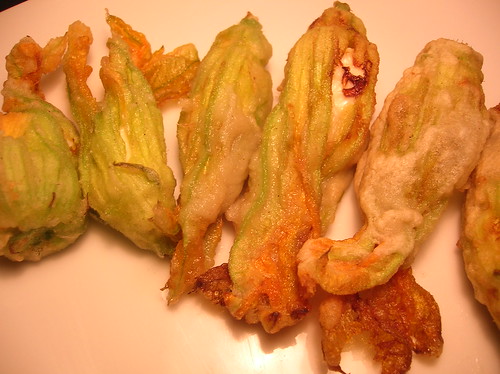
I’ve been pining away for weeks now for a good squash blossom fritter. It’s one of the things I love this time of year, when everyone else is going zucchini-crazy, I’m foraging for the blossoms. Since I don’t grow my own squash, I don’t have my own blossoms to pick, and I haven’t found any at the market yet that look viable (like this). I always stuff them with a little cheese-egg mixture (Boursin cheese works well), then batter and fry them.

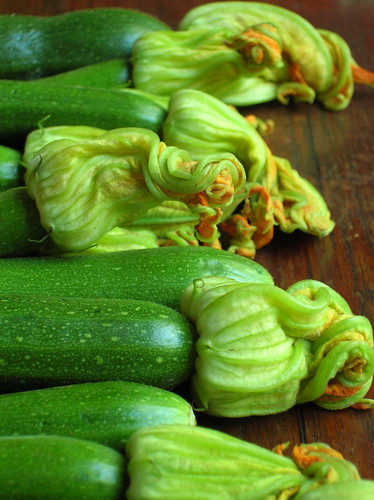
Dear M., who’s been hearing me go on about the squash blossoms I cannot find, sweetly brought me some squash from the market the other day. They were beautiful, but I quickly recognized they weren’t the kind I use for stuffing. Then I remembered: squash are male and female. The large male blossoms are the ones used for stuffing, while the female blossoms grow attached to the little squashes. Today’s anatomy lesson.


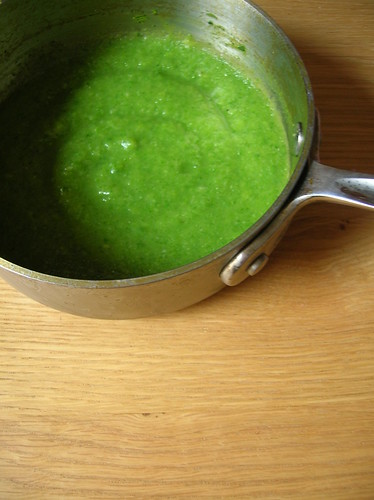
Here’s a tip from our farmer: start picking your zucchini as soon as possible. Picking your zucchini early will prevent the glut of baseball-bat-sized zucchini later in the season. And not only will you have fewer zucchini to deal with, but the tiny zucchini are the most flavorful, tender, and beautifully green. Small squash with their flowers still attached are often used in cooking, in Greece they might be folded whole into an omelet, or used in Mexico as a filling for quesadillas. I made simple soup that is really just a purée of baby (female) zucchinis and their flowers. It’s simple in the way that summer food can be: bursting with flavor and color. I like to call this a soup made of ladies, or a soup for ladies, but I think both sexes will enjoy it.

After making the soup, I finally got hold of those blossoms I was coveting, so I made a little composed dish: purée of (female) zucchinis topped with (male) blossom fritters. Both components are delicious on their own, but they also go together perfectly. Equality of the sexes and all.

Eeek, I know, horrible picture, but check out that oozy cheese.

Purée of Female Zucchini
Squash blossoms are both male and female, the females produce fruits, while the male do not. Whole female zucchini, with both squash and blossoms, are puréed together in this simple but wonderful summer soup. Adding a few fresh basil leaves is also a nice touch.

10-12 baby female zucchini with their blossoms still attached
2 tbl olive oil
water or stock
salt to taste

1. Slice the zucchini, discard the nubby top piece, and dice the flowers. Heat the olive oil in a wide saucepan and sauté the zucchini rounds over medium heat, until they begin the soften and have some brown spots. Add the zucchini flowers and toss just to combine. Immediately add just enough water or stock to cover the bottom of the pan by about one inch and season with salt. Bring the mixture to a boil, then simmer until everything is soft and combined, only about 3-5 minutes. Let the mixture cool slightly, then purée in a blender until smooth.

Male and Female: Purée of Zucchini Topped with Squash Blossom Fritters
Whole female squash are used in the purée, while male squash blossoms are used to make delectable fritters.

purée of female zucchini, as above
for the fritters:
4 large male squash blossoms
1/4 cup Boursin cheese
1 egg
1 cup flour
1 cup very cold mineral water
oil, for deep frying

1. Prepare the zucchini purée as directed above.
2. Heat the oil in a deep pot. In a small bowl, beat together the egg and the Boursin cheese. Stuff each blossom with about a tablespoon of cheese mixture. In another bowl, combine the flour and the cold water in a few swift strokes (it’s ok if it’s lumpy). Dredge the flowers in the batter, then fry in the hot oil for a few minutes until crisp and browned. Drain fritters on paper towels.
3. Ladle the purée in four shallow bowls. Top each bowl with a squash blossom fritter, serve immediately.
________________________________________