23 May 2010

Beef Ragu


I am rarely interested in large hunks of meat and I'm usually happy with a glass or two of wine, all of which makes me a pretty cheap date should you want to take me out to dinner. However, every once in a while I spy a meat recipe that strikes my fancy, say pulled pork or lamb flatbreads. This ragu recipe caught my eye because it not only looked succulent and juicy and perfect for a rainy day, but because it's very little effort.

Most ragu recipes call for a combination of ground pork and veal, but this one calls for chunks of stew beef. Technically a ragu is simply a meat sauce cooked with tomatoes and vegetables, and can be made with anything from sausage to lamb shanks to oxtails. I'd argue that in this case the long braise of the meat in the oven makes this especially good. And yes, this does take about 4 hours in the oven, so set it aside for a lazy Sunday or a day when you're home early from work.

But besides that long stint in the oven, there's very little else you have to besides chop up some carrots and brown the meat. Also, the recipe makes a lot, so you can eat it all week or, if you have recipe ADD like me, you can freeze half the batch for later. The rich flavor works perfectly when paired with the neutrality of pasta and tamed with a sprinkling of cheese.


Beef Ragu
This is just as tasty with lamb. Also, if you (tragically) happen to be low on wine, try combining 2/3 a cup Marsala with 1 1/3 cup low-sodium beef stock.

2 pounds stew beef, cut in chunks
Salt and freshly ground black pepper
1 onion
2 sprigs fresh rosemary
2 tablespoons fresh sage
8 cloves garlic
3-4 large carrots, peeled
Olive oil
2 cups red wine
1 28-ounce can diced tomatoes

1. Pat the beef chunks dry with a paper towel, liberally coat with salt and pepper and set aside. Peel and coarsely chop the onions, and chop the garlic. Chop the carrot into thin rounds.

2. Place an oven-proof Dutch oven or heavy stockpot over medium-high heat, and add olive oil to cover the bottom thinly. When oil is hot, add the lamb and brown deeply. Do this in batches if necessary. Don't worry about drying out the meat — you want it browned darkly for good flavor (~10 minutes).

3. When the meat is thoroughly browned, add the onions, rosemary, sage, garlic, and carrots. Reduce heat to medium-low and sauté until vegetables are softened, about 10 minutes. Add wine and continue to simmer until liquid has reduced by half, about 10 minutes. Add the tomatoes and their juices to the pot.

4. Bring to a simmer, then cover and place in a 275-degree oven for 3 to 4 hours. The longer it cooks the more tender it will be. Check the pan every hour and a bit of water if it starts to look dry. When ready to serve, go through with two forks and shred any remaining chunks of meat. Taste and season if necessary with additional salt and pepper. Serve over pasta with freshly grated Parmesan cheese.

19 May 2010

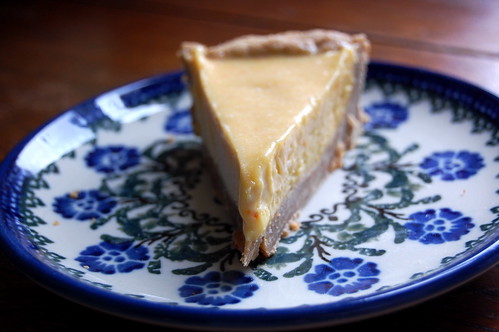
Blood Orange Creamsicle Pie


Moving in together is a funny thing. No matter how much time you've spent together before, there's always an adjustment to be made. You'll argue over whose bed stays or goes, discover his secret stash of books on game theory (I'm not kidding people). You learn things like never, never disturb Paul while he's napping. Trust me, a man awoken from a nap prematurely is not a good thing for anyone involved. I want to hide under the covers just thinking about it. But at the end of it all, if you're lucky, you'll discover that you get to come home to that person everyday, and that in itself is pretty awesome.

With Paul, I discovered that all of a sudden there is this person here who wants to cook with me, and whom I can cook for. Cooking for two is way more fun than cooking for one, and Paul is always asking questions like, "why is this considered a ragu," and "what's the difference between fennel and anise." I like this because it challenges some of my assumptions about cooking.


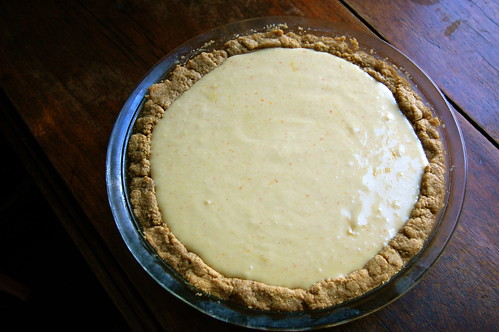
We were discussing key lime pie, and how you could make it with any citrus, say lemon or blood orange or yuzu. I like doing this a lot, taking a base recipe and changing the flavoring ingredients. So I decided to try the blood orange version, only using a classic French technique, and made a lose custard that could be turned into a frozen pie. And it's delicious, it cool and creamy and a little bit tangy. It's almost as good as a nap, just don't disturb me while I'm eating it.


Blood Orange Creamsicle Pie

1 graham cracker crust, baked
1 cup sugar
finely grated zest of 2 blood oranges
4 large eggs
3/4 cup freshly squeezed blood orange juice
1 1/2 sticks (12 tablespoons) unsalted butter, at room temperature and cut into tablespoon-sized pieces

1. Put the sugar and zest in a large metal bowl that can be fitted into the pan of simmering water. Off heat, work the sugar and zest together between your fingers until the sugar is moist, grainy and very aromatic. Whisk in the eggs followed by the juice.
2. Set a pan of water to boil. Fit the bowl into the pan (make certain the water doesn’t touch the bottom of the bowl) and cook, stirring with the whisk as soon as the mixture feels tepid to the touch. (if you're using a thermometer 180°F). As you whisk the cream over heat—and you must whisk constantly to keep the eggs from scrambling—you’ll see that the cream will start out light and foamy, then the bubbles will get bigger, and then it will start to thicken and the whisk will leave tracks. Heads up at this point—the tracks mean the cream is almost ready. Don’t stop whisking and don’t stop checking the temperature. And have patience—depending on how much heat you’re giving the cream, getting to temp can take as long as 10 minutes.
3. As soon as you reach 180°F, pull the cream from the heat and transfer it into the container of a blender (or food processor); discard the zest. Let the cream rest at room temperature, stirring occasionally, for about 10 minutes.
4. Turn the blender to high and, with the machine going, add about 5 pieces of butter at a time. Scrape down the sides of the container as needed while you’re incorporating the butter. Once the butter is in, keep the machine going—to get the perfect light, airy texture you must continue to beat the cream for another 3 minutes. If your machine protests and gets a bit too hot, work in 1-minute intervals, giving the machine a little rest between beats.
5. Transfer the orange cream to the refrigerator and let cool completely. It should set up considerably in the fridge. Pour until the crust and place in the freezer for several hours, until frozen.
6. To serve, remove the pie from the freezer about 15 minutes before you want to serve it (depending on the outdoor temperature, more or less time may be needed). Serve in wedges, store in the freezer.

12 May 2010

Artichokes with Saffron, Orange, Olives, and Almonds


Orange salads are something unique to Moroccan cuisine, and though it may sound odd to Western ears, the sweet juicy, slightly chewy segments of orange make for a great basis for a salad. They are commonly paired with a sprinkling of hot pepper and salty chopped olives, but you'll also find orange, radish, and cinnamon salad, or oranges with dates and slivered almonds, the varieties go on and on. (For recipes, check out Paula Wolfert's "Couscous and Other Good Food from Morocco.")

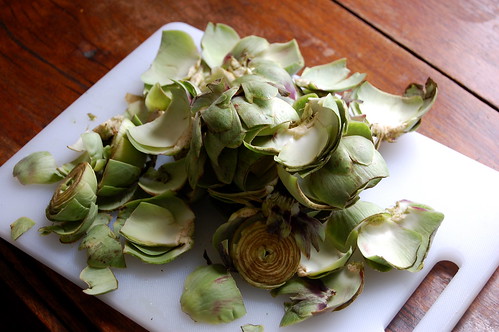
This recipe for baby artichokes braised with saffron, oranges, olives, and almonds is one I cobbled together from many sources. It would be at home almost anywhere in the Mediterranean, from Sicily to Cyprus, where all these ingredients are native. I have to say, I hate prepping artichokes, so it has to be a pretty good recipe for me to even go to the trouble. But the nice thing about baby artichokes (besides the fact that they're so cute. Really, just look at those little things). The best part is that baby artichokes really cook all the way through, so you have less concern about tough chewy leaves or spiky centers.

Other than the time it takes to prep the artichokes and the oranges, the recipe is a snap. You do a quick braise of the artichokes with a bit or orange juice, water, and saffron, and when they are tender you sprinkle over them orange segments, olives, almonds, and mint. It's beautiful to serve and full of contrasting sweet/salty/soft/crunchy notes.

Artichokes with Saffron, Orange, Olives, and Almonds

1 lb baby artichokes
a splash of lemon or vinegar
1 large orange or 2 small (I used Mineola)
a pinch of saffron
2 tablespoons chopped black olives
2 tablespoons slivered almonds
a few leaves of mint, slivered

1. Prepare a large bowl of water with a splash of lemon or vinegar. Prep the artichokes (see tutorial here). First slice off about an inch of the top. Then, remove the tough outer leaves. Finally, trim the bottoms and slice the hearts in half. Place prepped artichokes in acidulated water to prevent discoloring.
2. Section the orange by removing the outer pith and then slicing between the membranes to remove the sections (see tutorial here). Squeeze the remaining membrane part over a bowl to extract the juice and set aside the sections.
3. Add the saffron and about 1/2 cup of warm water to the bowl with the orange juice.
4. Heat some olive oil in a pan, drain the artichokes, and saute them briefly over medium heat. After a minute or so, add in the saffron water. Make sure the liquid cover the artichokes halfway up their sides. Cover the pan and let simmer for 15 minutes, or until tender when pierced with a knife.
5. Uncover the pan and let simmer until the sauce reduces to just a glaze. Remove from heat.
6. Meanwhile toast the almonds.
7. Sprinkle orange segments, chopped olives, almonds, and mint over artichokes. Serve slightly warm or at room temperature.

08 May 2010

Watercress Soup


My mother always waxed rhapsodic about watercress, she'd tell tales of how she and my grandmother would gather watercress in the creeks around their home, of the peppery flavor added to tea sandwiches and salads. Now, my grandmother was a tenacious woman, not afraid to get her hands dirty, but somehow I have a hard time picturing my grandmother's Chanel lapel pins tromping around in a stream.

Nonetheless, I always pick up some watercress when it's in season as if compelled by my mother's tales, but I have often found the leaves were thick and tough, or far too peppery to eat as part of a salad. But this year I spied in my grocery a delicate plant of tiny green leaves, with its root ball preserved in a small container of water. Watercress is a fascinating organism- it thrives on the edge of streams, where it has to have constantly flowing water to protect it from parasite and snails. Watercress can quickly become wilted and bitter once removed from fresh water, which explains those many unappetizing specimens I'd had in the past.

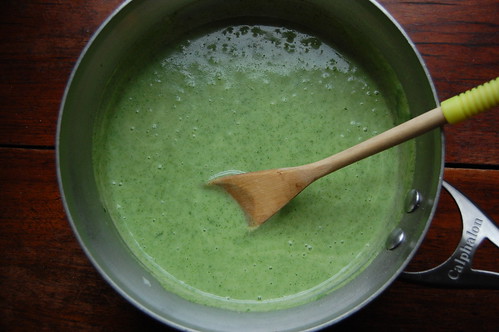
After a few pleasing crunchy salads, I turned the rest of the watercress into a pleasingly simple soup, one thickened with potato and a splash of cream, and bright green like a Shrek cartoon. It's simple in the way many good things are, you could serve it cold like a vichysoisse, or I like it warm with a nice hunk of toast.

Watercress Soup

olive oil, salt
1 large bunch watercress, leaves only, discard the stems
1 medium sweet yellow onion, peeled and diced
1 medium russet potato, peeled and roughly chopped
water or vegetable stock, about 4 cups
splash of heavy cream, optional

1. In a large saucepan, heat the olive oil over medium high-heat. Cook the onions, stirring until browned and caramelized, at least 15 minutes.
2. Pour in the water or stock, add the potatoes, season with salt, and bring to a boil. Let simmer until the potatoes are tender when pierced with a fork. If the water level gets low, add some more. When the potatoes are tender, toss in the watercress leaves and stir until wilted and bright green, a few minutes.
3. Remove the pot from the heat and allow to cool slightly. Place in a blender (or using an immersion blender), blend until very smooth. Add the cream if desired, and taste for seasoning. Reheat before serving.

28 April 2010

Shrimp with Mushrooms and Chiles


I may be having a bit of trouble adjusting back from our vacation- you mean I have to work and commute and run and blog again? I can't while away my time in an outdoor cafe? Blasphemy! It doesn't help that Paul and I moved in together, and all our possessions have been in boxes for weeks as we sort out what to do with 2 couches, 2 dining tables, and 2 of every blender, mandoline, and zester ever made. One of us may be a pack rat, I'm not saying who.

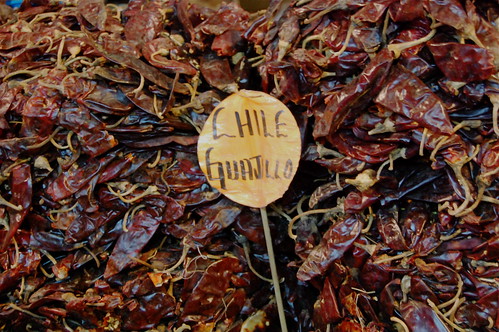
But don't worry, I wouldn't miss out on a chance to tell you about our excellent trip to Oaxaca, where we went to cooking school and learned about chiles and ate in the markets and in superb restaurants. Paul is already scheming to go back to some of the restaurants, and I'm busy trying to apply all the things I learned in our home kitchen.

We chose to go to Oaxaca, the southernmost state in Mexico, because it's known for its unique regional cuisine, much of which carries on ancient native traditions. Oaxaca is famous for its moles, the complex sauces which come in black, red, green, yellow and many other varieties. The famous mole negro is made from chiles, almonds, sesame, raisins, garlic, onion, spices, and chocolate. We loved the food culture in Oaxaca, the freshly ground chocolate factories, the central market with at least 100 varieties of chile, the ice cream and the fried grasshoppers. But we also loved Oaxaca because it's just a pleasant little town, with a big central square, and a handful of nice museums and shops, a town that's walkable and safe even late at night.

We took cooking lesons with the wonderfu Jose Louis at el Teatro Culinario, where they teach both classic and contemporary Oaxacan cuisine. I really enjoyed the contemporary class, where we learned to use traditional ingredients like chiles, avocado leaves, yerba santa, epazote and quesillo Oaxaca in contemporary dishes which I could easily stir up at home. The Teatro Culinario is also a spectacular restaurant, which serves 6 or 8 course meals of delicately presented contemporary Mexican food like nopales salad with fig paste, hibiscus sauce, requeson and squash blossom quenelle and balsamic reduction.

We're still lusting after the lamb chops in red sauce we had at Casa Oaxaca, and the cajeta ice cream, and most of all, the ability to forget about email and cell phones and while away our afternoons in a shady sidewalk cafe.

Shrimp with Mushrooms and Chiles

1 lb shrimp, peeled and deveined
1 lb mixed mushrooms, cleaned, trimmed, and sliced
1/4 cup diced onion
1 clove garlic, minced
1 each pulla, guajilla, and pasilla chiles
1 tablespoon each diced epazote, yerba santa, and cilantro
about a cup of water
salt, pepper, olive oil

1. Preheat the oven to 425 F. Using scissors, slice the dried chiles very thinly into a bowl. Let the chile seeds fall into the bowl as well, set aside.
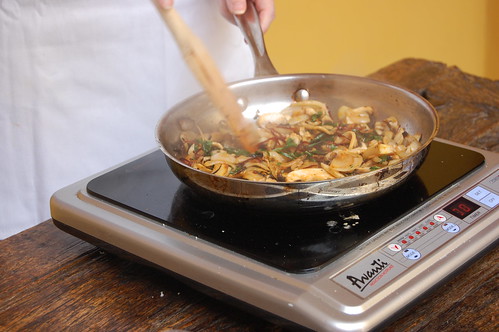
2. Heat some olive oil in a saute pan. Add the onion and garlic and saute until tender and translucent. Add the mushrooms, saute them for a minute, the add the chiles, chile seeds, herbs, and season with salt and pepper. Let this cook, stirring for about ten minutes, until the mushrooms are soft and reduced.
3. Meanwhile heat some olive oil in another saute pan (make sure it is oven-proof). Add the shrimp and saute over high heat until pink on the outside, but not fully curled up or done. Add enough water to fill the base of the pan, sprinkle with salt, place a lid on the pan and place in the oven to steam. Bake for about 5 minutes, or until the shrimp are very plump and cooked through, but not overdone.
4. Spoon mushrooms on a plate, spoon shrimp over. Serve over pasta or as desired.

05 April 2010

Chile Rellenos Strata


I like spicy as much as the next person, a fiery Thai curry or a smoky warm chili, but I have to admit, I'm intimidated by cooking with chiles. The unpredicatability of the heat, the need to wear gloves, those stray little seeds, I'll pass thanks. I know my intimidation comes from lack of knowledge, and that I need to learn more in order to get comfortable cooking with chiles. Also, to remember not to touch my eye after chopping poblanos, because that was pretty painful.


So, while I'm on vacation (yes, in Mexico, learning about chiles), I'll bring you this item from my archives, a chile rellenos strata. This is a cross between an Italian savory bread-pudding dish of strata, infused with the classic flavors of chile rellenos: poblano chiles, cheese, and salsa verde. It's a perfect breakfast dish since it can be made ahead and refrigerated overnight, and would also be a great side dish to bring to a potluck or barbeque. Do you cook with chiles? What are the varieties you enjoy? Do you live in the northeast U.S. and have trouble even finding interesting chile varieties in the store? Let me know in the comments.


Chile Rellenos Strata
Adapted from chow.com. If you have the extra time, make a fresh tomatillo salsa to go into the dish and then serve the remainder alongside.

4 poblano chiles (I couldn't find any, so I substituted jalepenos)
8 cups stale bread, cubed
1/4 cup minced red onion
1 cup low-fat sour cream or plain yogurt
1 cup grated white cheese like Monterey Jack
optional: an additional 1/2 cup crumbled queso fresco
1/2 cup salsa verde
1/4 cup minced cilantro
6 eggs
2 cups milk (whole or 2%)
1 tablespoon salt

1. Over the flame of a gas stove, or under the broiler, toast the chiles using tongs until blackened on all sides. Place in a bowl and cover with plastic wrap and allow to steam for 10 minutes. When the chiles are cool enough to handle, remove to skins, remove to seeds and interior veins, then dice them.
2. Preheat oven to 350 F. Place the bread, chiles, red onion, cilantro, and salsa verde in a bowl and toss to combine. Add the yogurt/sour cream and cheese and toss around until coated.
3. Spread the bread in a greased baking dish (9x13 or a round souffle dish). Whisk together the eggs, milk, and salt and pour over the bread mixture. If you want you can refrigerate this mixture overnight, let come to room temperature before baking.
4. Bake for 50-55 minutes, until puffed an golden brown and just barely set in the center. Serve warm, with sour cream and salsa.