Showing posts with label Fruit. Show all posts

23 June 2011

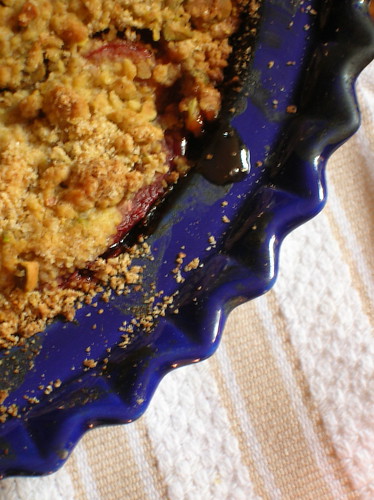
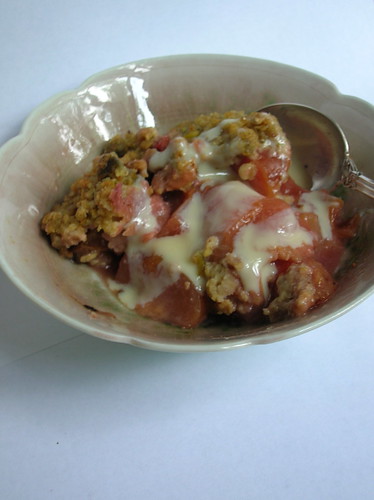
White Peach Crisp with Cardamom and Orange Blossom Water

DSC_0134

We welcomed summer with a picnic in the park marked with cheap Prosecco and homemade sourdough and stinky cheese, cute babies on blankets, a game of wiffle ball, and everyone dashing home just before the thunderclouds broke. My cooking recently has been much the same - impromptu, simple, easy. Sliced summer tomatoes. A bowl of peaches. Summer squash tossed in a crust with eggs, cream, cheese, and breadcrumbs. Nothing measured. Crusts made by the feel of the dough, the crumbliness of butter. Ratatouille made with the end of the week's vegetables.

DSC_0123

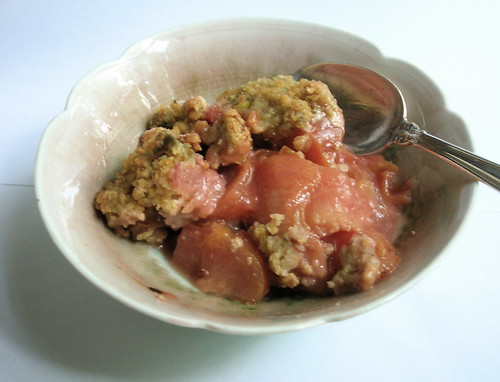
It makes for good eating but it certainly doesn't make for good blogging. There was one thing though - a white peach crisp. I have a thing for white peaches. They are delicate and floral, and they blush pink. They are almost too precious, but when baked they develop a bit of uumph, topped with a crumbly crust of brown sugar and accented with cardamom and orange blossom water. Those last two ingredients add an extra touch to this dish, but it would be perfectly delicious without them.

peaches


White Peach Crisp with Cardamom and Orange Blossom Water

Ripe peaches are sweet enough that I don't think they need extra sugar. You can peel the peaches with a knife or blanch them to remove the skin.

12 white peaches
3 tablespoons flour
1 tablespoon orange blossom water
1/8 teaspoon cardamom

1 cup brown sugar
1/2 cup flour
1/2 cup oats
1 pinch salt
8 tablespoons (1 stick) butter

1. Preheat oven to 415 F. Combine the crisp topping dry ingredients. Cut in the cold butter with a pastry blender until small crumbs form. Refrigerate crumble topping.
2. Peel and slice peaches into a bowl. Add the 3 tablespoons flour, cardamom, and orange blossom water. Toss together and place in a baking dish. Scatter the crumble over top. Bake 20 minutes, turn the temperature down to 375F and bake another 15-20 minutes, until peaches are soft and topping crisp.

16 July 2010

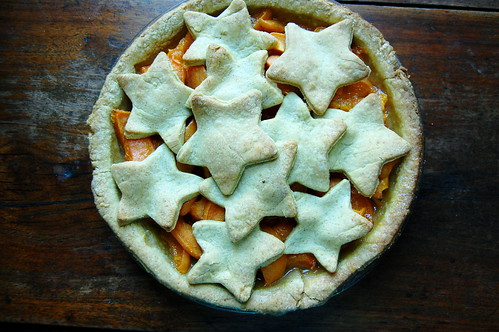
Apricot Pie with Pistachio Crust


I was trying to think of a kind of pie I hadn't tried before (you know besides mango, butterscotch, pecan, chamomile, blueberry crumble, and chess). I'd never made an apricot pie before, and given that it is currently the 2.4 seconds that apricots are in season, it sounded pretty good. I love apricots, but it's terribly hard to find a good one around here, they're often too tart or mealy.


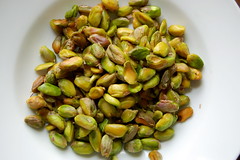
I also decided to stick with the classic pairing of apricots and pistachios by making a pistachios crust. A word of advice dear friends: if you ever see a package of blanched pistachios in the store, just buy them. I don't care where you are, heck you may even want to go ahead and order them now. Because one day, along will come an occasion when you need blanched pistachios- say to scatter over a pilaf, or to make a vibrant green tart dough (non-blanched pistachios make the dough brown), and you will be cursing yourself not only shelling the pistachios, but dunking them in boiling water and then plying off their little papery skins. Save yourself this trouble before you could ever encounter it.

But in the end the tart dough was lovely, the apricot bright and punchy, and the whole thing with a big scoop of homemade vanilla ice cream on top was messy and delicious. The fruit was a bit tarter than I would have liked, so if your fruit is on the tart side I'd recommend using the full cup of sugar.


Apricot Pie with Pistachio Crust
I didn't bother peeling the apricots, but the texture is probably better if you do. If you have proper ripe apricots the peels should just pull right off with your fingers.

5 cups apricots
3/4 - 1 cup sugar, depending on tartness of apricots
3 tablespoons cornstarch
1/8 teaspoon cardamom
1 teaspoon vanilla

12 tablespoons butter
1 1/4 cups flour
1 cup ground pistachios, made from 1 1/2 cups blanched pistachios
2 tablespoons sugar
3-4 tablespoons ice water

1. Make the dough: Place the whole blanched pistachios in a food processor and pulse until finely ground. Do not grind them to a paste. Add the flour, pieces of butter, and sugar, and pulse in the food processor until the mixture is crumbly. Add the cold water with the processor running, 1 tablespoon at a time, until the dough comes together. Gather up dough, pat into 2 disks and refrigerate until ready to use.

2. Roll out the two dough disks on a lightly floured surface. Fit one disk into the pie pan, reserve the second dough disk, wrap them in plastic and place them in the fridge to chill.

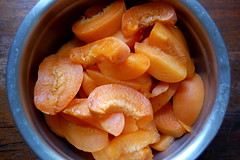
3. Preheat oven to 350 F. Meanwhile, pull apart the apricots, discard the pits, and slice the fruit. Combine in a bowl with the sugar, vanilla, and cardamom, and let macerate for about 15-20 minutes.

4. Scrape the fruit into the prepared pie dough, leaving behind any juices that accumulate. Cut out shapes or latticework out of the remaining pie dough and arrange over top. Sprinkle top with a bit of sugar if desired.

5. Bake for 50-60 minutes, until crust is lightly browned and filling is soft and bubbly. Let cool slightly before serving.

06 March 2009

Apricot "Sunny-Side Up" Pastries

I guess I thought this would be easier. The surgery is one thing - long, scary, difficult, but in the end it ends. And mom gets moved out of intensive care and the scar heals and I think my life can resemble normalcy again. Only it can't. This long haul part- the weeks of chemo, the 24 hour nursing, the constant complications and medications, I don't know how to do this. I don't know how to support my mom, work at my job, maintain my household and some semblance of my own life, while constantly commuting between two cities. If I'm not with my mom consistently, I'm out of the loop, I hear about doctors visits only after they happen and crises only after they're fixed. But I can't just abandon my job and my friends because I'm afraid when I need them they might not be there.

So I'm not good at this. I'm trying but I'll be the first to admit I haven't quite found a balance that's working. And in the meantime, the little things I am good at - my job (hopefully), feeding people, knowing about obscure spices, those little things help remind me that I'm competent at something.

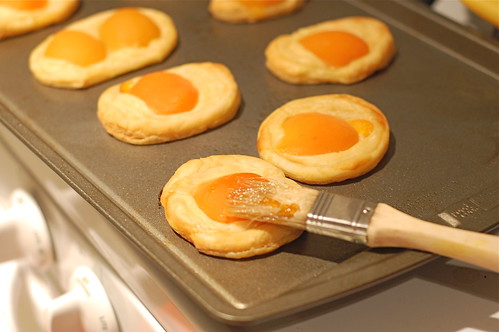
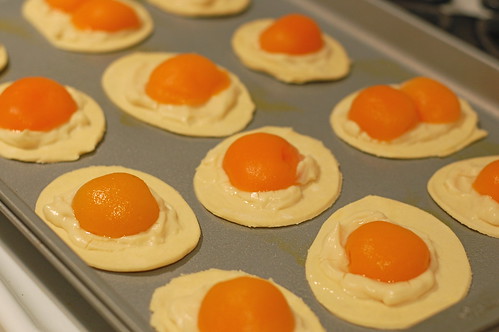
I made this recipe for my office the other day, after a rare weekend when I had time to bake. They're very simple little pastries with apricots placed over puff pastry so that they end up looking like sunny-side eggs. They're very easy and I think quite cute. When so many things in your life are disappointing, there is something so satisfying about watching people enjoy something you made, and even ask you for the recipe. So here you go:

Apricot "Sunny-Side Up" Pastries
Extrapolated from something I saw Julia Childs make once.

1 box puff pastry, thawed
1 recipe vanilla pastry cream, recipe follows, (or substitute prepared/purchased vanilla pudding)
2 cans apricot halves or 16 poached halved fresh apricots
1/4 cup apricot jelly

1. Preheat oven to 400 F. Use an overturned glass or circle cutter to cut the pastry into rounds. Use a rolling pin press down on the center of each circle so that it is more of an oval shape (the edges will be thicker than the center of the pastry, this will enable the pastry to puff up around the apricots.

2. Place rounds on a greased or lined baking sheet and top with a dollop of pastry cream/pudding, spreading the cream slightly into a circle. Top each round with one apricot, cut side down, or two apricots for bigger "double-yolk" pastries. (at this point assembled pastries can be refrigerated, covered, overnight). Bake 25-35 minutes, or until puffed and golden and brown on the bottom.

3. Warm the apricot jelly in the microwave/small saucepan until warm and liquid. Use a pastry brush to brush the top of the apricots with jelly so that they remain moist and shiny. Serve warm or at room temperature.

Pastry Cream:
2 cups milk
1/2 cup sugar
2 tablespoons unsalted butter
Pinch salt
1/2 vanilla bean or 1 teaspoon pure vanilla extract
3 tablespoons cornstarch
2 eggs, beaten to combine

1. Bring the milk, 1/4 cup of the sugar, butter, salt and vanilla bean to a gentle boil in a medium saucepan. Remove from heat.
2. Whisk together the cornstarch and the remaining 1/4 cup of sugar. Add the eggs to the cornstarch and mix into a smooth paste.
3. Slowly, and in small amounts, whisk a little of the hot milk into a the egg mixture. (this is called tempering the eggs, which you need to do to get them to the same temperature of the hot milk in the pan, so they won’t curdle.) Once the egg mixture is warm to the touch, pour it back into the milk in the pan.
4. Return the custard to the stove and bring to a boil, whisking continuously for 2 to 3 minutes, so that the custard is thick and does not taste grainy. Optional: press pastry cream through a sieve for ultimate smoothness.
5. Refrigerate with plastic wrap pressed directly on the surface until ready to use.

10 February 2008

An Apple By Any Other Name

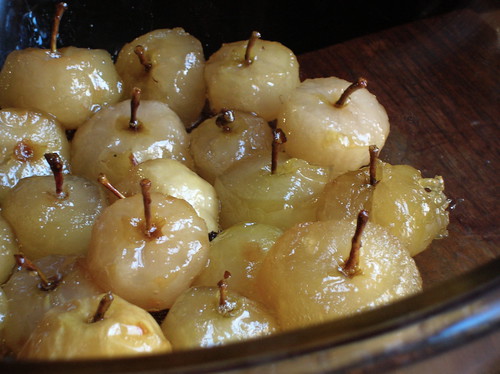
This recipe has been knocking around in my files for about thirty-eight days, waiting for me to tell you about it. It has not been forgotten because it's not delicious (it is) or difficult (it isn't), and it's not that I don't have anything to say about it, I do. Problem is I don't know what to call this recipe. Candied baby apples? Glazed apples? Glaceed apples? None of those quite work. Lady Apples in Syrup, maybe...

Instead, let's talk about these lovely sweets. There is a tradition in the Middle East, and in fact across the Mediterranean, of preserving tiny fruits in syrup. It is quite similar to jam, but the fruits are usually kept whole and cooked in a syrup, in Greece this is called "spoon sweets." Unlike jam, where less-than perfect fruits are cooked down, the tiniest prettiest fruits are chosen for cooking in syrup, thereby preserving their beauty. They are often offered to guests, on a small plate topped with a bit of yogurt or thick cream. Standard are tiny lady apples, little pears no bigger than your thumb, teensy apricots, and figs. Dates, watermelon rinds, nuts and kumquats are other options. I've written before about the beautifully spiraled rolls of Seville orange and grapefruit peels which are cooked in the same process. And most fascinating, this technique isn't just limited to fruits, but used for vegetables too: chunks of pumpkin, tomatoes, and even the elegant baby eggplants are candied in syrup (there's a recipe in Aromas of Aleppo if you're interested).


At fancy sweet shops you might see these preserved whole fruits drained and individually wrapped in plastic, but the more home-style version is to leave the fruits in the syrup and can them or keep them in jars. Here I've used tiny lady apples that are in season now. I read recently that you should peel the apples, something I'd never bothered with before, so I tried peeling half of them, and I can tell you there's barely a difference and it is certainly not worth the effort. It is, however, essential that your core the fruits, or you'll get a mouthful of seeds, a tiny melon baller is the best tool for this.

So there you have it. Now that you know all about these sweets in syrup, you can decide what to call them yourself. I suppose a name isn't that important as long as they're as tasty as these are.


Lady Apples in Syrup
Though you want small apples for these sweets, keep in mind you have to core them, so you don't want teeny-tiny apples or you won't have any flesh left. The apples can be served as dessert on their own and also make great gifts in jars.

2 lbs lady apples
4 cups sugar
4 cups water
2 tablespoons orange blossom water or lemon juice

1. Working from the bottom of the apples, cut a cone out of the bottom, then use a small melon baller to scoop out the seeds from the center. Leave the stem attached on the top.
2. Place sugar, water, and orange blossom water in a wide deep pot. Bring to a boil, stirring so the sugar dissolves. Let boil gently for about five minutes so that the syrup is thick and viscous. Add the apples, stirring to combine. Lower the ehat and let the apples simmer gently in the syrup for 35-45 minutes. The apples should become translucent and soft but should not fall apart. The syrup will reduce somewhat but should not darken in color.
3. Remove apples with a slotted spoon to jars. Pour syrup over top. (If the syrup seems thin, you can continue to boil it until it thickens up a bit, but this shouldn't be necessary). Store in the refrigerator. Serve at room temp, with yogurt or clotted cream.

09 October 2007

Overnight Apple Cake

Just sleep on it. It's advice often given when contemplating a decision, as if through the transformative process of the night, the issue will emerge clarified. As a kid when my friends and I had sleepovers, we'd often try and stay up all night in an act of youthful defiance: we never quite succeeded, succumbing if not to sleep then to bleary-eyed silence. I have long believed that there is a moment in each night, somewhere between the late-night revelers and early risers, where everything is still. One moment where everything rests, pauses, comes into alignment, before proceeding again on its way. By its very nature, this is the one moment where your eyelids will flutter and you will drift off for a second, but if you concentrate hard and listen very carefully, you'll catch it.


If you've ever baked you know that yeast doughs are often left overnight, and that extra rest can give the dough or sponge magical lifting power. That idea of overnight magic is what attracted me to a little recipe for an apple cake: sliced apples are layered with some sugar and baked slowly overnight. In all honesty, I was sure it wouldn't work, the photo in the book was so beautiful it couldn't have resulted from a process so simple. However, my mom's neighbor offered to share the bounty of her apple tree, and with a surfeit of apples, it was little cost or labor to give the recipe a try. Last weekend I took the puppy and a basket and (feeling rather farmer-ish) headed down to pick some apples.


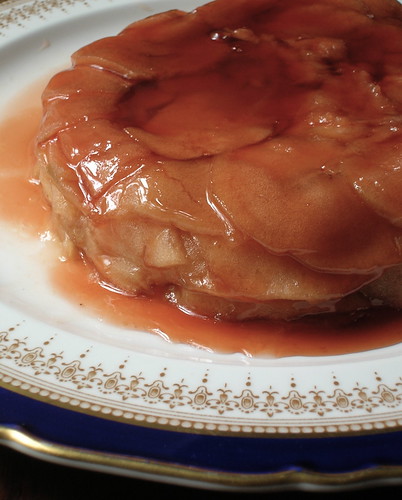
Pat had told us the apples were quite tart, and indeed they were inedibly astringent, only for use in cooking. I increased the amount of sugar in the recipe accordingly and slipped the apples into that oven that evening. By the time I had gone to bed the kitchen was wafting wonderful smells. The next morning when I opened the oven it was like I had stuck my nose in a dozen apple pies, an intoxicating complex scent. Drizzling the reduced juices over the cake, I was pleased to see it really was looking like the photo. But the real surprise was the taste: as outstanding as the lovely layered appearance. My mom, who has waxed rhapsodic about tarte tatin, called it "the best apple dessert I've ever had," and that's saying a lot. I'm inclined to agree. Because this is ready in the morning, it could be nice for breakfast with some sweetened yogurt, but if you can wait it's truly outstanding with vanilla ice cream. All it takes is a little overnight magic.


Overnight Apple Cake

4 pounds tart cooking apples, like Granny Smith
1 orange
3/4 to 1 cup sugar, depending on your apples
2 tbl butter

1. Preheat the oven to 175 F. Choose a 6-cup souffle dish, generously grease it with one tablespoon of butter. Cut a round of parchment to fit inside the dish, generously grease it on one side with the remaining tablespoon butter.
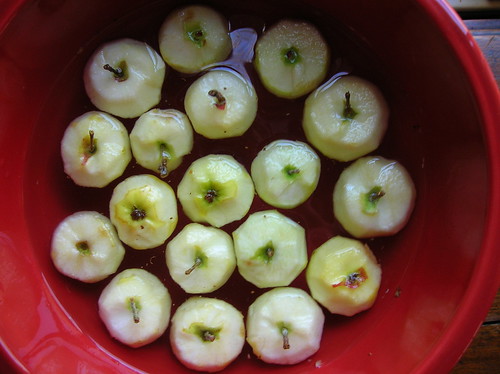
2. Place the sugar in a bowl. Zest about 1 tablespoon of the orange zest into the sugar bowl, rub the zest into the sugar with your fingertips. Halve the orange and squeeze its juice into another bowl. Peel the apples, core them, and thinly slice them into rings (if you don't want to bother coring, simply halve them and thinly slice). Add the apple slices to the bowl with the orange juice as you work to prevent discoloring, tossing them to coat.
2. Layer the apple slices, overlapping them, in the prepared dish, sprinkling each layer with a little of the sugar. Place the parchment round, buttered-side down, over the apples. Place in the oven for 12 hours.
3. Remove the apple dish from the oven, there should be a good amount of bubbling juice. Pressing down on the parchment with an oven mitt, pour off the juice into a sauce pan. Bring the juice to a simmer and boil until brightly colored and thickened. Meanwhile, invert the apple cake onto a serving plate. Drizzle with the juices.

I should note dear Molly had some trouble with the original recipe. I believe because she used less sugar, not only was the cake too tart, but the apples didn't render enough juices. The pectin in the reduced juices holds the cake together and gives the pretty shiny top.
___________________

25 September 2007

Postcard from Lunch


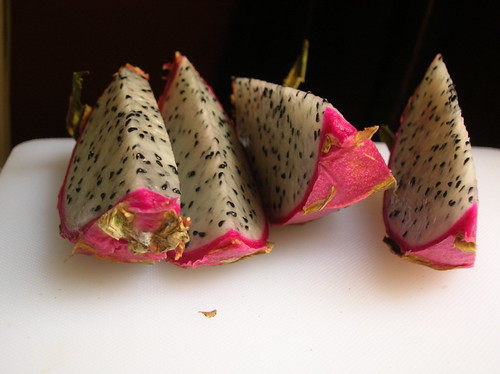
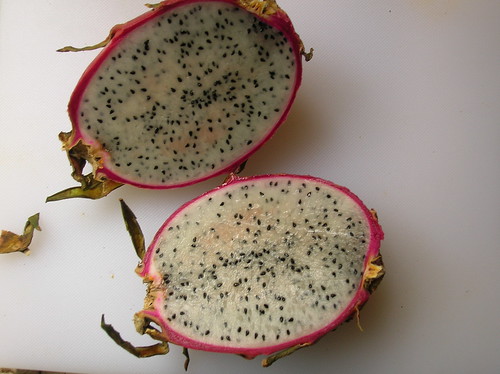
Dragon fruit (pitaya). So pretty, I just had to share it. I also had some grapes, blue cheese, and crackers. Highlight of an otherwise banal Tuesday.
dragon fruit + grapesafter lunch

11 September 2007

Green Gage Plum and Pistachio Crumble


Sometimes recipes just fall in your lap. On an August afternoon I made my way over to the market, where late summer plums were in their full regalia. I was drawn to the unusual green plums, called green gages, and though I pondered them curiously, I'd never had a green plum and was unsure if I would enjoy them. That very same evening, I read Luisa's post which raved about a wonderful plum crumble she'd made and, already cursing myself for leaving the market empty handed, I asked if she thought the recipe would work with green gages.


Luisa responded so enthusiastically that I scampered back to the market as soon as I could to get myself those special plums. Quite frankly, I've always been rather blase about plums; but oh how wrong I was. Just one green gage was enough to convince me otherwise. Plums are the last fruits of the summer season, and they hold all the juiciness of those summer stone fruits, but also with a depth and warmth that only the early tinge of cooler evenings can bring. Of all plums, I prefer the smaller European varities like prune-plums and damsons, and among them green gages are prized for their flavor.

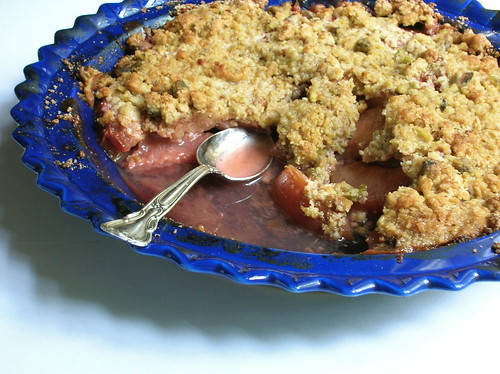
Since I'd been contemplating green fruits, I had the idea to add green pistachios to the crumble topping (also because I accidentally bought too many at the shop last week, who knew one pound was so many?!). I had forgotten that the green gage plums turn a beautiful pink-orange color when cooked, so instead of the monochromatic dish I had pictured, I ended up with something more reminiscent of when you first pick your own outfit for kindergarten. A riot of pink and green, the crisp was just as flavorful and delicious as it was colorful. Adding pistachios gives this a special flavor and makes it quite unlike any crisp or crumble I've had before. Plum season is just getting into full swing, so you've got plenty of time to seek out those wonderful green gage plums and make yourself a crumble.


Green Gage Plum and Pistachio Crumble
Green gage plums are the princes of late summer fruit, full of juicy flavor, they turn deep pink/orange when cooked. The pistachios in the topping give this a special touch. Inspired by Luisa and Marion Burros.

12-15 green gage plums, prune plums, or green pluots
3 tbl brown sugar
3 tbl flour
1/2 tsp each cinnamon and ginger
1 tbl fresh lemon zest
for the topping:
3/4 cup flour
1/4 cup finely chopped (or roughly ground) pistachios
3/4 cup sugar
1 tsp baking powder
1 egg, beaten
4 tablespoons butter, cold

1. Preheat the oven to 375 F. Halve the plums, pit them, and slice into thick wedges. Toss the plums with the remaining filling ingredients in a bowl and set aside.
2. For the topping, combine the dry ingredients in a bowl. Agg the egg and stir with a fork to make a crumbly mixture.
3. Place the prunes in a deep 9" pie pan or small casserole. Sprinkle the crumble mixture over the top. Very thinly slice the butter into slivers and lay it over the surface of the crumble (yes, I know it's a bit tedious). Use as much butter as necessary to make sure the whole surface of the crumble is thinly covered with butter. Place in the oven and bake 35-45 minutes, until the top is browned and the filling is bubbly.

08 September 2007

Summer, Preserved

summer, preserved
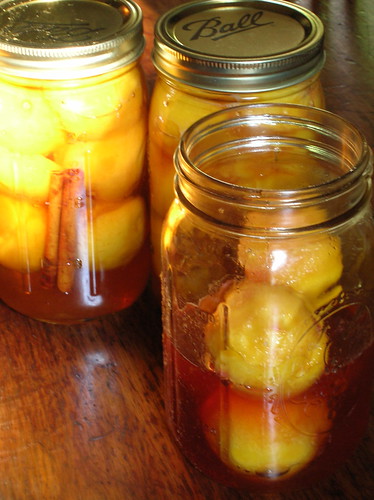
Bourbon-Preserved Peaches

Somewhere at the height of summer, as we feasted ourselves on another dinner of corn, butter beans, and tomatoes, it was pointed out that we could preserve some of these seasonal delights for enjoyment later in the year. I read recently that because of our local drought, the corn season may end much earlier than usual, and just the thought of any summer bounty being cut short had led me straight to the market to stock up while the getting was still good. We could, it was noted, par-boil the corn and freeze it, or make tomato sauce for the coming dark months of winter. However when it comes to produce, I have the equivalent of in-season ADD. I like to enjoy fruits and vegetables in their immediacy, and after all, there will be winter squash and chestnuts, and come January persimmons will beckon from street-side stands.


However, there was one preserve I could wrap my head around, and that was the idea of preserved peaches, preferably spiked with a nice dose of bourbon. These are my version of that classic Southern concoction known as pickled peaches. If you are skeptical of the idea of a sweet pickle, allow me to explain- in the South, "pickled" is often used to refer to any preserved item, both sweet and savory. Therefore, pickled peaches and pickled watermelon rind are sweet syruppy preserves, though hinted with a touch of tangy-ness. Jars of these peaches are made every summer, then packed away until the winter holidays, when they are pulled out to be served alongside the Thanksgiving turkey and the holiday roast. The peaches' thick sweet syrup is flavored with just enough tangy vinegar to be served alongside an entree, although I think the sweet-sour mix is truly heavenly when paired with vanilla ice cream.


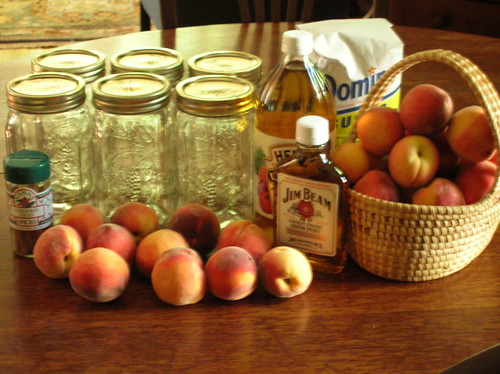
Although I'm not one for preserving, I do know how to can things, and I was enamoured with the idea of making bourbon-preserved peaches, so I headed to the market. For these peaches, you want small under-ripe fruit (small so that they fit whole into the jar, under-ripe so that they don't get too soft). I asked the farmer about smaller peaches, and he let me climb up into the back of his truck and pick out some smaller peaches, and because they were under-ripe he gave them to me for a steal, only $6 for the whole bunch. There's no getting around the fact that these are a bit labor intensive- you've got to poach and peel the peaches, then make the syrup; however, I don't think this is an unpleasant way to spend an afternoon, and after only two hours of labor I had nearly four gorgeous quarts of peaches. The canning process in itself is very short and simple, although if you choose not to can them they still last for four weeks in the fridge.

I add the bourbon in two different places- in the first part the alcohol is cooked off, but a little bit is added at the end of the syrup-making to give the peaches a bit of piquancy. I should say that if bourbon is not to your taste, you can omit it or use another alcohol like brandy or amaretto. The peaches will soften and intensify as they sit, but I will say that we consumed one jar immediately, and they were the most divine version of summer peaches I've ever had, the syrup bathing a creamy homemade brown-sugar-sour-cream sherbert. And although I canned them with the intent of saving them for the doldrums of winter, somehow letting the peaches sit that long just seems too much to bear. It's only the first week of September, but I'm already opening the second jar of peaches and reaching for the ice cream. I may regret it come winter, but by then there will be other produce to enjoy.


Bourbon-Preserved Peaches
These sweet-tart fruits are a spiked cousin of Southern pickled peaches. They are traditionally served alongside roast meats, but their slightly sour note and thick syrup means they are heavenly with vanilla ice cream. The same preparation can be applied using apricots and brandy, and Amaretto also works nicely. If you abstain from alcohol, omit it and increase the vinegar to 2 cups.

6 lbs small, firm peaches
2 lbs (4 cups) sugar
1 1/2 cups cider vinegar
1 cup bourbon, divided use
4 cinnamon sticks
1 pinch cloves
1 tablespoon chopped crystallized ginger
4 wide-mouth quart canning jars

1. Before you begin, assess the size of your peaches to see how many you'll want to cut in half to fit snuggly into the jars. Set a very large pot of water to boil. Sanitize the jars by immersing them and their lids in the boiling water for a minute, remove with tongs and set aside. Leave the water boiling, and prepare a bowl full of ice water.
2. Blanch the peaches. Submerge a few peaches in the boiling water, let boil for 1-2 minutes, then immediately transfer the peaches to the ice water. Let the peaches sit in the ice water for a minute, then remove and immediately peel the skin from the peaches and place in a clean bowl. Repeat until all the peaches are peeled. Working over the bowl to catch any juices, halve and pit as many peaches as necessary (I usually halve about half the peaches).
3. Drain the pot, rinse it, and return it to the stove. Combine sugar, vinegar, 1/2 cup of bourbon, 1 cinnamon stick broken in half, the cloves and ginger. Add any juice from the bowl of peaches. Bring the mixture to a boil, stirring to dissolve the sugar. Turn the heat down and let the syrup simmer for about 15-20 minutes, until the syrup is concentrated and slightly thickened (the syrup will be slightly golden, but it should not darken in color).
4. Add about one third of the peaches to syrup, raise the heat slightly, and poach for about six minutes, turning peaches to coat. (It will seem like you don't have enough syrup, don't worry). Transfer peaches to a jar, packing the whole peaches with the peach halves as closely as possible. Continue poaching the peaches and filling the jars in two more batches. (I usually end up with three full jars plus a half jar, depending on the size of the peaches). Turn the heat off the syrup, let cool slightly, and then stir in the remaining 1/2 cup bourbon. Carefully ladle the syrup into the jars, filling to within 1/2 inch of the rim. Insert a cinnamon stick into each jar. Run a knife or small spatula on the inside of the jars to release any air bubbles, wipe the rims of the jars clean. Place the lids on the jar and screw on caps so that they are finger-tight.
5. If you are canning the jars, prepare a large bot of boiling water again. Submerge the closed cans in the boiling water for 15 minutes. Remove with tongs or rubber mitts, set aside the jars to cool to room temperature. If you don't want to process the jars, the peaches will keep for four weeks in the refrigerator.