Showing posts with label Nibbles. Show all posts

01 April 2010

Fromage Fort and a Vacation


Last week we had a party- I cooked for days ahead of time, and you know what? I didn't take a single picture. What a terrible food blogger. Some of the things were things I've shared here before, the muhammara, the black lacquer chicken, my favorite quinoa salad. But that wonderful rhubarb custard pie, the cheese salad? Undocumented, lost to the wilds of imagination.

Add to that blogging offense, and we're headed out of town for a couple weeks on vacation (woohoo!). We're planning on taking some cooking lessons on our trip, and I hope to come back with much to report. But in the meantime, I'm culling through the 3,299 photos on my laptop (and I wondered why it runs slow sometimes), trying to find those items lost in the archives. Hopefully they'll keep you entertained in my absence.

First up we have an easy appetizer and a great way to use up those random tidbits of leftover cheese. Fromage fort, or strong cheese, is simply a mixture of cheeses blended with wine, garlic, and seasonings. What's so nice about fromage fort is that it can work with almost any combination of cheeses, even strong cheeses like blue cheese or epoisses. It helps to include a soft cheese, to bind the mixture together, but really anything goes. In this particular mixture I used provolone, parmiggiano reggiano, and camembert. The mixture is quite good in it's plainest form, but you can also add in any herbs (chives are great) or spices like fennel or turmeric.

Fromage Fort
The cheese can be served as a dip, or spread on toasts and run under the broiler until bubbly and fragrant.

1/2 lb cheese in pieces
1 clove garlic
1/4 cup dry white wine
salt, pepper
chives (optional)

Pulse in a blender until smooth.

23 March 2010

Sausage and Smoked Cheddar Tartlets

I like to entertain, but when your guest list involves 6 vegetarians, 2 pescatarians, 3 avowed carnivores, 1 semi-religious Jew, 2 Seventh-Day Adventists, and a couple die-hard pork fiends, well, I think you see my challenge? I love my friends and their diversity, but I swear cooking for them can be awfully complicated. This one won't eat this, that one won't eat that. So my goal is always to have a variety of things to satisfy as many people as possible.

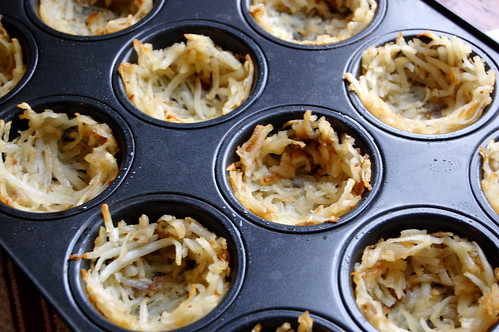
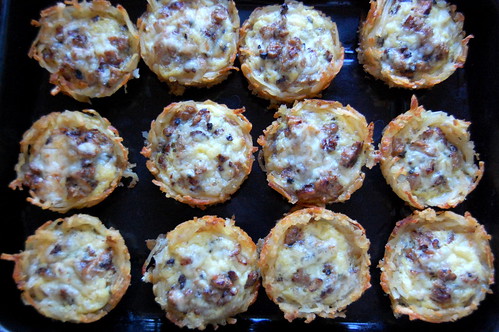
We had a party last week and I thought making sausage and smoked cheddar tartlets might fit my criteria (if you have vegetarian friends that faux sausage stuff works well here and I swear no one will notice the difference). I made a grated potato crust for half the tartlets, and the second batch I made with plain old pastry dough because those potato crusts were awfully time consuming. However, the potato ones were delicious, very much redolent of a breakfast of hash browns and sausage, only in a portable morsel. The smoked cheddar adds meatiness, and there's a bit of kick from red pepper and scallions.

Also like many things I do for parties, this dish has a make-ahead element - the crusts can be done far in advance. Even the tarts themselves can be a made a day or two ahead and reheated. I like to entertain, but I also like to make it as stress-free as possible.


Sausage and Smoked Cheddar Tartlets
Makes 2 dozen. Can also be made with a traditional pastry or phyllo crust.

8 cups grated potato
canola oil
4 eggs
1/4 cup cream or whole milk
16 oz ground sausage
8 oz smoked cheddar cheese, grated
salt and pepper
2 tablespoons diced scallions
pinch of red pepper, depending on how spicy your sausage is

1. Heat the oil in a wide pan. Add the grated potatoes (you may need to do this in batches) and saute until softened and lightly browned in spots. Continue in batches, adding more oil as necessary, until all potatoes are cooked.
2. Grease very well 2 dozen muffin tins. Press the potatoes into the tins to form crusts. Make sure there are no gaps in the crust, and err on the side of making thicker crusts. At this point, crust can be frozen up to one week before proceeding.
3. Preheat oven to 375 F. Heat more oil in a wide saute pan. Add the crumbled sausage and cook, crumbling with a spoon, until cooked through and crispy in some places, but still tender in others. Transfer sausage to a bowl and add salt and pepper to taste, let cool slightly.
4. Add the eggs, cream, scallions and pepper to the sausage. Fold in the cheddar cheese. Use a spoon to fill the potato cups with the sausage/cheese mixture.
5. Bake for 15-20 minutes, until puffed and golden. Let cool 10 minutes before very delicately attempting the remove the tartlets from the pan. Serve warm or at room temperature.

29 July 2008

Empanadas


Last time I made empanadas, nearly fifty of them,


Rolling, cutting, filling, folding. From my mothers old Argentine cookbook, half in English, half in Spanish, and torn across the cover.

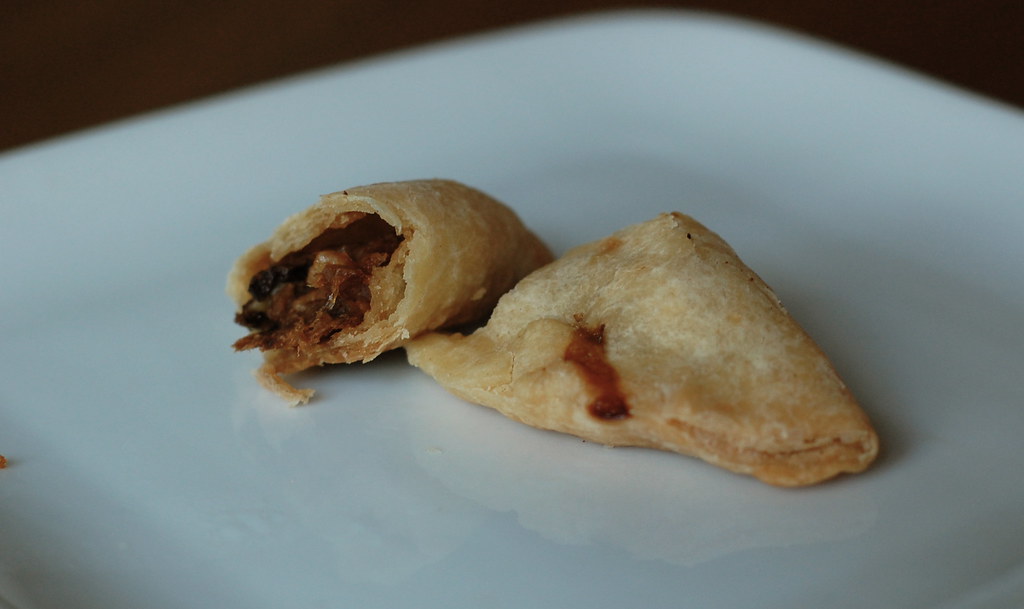
The traditional way, although I forgot the hardboiled egg. I always do. But please don't skip the olives and raisins. It sounds odd, but it gives that sweet salty balance.


I froze them ahead of time, and then baked them. So that I could look like one of the hosts I always want to be, the one who serves things with ease.

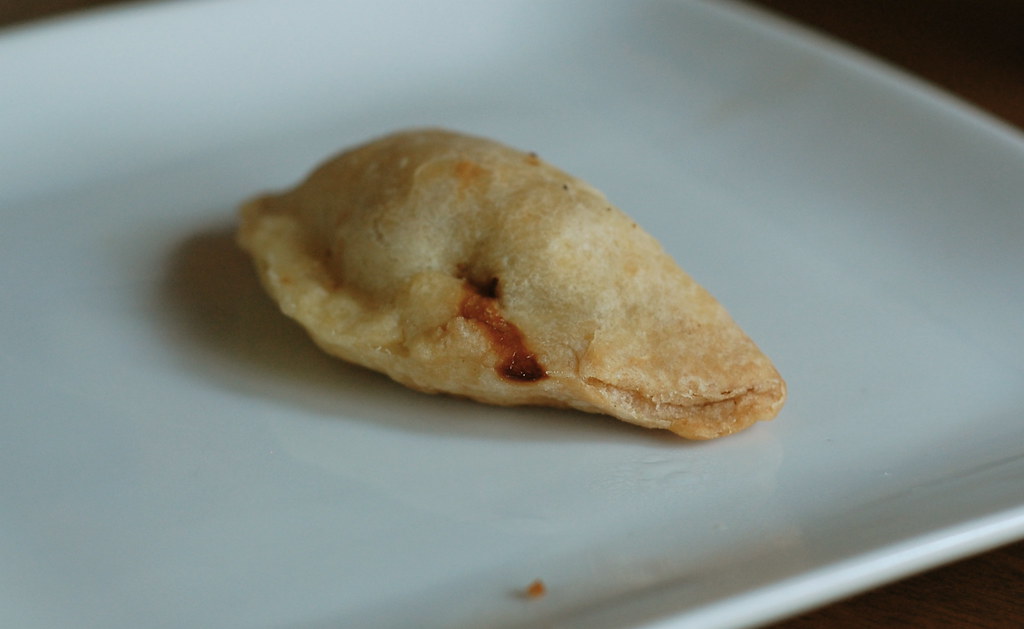
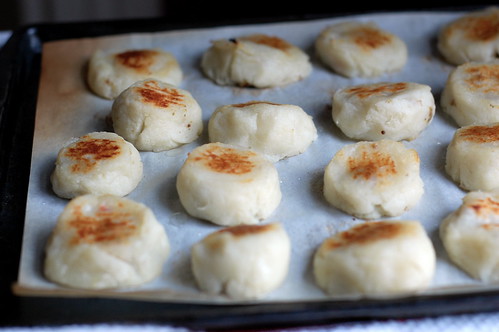
They disappeared so fast, into the stomachs of hungry guests, that I didn't even get a picture. So you'll never know how beautiful they looked on their platter, all of them, with their fork-pleated edges.

Except for this one. That I had to hide and save, just for you. Or really, for me. Because I'm afraid I ate it too.


Empanadas
Though it would be completely sacrilegious, for vegetarians you can make these with an imitation meat (like crumbled soy protein sausage) or chopped mushrooms. And if you are pressed for time, I won't hold it against you if you use purchased pie crusts, pie crust mix, or puff pastry in place of making your own pastry. Adapted from Asi Cocinan Los Argentinos.

1 recipe shortcut pastry of choice
3/4 lb ground beef
1/4 cup lard or butter
1 bunch scallions, chopped
1 clove garlic, chopped
1 small sweet green pepper, finely diced
2 tablespoons tomato paste
1/2 teaspoon each oregano, cumin, paprika, and parsley
2 heaping tablespoons seedless raisins, chopped
2 tablespoons chopped green olives
1 large hardboiled egg, chopped

1. Heat fat in a large skillet. Add the scallions, garlic, and pepper and saute until softened. Add the tomato paste and the spices and stir to combine, at this point I usually add a few spoonfuls of water to get everything to combine. Add the beef, stirring to break it up, and cook until no longer pink. Remove from the heat, add the raisins, olives, and chopped egg. Taste for seasoning (remember the olives are brined, so salt is usually not needed).
2. Roll out your pastry and cut circles with a biscuit cutter or inverted glass. Have a small bowl of water at your side. Place a small spoonful of filling in the middle of each circle, moisten the inner edges of the pastry and fold to seal. Crimp by twisting the edges or with the tines of a fork. Avoid over-stuffing the empanadas. Refrigerate or freeze empanadeas until ready to bake.
3. Preheat oven to 375F. Spread empanadas on a baking sheet and bake until golden brown and some of their filling is oozing out. Frankly, I've never timed this exactly but I'd guess 25-35 minutes, depending on the size of your empanadas.

30 March 2008

Nine Layer Salmon Bites

Do you ever have those recipes that you just know are going to be perfect and easy and delicious, so you immediately clip them or bookmark them, only to have them sit and linger for months, years even, waiting to live up to their (I know this is sooo delicious) potential? And then, when you finally, finally, get around to making them, you realize they weren't so easy or tasty after all?

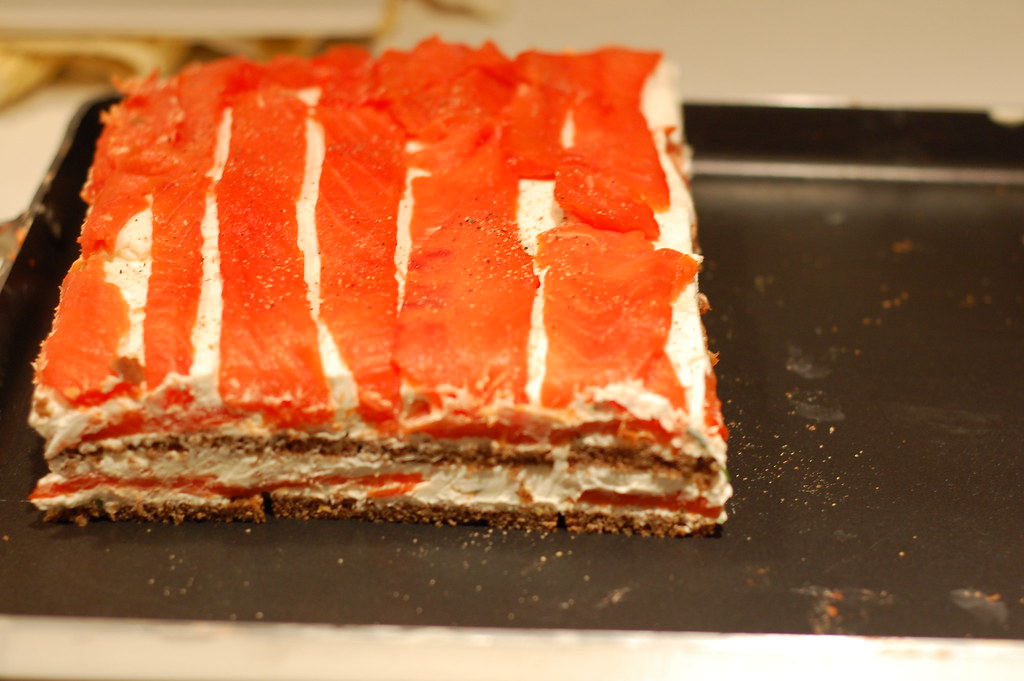
This recipe for Seven Layer Salmon Bites was one of those recipes- oh don't get me wrong, it was really delicious, but it was also a little trickier than I had imagined. I've been wanting to make them ever since I saw the gorgeous photo in Gourmet a couple years ago, they just looked so festive and pretty with their spunky salmon roe topping, I could already picture them at my next dinner party. Apparently, it took me two years to come up with an occasion to make them. And even then I couldn't get any decent salmon roe, after trying numerous groceries including Eastern Market, Black Salt, and there was no way I was braving traffic to get to Dean and Deluca (damn you D.C., sometimes you are so inaccessible!!) but I think it was just as good without.

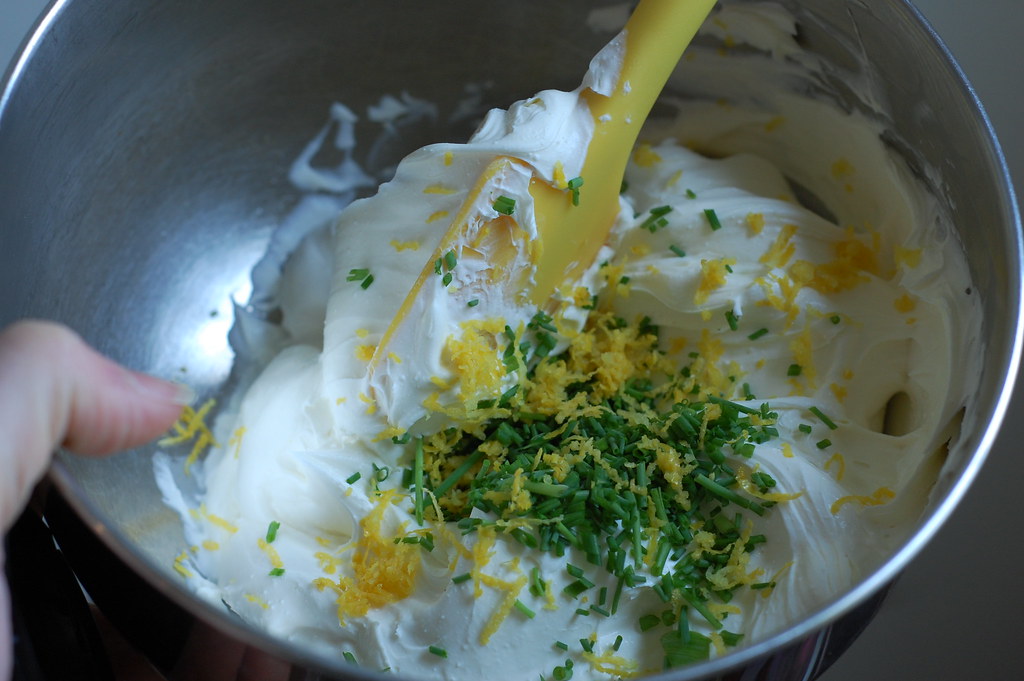
But I had the salmon and the pumpernickel and I stirred up the cream cheese mixture, which flecked with chives and lemon zest and pepper was positively finger-licking good. Then all I had to do was layer it up, chill, and slice. Except (except!) have you ever tried to spread a very sticky cream cheese mixture over a matrix of bread slices? Or over slippery salmon? Yeah, let me just say not the easiest thing I ever did. The cream cheese kept sticking to and dislodging the bread, the salmon was sliding around, and I of course, was cursing like a sailor. In the recipe's defense, it calls for whipped cream cheese and I had used regular, but in my defense the quantities in the recipe were rather off, and I finally solved the cream cheese problem by thinning the mixture with some heavy cream.

I realize these are small quibbles, but the difference between an easily assembled dish and a frustrating one is often the difference between whether something is adopted with regularity into one's kitchen. And with a few small tweaks, this is a dish that should be adopted into your kitchen. I know salmon-cream cheese canapes are nothing new, but the extra layering effect makes them a bit more special. They disappeared so fast at the party I made a few more later in the week just for myself. So go ahead, bookmark the recipe, I promise this version really is easy and delicious. And please don't wait two years to make it.

Nine Layer Salmon Bites

16 oz cream cheese, preferably whipped type, at room temperature
4 tablespoons heavy cream
1/4 cup chopped chives, plus more for garnish
zest of 1 lemon
several good crackings of black pepper
9 oz thinly sliced smoked salmon
6-8 slices thinly sliced pumpernickel bread

1. Cream together the cream cheese, heavy cream, chives, lemon zest, salt and pepper until smooth and spreadable.
2. Trim the bread slices to squares or rectangles and lay them in a jelly roll pan to form approximately a 16 by 9 inch rectangle, or about 2/3 of the jelly roll pan. Spread 1/2 of the cream cheese mixture over the bread slices. Layer half of the salmon slices on top. Repeat making another layer of cream cheese than another layer of salmon.
3. Slice the entire rectangle in half width-wise to form two squares. Use two large spatulas to transfer one square on top of the other (so it is now double-height). Press down gently then refrigerate the stack for at least half an hour in order for it meld together.
4. Remove from the fridge and using a sharp knife cut into small bites, wiping the knife after each cut. Garnish with chopped chives. Chill until ready to serve.

17 January 2008

Olive-and-Walnut Stuffed Potato Bites

On Tuesday, after a doctor's appointment, trip to the pharmacy, and an Arabic lesson, I had precisely 1 1/2 hours before I had to go hop a bus to yoga and then scoot myself all the way across town to pick up a piece for my computer and then be home to administer a complex set of medications to our puppy. Of course, I decided this would be the perfect time to make, shape, stuff, and fry potato balls. Behold my brilliance.


I actually made it, literally running out the door with my scarf flying behind me and half the potato balls still sitting on the counter, but as I sat down on the bus I realized I smelled like a giant French fry. It stayed with me all through yoga, too, wafting among the incense like a McDonald's franchise. But by the time I made it back home after a long day and reheated those potato bites and made myself a green salad, it was totally worth it. So worth it.


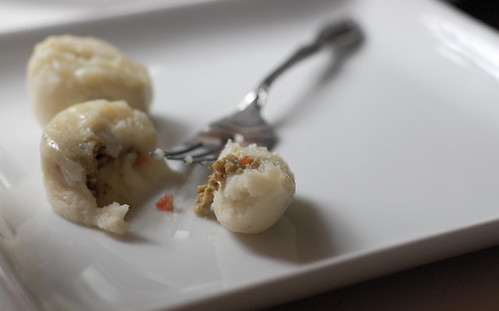
The recipe is for olive and walnut stuffed potato bites, and is very loosely inspired by a Saudi recipe I found in Maria Khalife's The Middle Eastern Cookbook (a new little book written by the founder of the Arab version of the Food Network). I ended up baking the potato balls because sometimes, especially in January, deep-frying just isn't in the cards. Though I'm sure they'd be amazing fried, I really can't imagine anything better than a warm ball of mashed potato with a bright burst of olive in the middle. I think I'd forgotten how marvelous potatoes are, just the smell of them cooking was intoxicating, and that filling: slightly sweet with raisins, the finely ground walnuts are almost unnoticeable except for the hint of nutty flavor, and finally the big salty olive pop. If I were to do this again I would fry not bake them, a few of them got a bit melty when baked.

These would be perfect appetizers, but they make a great end to a long day, slowly popping one after another into your mouth, savoring each and every bite. I guarantee that no matter how many you make, they'll be gone before you know it. Although, if you find people on the bus wondering what that French fry smell is, don't say I didn't warn you.

Olive-Walnut Stuffed Potato Bites
Makes about 24 potato balls.

2 lbs russet potatoes (about 3 large)
3/4 cup flour
salt and pepper
1/3 cup walnuts
2 tablespoons golden raisins
1 cup green olives (pimento-stuffed ones work nicely), rinsed
1/2 teaspoon sumac or substitute lemon zest
1/2 teaspoon allspice
1 teaspoon fresh oregano, optional

1. Put a large pot of water to boil. Peel the potatoes and roughly chop. Cook the potatoes in bloiling salted water until tender. Drain the potatoes and place in a large bowl. Shake the bowl to allow some of the steam to escape from the potatoes so that they dry out slightly. Using a potato masher, mash the potatoes until very smooth. Sprinkle in the flour and season with salt and pepper. Mash the mixture to form a smooth combined dough. Set aside.
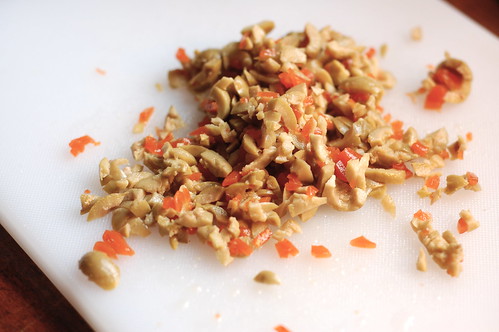
2. Place the walnuts and raisins in a food processor or spice grinder. Pulse the mixture until it forms a coarse meal (some chunks are fine). Add the olives and sumac and spices and pulse just so the olives are chopped and you have a chunky mixture.
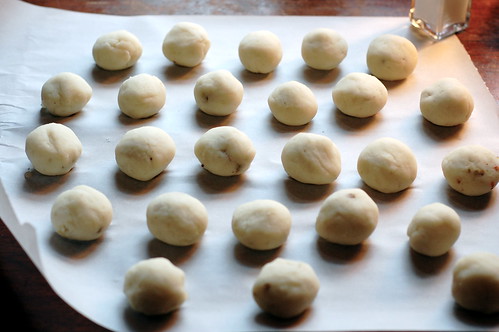
3. Working with damp hands, take a golf-ball sized piece of potato, flatten in your palm, fill with a small spoonful of olive mixture, then close up and roll into a ball. Continue forming balls, placing them on a baking sheet, until mixture is used up. Refrigerate potato balls 1/2 hour before frying (if you have the time).
4. To fry: Heat a pot of oil to very hot. Fry balls in batches until golden brown, remove with a slotted spoon and drain on paper towels. Serve hot.
To bake: preheat oven to 450 F. Line a baking sheet with parchment paper and add a generous amount of olive oil to the pan. Roll potato balls around to coat with oil, then space evenly on the baking sheet. Bake in the lower third of the oven for 10-12 minutes, or until the bottoms are golden brown (the balls will flatten slightly). Flip over and bake another 5-10 minutes, so that the second side is browned. Keep an eye on the balls so that they don't melt or brown too much. Let cool at least ten minutes before serving (this helps firm the balls so that they don't fall apart). Can be done ahead and reheated.

19 November 2007

Nutty Pumpkin Dip


People are often surprised by the use of pumpkin and winter squash in Middle Eastern food. Perhaps because pumpkin is often looked down upon in other cuisines, or because many people associate the Middle East with a warmer climate, or simply because we associate it with American pumpkin pie, but winter squashes are quite beloved from Algeria to Lebanon to Yemen. There's even a saying about how the Prophet Muhammad loved pumpkin, though this is not possible because pumpkin is a New World crop. (I use the term pumpkin loosely, as the preferred squash in the Middle East is the similar large turban squash). Today, roast pumpkin seeds (bizr) are probably the most popular snack in the region, and pumpkin finds its way into Moroccan lamb tagines, Lebanese pumpkin dumplings, and is caramelized in chunks as sweet treats and grated and transformed into jams and desserts.


This recipe is basically the pumpkin version of hummus, and it is one of my favorite uses of pumpkin in Middle Eastern cuisine. Instead of chickpeas, the recipe combines cooked pureed pumpkin with tahini, garlic, and lemon. You’ll often find this pumpkin dip on tables as an appetizer, perhaps garnished with flecks of parsley or jewels of pomegranate seeds, and its nutty sweet aroma makes it as delicious as it is beautiful. But as wonderful as it is as a dip, I actually love to serve this as a side dish at dinner, much like you might serve a butternut squash puree, and I even like to thin it with a bit of broth and serve it as a soup. Which means that you have three very good serving options for one very good recipe. And actually, sometimes when I serve it as a dip I add a few chickpeas to the mix, keeping that hummus inspiration, option four.

In our house, we’ve adopted this Middle Eastern pumpkin dip as an appetizer at Thanksgiving or at a buffet over the holidays, it looks so festive with its sparkly pomegranate seed garnish. I'll stop now before I give you yet another serving idea, so you can go forth, spread the love of pumpkin, and some cheer as the holiday season is just beginning!


Nutty Pumpkin Puree (Mouttabal al-Yaqteen)
This versatile puree is usually served as a dip and it makes a delicious winter appetizer. I also like to serve it as a side dish at dinner. This makes a lot, so you can halve it depending on the crowd.

2 lbs fresh pumpkin or other winter squash
2 garlic cloves
3/4 cup tahini
juice of 2 lemons
1 tsp ground cumin
pinch salt
3/4 cup pomegranate seeds, or pomegranate molasses, or parsley, for garnish

1. Preheat the oven to 400 F. Cut the squash in half, place cut side down on a greased baking sheet, and roast until completely tender, about 45 minutes. Remove from the oven and let cool slightly.
2. Meanwhile, place the garlic, tahini, lemon, salt, and cumin in a blender or food processor and pulse until the mixture is well combined and lightens in color slightly.
2. Use a metal spoon to scoop out the squash flesh and transfer it directly to the blender jar. Blend the mixture until smooth. Adjust the consistency with a little bit of water if necessary. Transfer to the refrigerator to store until serving.
4. To serve, spread the dip in a serving bowl and sprinkle pomegranate seeds and a drizzle of pomegranate molasses over top.

Variation: Pumpkin Hummus- add one cup cooked chickpeas to the mixture before pureeing.

26 September 2007

G.O.O.P.


My grandfather always said of our island retreat in South Carolina, “if you have to ask what there is to do there, then it's not the right place for you.” He meant, of course, that you weren’t supposed to do anything when you were there, there was the beach and the creek, sunrises, sunsets, birds to watch, sea shells to collect, and if that didn’t fill your day up already, a few good books to read.

The area has changed a lot since my family started going there generations ago, the encroachment of chain stores and fast food outlets is painful, but the island is still relatively untouched and standing on the beach looking out the view is the same. We don’t get there nearly as often since my grandparents passed away over a decade ago, and when we do I’m afraid we don’t quite live up to Grandfather’s mantra. We’ve got a laundry list of things to do: visiting friends, swinging in hammocks, renting bikes, eating shrimp and grits and boiled peanuts, looking at alligators in the state park. Don’t get me wrong, we still plan our days around the tide charts, but we also make sure to go to Frank’s restaurant, where we play bocce on the back court and where we always, always order the G.O.O.P. appetizer.


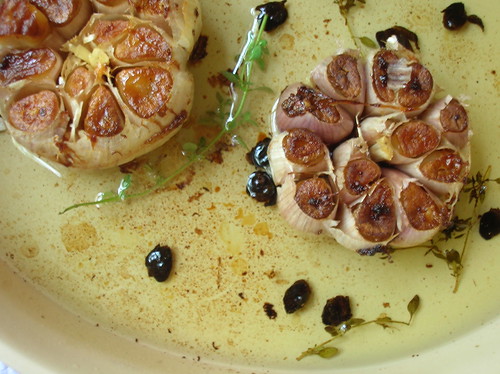
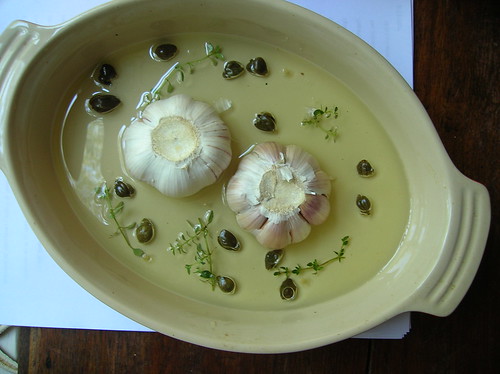
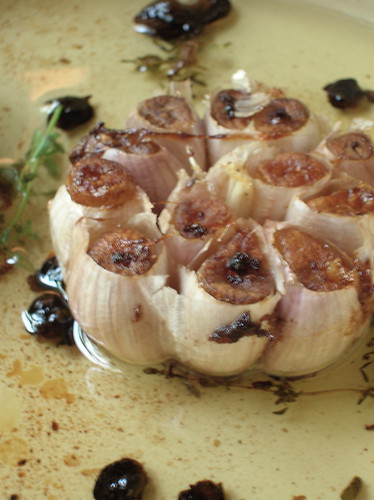
GOOP (it’s name was the kitchen code for garlic olive oil plate) is an addictively delicious plate full of roasted garlic, speckled with olives and capers and herbs. It’s also perfectly easy to make at home, and it’s as simple as it’s acronym suggests. Basically, put some garlic heads in a pan with some olive oil and herbs and capers, cover and roast for about an hour. That’s all, after it’s cooled you can add some olives if you like, and then you get out your baguette and go to work. Dip the bread in the olive oil, use a knife to spread the soft warm garlic over your bread, or fish an olive out with your fingers. Oh, and have you ever had a fried caper? Boy, you’re in for a treat because capers fry up into crunchy, salty explosions of flavor. This was actually a result of a mistake, I’m pretty sure the restaurant adds both capers and olives after roasting, but I accidentally put them in before, the crunchy capers were a delight, the olives not so much.


GOOP, or if you prefer roasted garlic plate, is a great thing for entertaining, not only because it is easy and delicious, but also because it needs a good bit of time to cool down (don’t want to burn anyone with hot oil now). So, toss it in the oven several hours before your guests are going to arrive, then put it on the back burner while you run around for a half hour hoping your guests don’t knock on the door before you’ve gotten dressed. I recommend one head of garlic per person, because people really devour the stuff. I actually love to make this on a night when I just don’t feel like fixing dinner, just a good baguette, maybe some wedges of cheese or fruit, a movie, and a lot of roasted garlic. It’s just the kind of quiet, simple pleasure that I think my grandfather would have approved of.


G.O.O.P. (Favorite Roasted Garlic Plate)
Roasting garlic turns it's flavor soft and mellow and perfect for enjoying on it's own. Any leftover oil can be filtered and reserved. Serves 4.

4-6 heads garlic
1 1/2 cups olive oil
4 sprigs thyme or rosemary
salt and pepper
1 tbl extra-large capers
mixed olives, optional
baguette or country-style bread for serving

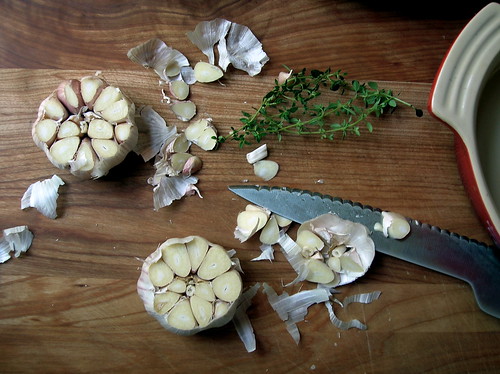
1. Preheat the oven to 300 F. Cut the garlic through the equator to that the tips of the cloves are exposed, discard top bits. Pour the olive oil into a small roasting dish. Add the salt, pepper, thyme, and capers to the oil. Nestle the garlic cut-side down in the dish and cover tightly with foil.
2. Roast the garlic for 45-50 minutes, until the bottoms are well browned and the garlic is soft. Set aside to cool for at least 20 minutes (important! the oil is hot!).
3. To serve: add the olives, if using, and turn the garlic cut side up. Dip your bread in the oil, and scoop out garlic cloves and spread on bread with capers, munch on olives, etc.

24 May 2007

What Was Always There, Newly Admired


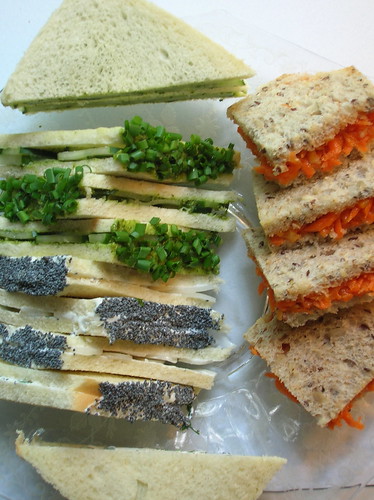
Radish-Poppy Seed, Cucumber-Coriander Chutney, and Carrot-Ginger Tea Sandwiches

Back when I was in high school, my mom and I were out for our usual dose of Sunday museum visits, something know in our house as "museum therapy," and perusing an exhibit at the National Portrait Gallery. Without warning, I saw my mom approach a man wearing tortoiseshell glasses and who stood with his nose inches from a painting, scribbling notes on a legal pad clutched to his chest. "Dink, is that you?" she asked. To my surprise, he turned and said in a dead-serious whisper, "you used my real name." Actually, I was soon to learn that his real name is Don, and Dink was a name used only by his childhood friends. He and my mother had been best friends through high school, he often picked her up in his mother's pink convertible, and gave her a statue of Hamlet when they graduated.

However, after high school they lost touch, and until that meeting in the hushed gallery halls, hadn't seen each other in nearly thirty years. In a subsequent lunch, my mother learned Dink (as we still call him), was a lawyer who lived nearby with his partner John in a great apartment building, and a friendship was resumed as if there had never been a gap. These days, Dink and John are some of the most creative, intelligent, well-traveled people we know, and I always look forward to when they come to visit. They often talk about memories of growing up in Tennessee, stories looked on with the fresh eyes of time and experience.


Knowing they were coming for a picnic last weekend, my mind set on what to fix: simple things, like a little chopped tomato salad, and some slices of teriyaki chicken, a big bowl of grapes and a nice smoked cheddar. But I was also thinking about those foods of the old South, and looking on them with new eyes. Take, for example, the tea sandwich. I picture it as part of the luncheon spread at the Country Club, piled on platters next to a gelatin salad and ham biscuits, probably coated in mayonnaise and insipidly soggy. I've always associated tea sandwiches that way, never giving a thought to where they came from. It took my British-born companion to point out the obvious, that tea sandwiches are one example of the Old English roots of the South.

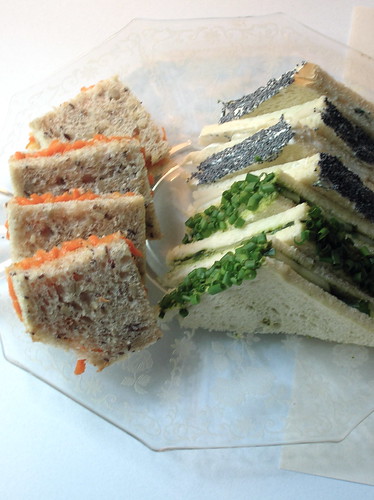
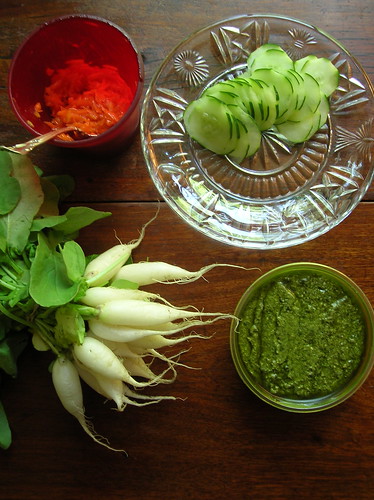
That got me to thinking about the linneage of tea sandwiches, and the other behemoth of British colonization, India. Spying a jar of coriander chutney, a thick green paste made with coriander and coconut, I immediately knew it would be a perfect twist on the classic cucmber-watercress sandwich. But why stop at one type of tea sandwich when you can have many? Sometimes my culinary imagination gets the best of me, so those French breakfast radishes I picked up at the market got paired with a delectable cream cheese- poppy seed spread. And finally, sweet grated carrots paired with ginger and a deliciously nutty bread.

I'll admit tea sandwiches are a bit fiddly, you can't really do them ahead or they'll get soggy. But I had a ball putting this together, and best of all, the sandwiches were delicious, each person had a different favorite. Sometimes it takes an old friend and a new perspective to discover something that was right there all along.


Tea Sandwich Tips
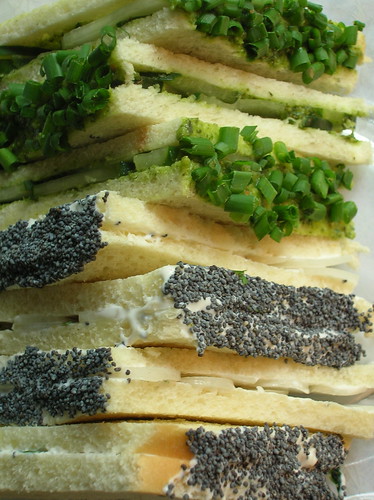
Use very thinly sliced good quality bread. To prevent sogginess, spread the bread with a thin layer of unsalted butter, and don't assemble more than 3-4 hours ahead of time. Remove all crusts and slice the sandwiches into small shapes about the size of two bites. For fun, you can decorate the edge of the sandwiches with chopped herbs, seeds, or finely grated vegetables.

Radish-Poppy Seed Tea Sandwiches
slivered radishes, chopped chives, 1/2 cup cream cheese, 3 tbl mayonnaise, 2 tbl poppy seeds, 1 tsp lemon zest, white bread

Combine cream cheese, mayonnaise, poppy seeds, and lemon zest. Spread bread with cream cheese mixture, cover with a layer of slivered radishes and a sprinkling of chives, then top with a slice of cream cheese-spread bread. Trim crusts from sandwiches and cut into small shapes. If desired, spread one edge of sandwiches with a small amount of the cream cheese mixture and dip in poppy seeds to decorate.

Carrot-Ginger Tea Sandwiches
3 large carrots, grated, 1/2 cup marmalade, 1 tsp ginger, whole-grain bread

Combine the grated carrots, marmalade, and ginger (if you have a ginger marmalade, you can use it and omit the powdered ginger). Make sandwiches with whole grain bread and cut into small squares or triangles.
Cucumber-Coriander Chutney Tea Sandwiches
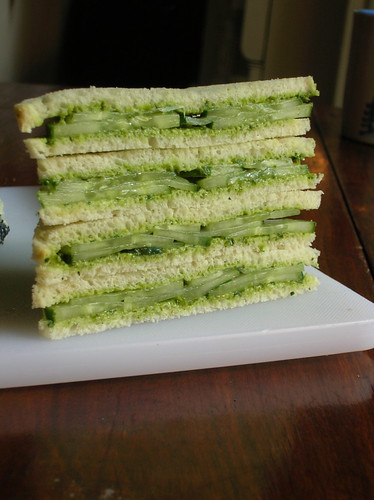
1-2 cucumbers (preferably seedless), coriander-coconut chutney (available in jars in international food stores), unsalted butter, white bread, chopped chives, herbs, or dessicated coconut for decorating

1. Peel the cucumbers in a striped pattern, leaving only a little bit of green for accent. Using a mandoline or a sharp knife, thinly slice the cucmber, pat the slices dry with paper towels.
2.Spread one side of the bread slices with a small amount of unsalted butter to prevent sogginess. Spread the bread with coriander chutney, top with cucumber slices, assemble sandwiches, and trim crusts. If desired, spread one side of the sandwiches with coriander chutney and dip in chopped chives or dessicated coconut to decorate.