Showing posts with label Southern. Show all posts

29 April 2009

North Carolina-Style Pulled Pork

Every time I think my life is beginning to resemble normalcy again, I find that it isn't. I went to a Neko Case concert a little while ago- we had a great time but halfway through the concert I got really sad. My mom loves Neko Case and I know she would have loved to be there, but then I looked around at the noise and the crowds and I realized she wouldn't be up for it. I hope she will be one day.
Every time I get a few normal days, every time I think I might be able to go to yoga two days in a row, there I go again- back to the hospital, to waiting rooms and scans and pain and tears. Of course, I cannot complain, not being the one actually going through the constant tests and pokes and prods. But nonetheless, I feel as if I'm caught between a sense of normalcy and complete imbalance.

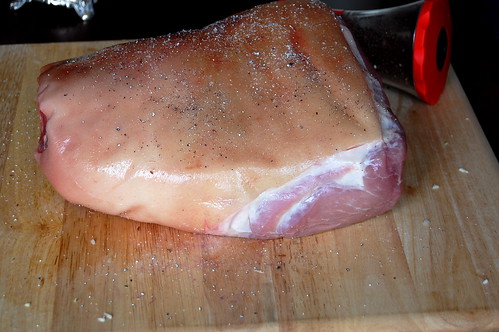
And thus, we cannot move forward here on the blog yet. I mean, last time I mentioned homemade North Carolina-style pulled pork, and who would want to move on from that?? I've always wanted to make this ever since a friend made it for a dinner once, and I finally found the occasion and procured the recipe.

To clarify, North Carolina-style is a slow-roast pork that is combined with a very vinegary-peppery sauce. It's not like those other sticky-sweet barbecues, and because this recipe is only an approximation of the real thing, it doesn't have the exact smoke and char of a pit barbecue. But none of those things detract from the recipe at all- the sharp vinegar pairs nicely with a dollop of coleslaw on a good soft (homemade!) burger bun.

I suppose I cannot just move on with my life at the drop of a hat because my life is different than what it was before. I can't just go back to what's familiar, I need to reevaluate, readjust. Maybe I need to feng shui, I don't know. Whatever it is, I hope it involves a little more me time, and a little more cooking.


PORK BARBECUE
for 8-10 gigantic sandwiches

A. 4 lb. boneless pork roast--pot shoulder blade or Boston butt
(or you could use a bone-in roast, in which case double the weight)

B. salt, pepper, cut garlic cloves

C. 1 onion, sliced
1/2 cup cider vinegar

D. 3/4 c. white vinegar
3/4 c. cider vinegar
1T. sugar
2 t. crushed red pepper flakes
1 t. fresh-ground pepper
1 T. good quality hot sauce--for instance, Crystal. (NOT the pure-heat type like Tabasco)
1 to 2 t. salt

Rub A with B. Cook in Crockpot with C. c. 10 hours. (If you don't have a Crockpot, brown meat in oil and then bake with C in covered roaster 3-3½ hours at 325º. )

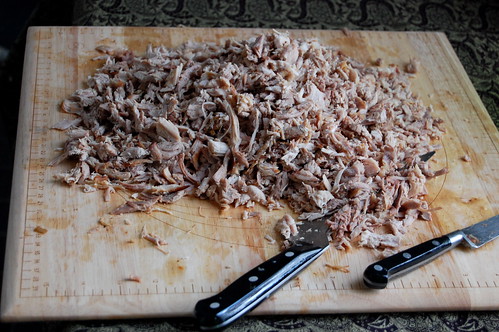
Cut cooked meat into chunks and then shred by hand, discarding fat.

Put meat in a saucepan, mix D and pour ALMOST all of it over the meat. Cook, stirring occasionally, until meat has thoroughly absorbed the sauce, adding more sauce if needed. (You want the meat to be well soaked but not soupy.)

Serve with soft white buns that will soak up the juices. You can add cole slaw right into the sandwich or have it on the side.

15 June 2008

Before


My uncle came to visit a few months ago, just for a quick weekend trip- I was a bit disorganized at the time but we managed to entertain ourselves. As we wandered around D.C. he kindly offered to buy me something, and for the life of me I couldn't think of anything I wanted (and have subsequently thought of about ten things I should have asked for). But as we browsed a housewares shop, a little counter-top deep fryer struck my fancy, and that was what I picked out.

In retrospect, this weekend which would have been remarkably average, I will always remember as the weekend before. The weekend before the diagnosis, before the brain tumor, the last time I saw my uncle before screws were drilled in his skull, before surgery and staples and medications and oh-so-many bumps along the road. They say that memories are not of events, memories are of the stories we tell ourselves about events. The ultimate unremarkability of that weekend will always be colored by what came afterwards, the luxury of doing something as normal as buying a fryer without having to worry about putting on a hat to cover the scars.

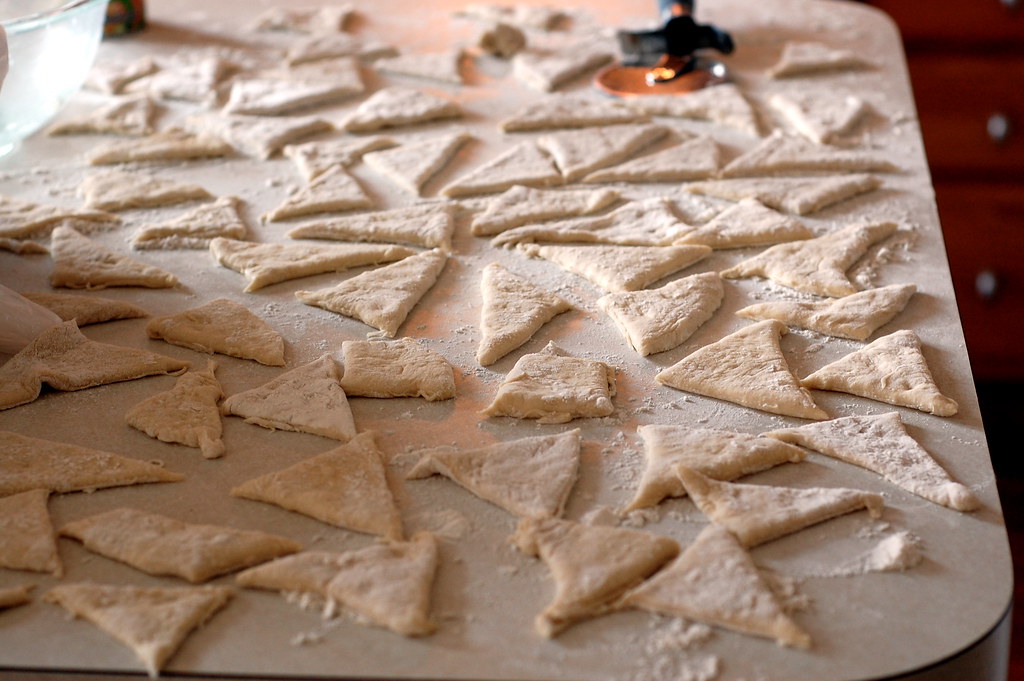
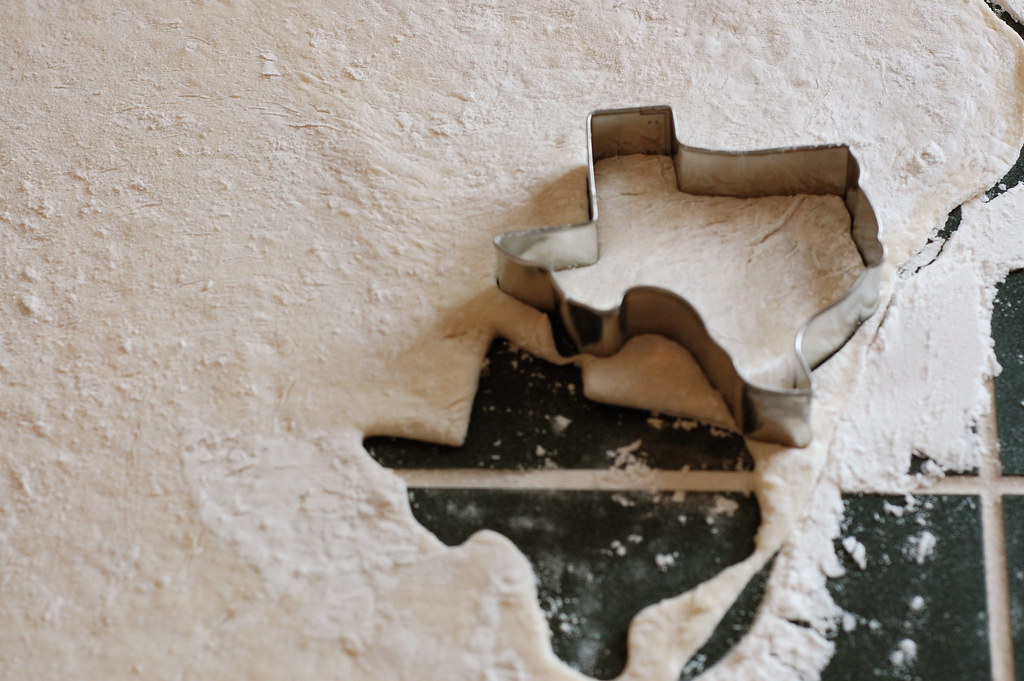
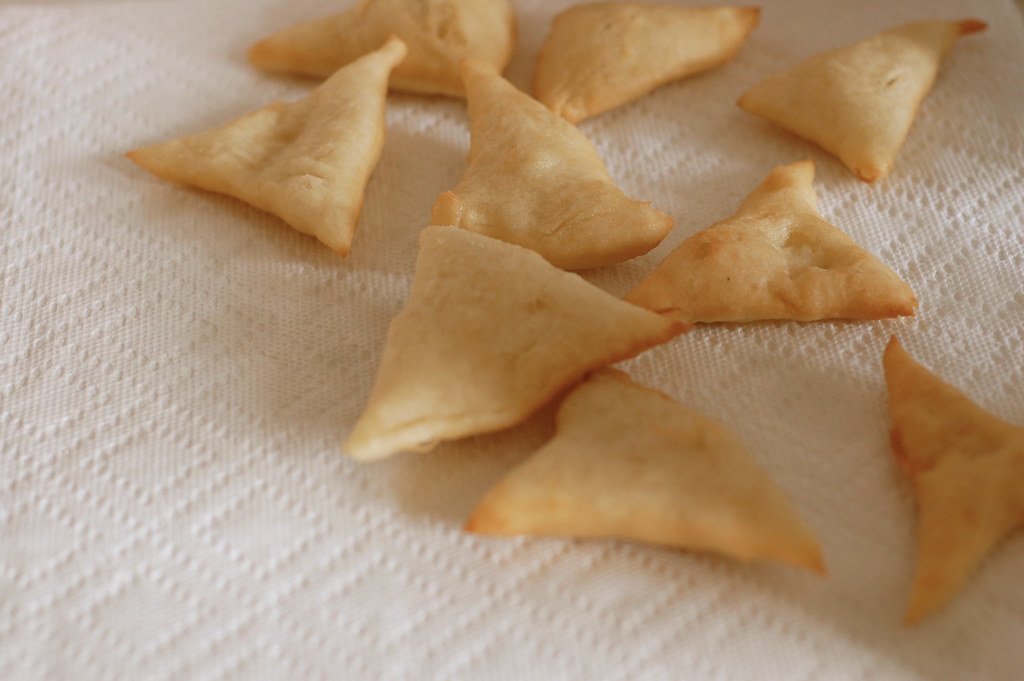
The deep-fryer has sat on the top kitchen shelf neglected for the past two months, still in its cardboard box. At lunch one day, I mentioned my neglected fryer to my friend Johanna, who immediately hatched a plan for sopapillas. As Texan as any Texan I know, Johanna in fact hatched a plan for a whole Texan-themed lunch, complete with excellent enchiladas verde and queso and refried beans. The day before, we had a sopapilla practice session: armed with a trusty recipe from Homesick Texan, we made the simplest yeasted dough, rolled it out and cut it into triangles which were fried, rolled in cinnamon sugar, and drizzled with honey.

At this point, my uncle would probably like to chime in and say he's doing quite well thank you, and no one is more steadfastly positive than he is. But I can also say that sometimes, sometimes you think you're getting along perfectly fine, and then you do something as simple as cook for a bunch of people, and the fierce happiness you get from it makes you realize otherwise. That day, I don't think I ate a single sopapilla, I just rolled the dough and cut it, and watched as they puffed magically in the oil, and watched as people gathered around the counter, drizzling them with honey and eating one after another, and the whole time I couldn't wait to call my uncle and tell him all about it. And when I did, I was already planning what I could fry next...


Sopapillas

1 package active dry yeast
1 1/2 cups warm water
1 tablespoon of butter, melted
1 tablespoon of sugar
4 cups all-purpose flour
1 teaspoon salt
vegetable oil
sugar
cinnamon
honey

1. Mix the yeast with the warm water and let it sit for five minutes. Combine the flour and salt. Add the butter and sugar to the yeast/water mixture and then slowly add to the flour and salt. Knead for two minutes, until dough is smooth and elastic.
2. Rise in a covered, greased bowl for one hour or until dough is doubled in size.
3. After dough has risen, punch it down, and on a floured surface, roll it out into a 1/4-inch thick rectangle.
4. Using a knife or pizza cutter, cut out 3 inch squares, and then cut squares on the diagonal into triangles.
5. Heat up three inches of oil in a big pot to 375 degrees. Fry triangles of dough in the oil for one minute on each side. The dough should puff when it hits the oil. Drain, and then sprinkle with cinnamon and sugar. Serve hot with honey.

04 January 2008

Never Too Late for Luck


By now, you've probably messed up your first few checks, replaced your calendar, and generally settled into a new year with a big fat round eight at the end of it. I'm not one for New Year's resolutions or much retrospection, but a new month at the start of a new year does encourage a bit of reflection. If you had asked me, I would have probably told you that 2007 involved a lot of waiting, several wrong turns, and a few frustrations. But when (while twiddling my thumbs on the train) I started listing the things that had happened in the past year, it looked like quite a lot:

- I made 20 ice cream recipes
- I left a job and a city I loved
- My significant other of several years became less significant and more other
- I found a new joy instead (albeit one who eats my shoes)
- I learned to do vrschikasana.
- I found a part of my family I had never known before
- I got a new job
- I'm moving to a different city
- I am finally learning to drive (about 9 years after I should have)

There are many more things I could add to that list, but it's quite a bit, really. I'll be starting a new job at the end of the month and will be in Washington, D.C. for the next three years. I'm a bit apprehensive about all of it, but I hope it will be new and exciting and challenging intellectually, plus it will be nice to be able to see my family and friends regularly without the medium of Skype. This blog will continue as usual, and I've already got some things tucked up my sleeve, including one of my absolute favorite Middle Eastern recipes and some other new-to-me discoveries.

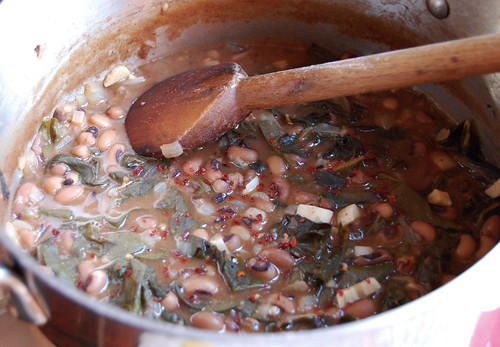
My mom should get a big thanks this year, as she's played host to me in my transition, generously ceding her kitchen to my endeavors and also footing some major grocery bills. In our family, we've always had traditional foods for the new year: black-eyed peas (for seeing into the new year), collard greens (green for greenback$) and cornbread (for gold). I have no idea if any of those symbolisms are verifiable, but I've always liked the idea of them. Imagine my delight when, while traveling in northern Syria, I learned that they also eat black-eyed peas for good luck? In Aleppian Jewish tradition they eat black-eyed peas on Rosh Hashana (the Jewish New Year), usually with veal. The other traditional Syrian preparation of black-eyed peas involves the peas stewed with Swiss chard. This dish is literally a dead ringer for one you might find in the American South: swap the chard for collards and the Aleppo pepper for paprika and you've gone from one half of the world to another. I find these similarities terrifically fascinating, but then again I'm a total nerd.

The new year may have come and gone, but I say it's never too late for a little luck. Plus, this dish is really hearty and delicious: the peas are long-cooked so that they take on a sort of velvety smoothness punctuated by a hint of spice. You can serve it as a thick stew in bowls, dolloped with a little plain yogurt, or as I had it in Syria, ladled over rice.

So here's to 2008 and all the changes it may bring. I hope yours is healthy and happy and I look forward to sharing it here with you. And if you live in D.C. and see a girl in a brand new VW Rabbit, you might be advised to change lanes.


Black-Eyed Peas with Swiss Chard

splash of olive oil
1 thick-cut slice of bacon (optional)
1 medium-sized onion, diced
3 cloves garlic, sliced
1 bunch (~8 stalks) Swiss or Rainbow Chard, ribs removed and leaves roughly chopped
4 cups fresh black eyed peas or 1 1/2 cups dry black eyed peas soaked in water overnight
2 tablespoons tomato paste
pinch of salt
1 teaspoon Aleppo pepper or other mild red pepper

1. In a medium-sized pot, heat the olive oil. Add the onion and garlic (and bacon, if using) and saute until soft and translucent but not browned, 10 minutes. Add the chard, black-eyed peas, tomato paste and enough water to just cover the mixture by an inch and bring to a boil. Season with salt and turn down to a simmer. Simmer, stirring occasionally, for 45 minutes for fresh peas and 1 1/2 hours for dried peas. You may need to add a touch of water- it should be thick and stew-like. Stir in the Aleppo pepper and simmer another 2-3 minutes to combine. Taste for seasoning and serve warm.

19 December 2007

Why I Love Tomato Aspic

I love tomato aspic. It only took me twenty years to figure it out.

You see, as much as I've lauded the cooking of the American South, the culinary traditions of my mother's family and many others stretching across Tennessee, the Carolinas, and Texas, I'm afraid it's easy to romanticize things. Somewhere in the past half century the ease of open-a-can-of-this-and-combine-with-a-can-of-that has crept into the vernacular. Like kudzu vine, culinary traditions have been entangled in processed cheese and smothered in creamed soup. Sometimes it's scary.

Don't get me wrong, the barbeque's still great, there's real cornbread and fresh shucked oysters and plenty of pie. But one year we were in Tennessee for the holidays, doing the usual rounds of Christmas parties and visiting. Everywhere people were pressing little cheese biscuits and pecan tassies in your hand, all of them delicious, but after awhile I was starting to crave a vegetable. Or just something, anything, that resembled its fresh natural state. At the dreaded bank Christmas party, amid the ladies in their Christmas sweaters, I looked in desperation for something not slathered in mayonnaise or cream cheese. Finding nothing, I resigned myself to another ham biscuit.

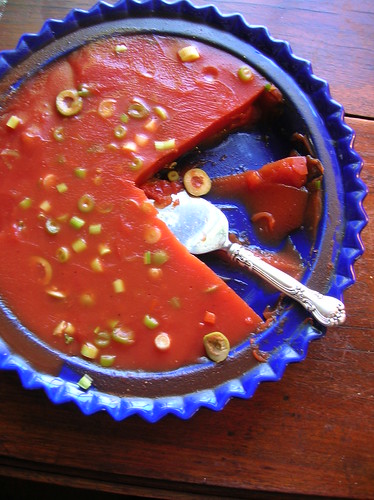
This is how I came to discover tomato aspic. Aspic is just a fancy word for a savory gelatin; aspics were popular in the fifties (think of those molded salads), but in my family and many others' across the South aspic never went out of style. Specifically, tomato aspic. There is no family gathering to be had without tomato aspic, my family is so passionate about it. It was always on every dinner and buffet table growing up but I had never actually eaten it. Few things could be less appealing to a child than a wobbly block of solidified tomato juice.


Then came the holiday of vegetable depletion, and as I surveyed the buffet I saw the tomato aspics my aunt had made, perfectly shaped in Christmas tree molds and decorated with green olives for the season. I took one, along with a heaping salad, and promptly fell in love. It's hard to describe what's so wonderful about tomato aspic, even now I can't really put words to something which sounds, on paper, so unappealing. Maybe you have to be born into the tomato aspic tradition, but I didn't discover it for the first twenty years of my life, so I think there's hope for you too.

Today, tomato aspic is one of my favorite foods. As often as fresh sliced tomatoes make up my lunch in the summer, a wedge of tomato aspic is sure to be on my plate in the winter. I've even packed a whole tray of it in ice to take to the refrigerator at work so I can have it all week long. But more than that, those funny red blocks remind me of home and the holidays, my mom always has a plate of aspic in the fridge when I'm coming to visit. Sometimes it's decorated with green olives or scallions, other times it's plain, simply tomato juice spiced with a bit of Worcestershire and spice. We're headed to Tennessee next week where I'll be eating ham biscuits and bourbon balls and where my aunt is already getting out the molds, so that when the need for a vegetable strikes, the aspic will be ready. In my family, it wouldn't be the holidays without it.


Tomato Aspic
I've made this with both 2 and 3 packages of gelatin and I prefer the firm yet melting aspic that comes from using 2 packages. However, if your aspic will be part of a buffet or sitting out at room temperature for a while, I'd recommend using 3 packages for a very firm gel.

4 cups tomato juice, preferably low-sodium
1 tablespoon lemon juice
1 bay leaf
1 cup chopped onion and celery
1 tablespoon Worcestershire sauce
dash of Tabasco or other hot sauce, optional
1/2 teaspoon salt (omit if not using low-sodium tomato juice and use your judgement)
2 packages (1/2 oz.) gelatin
2 tablespoons mild vinegar, like apple cider vinegar
optional: chopped scallions or sliced pitted green olives
for serving: butter lettuce leaves, homemade mayonnaise

1. In a large bowl, combine 1/2 cup of the tomato juice with the gelatin and the vinegar, stir to combine and set aside.
2. Place the remaining tomato juice, lemon juice, bay leaf, onion, celery, worcestershire sauce, and salt (to taste) in a sauce pan. Bring the mixture to a boil, then let simmer for 20 minutes.
3. Pour the tomato juice through a sieve into the bowl with the gelatin, discard the vegetables. Stir the tomato-gelatin mixture well so that the gelatin is completely dissolved. Transfer the mixture to a 9 inch pie plate or decorative molds and place in the refrigerator to set. If using olives or scallions, press them into the aspic after about 30-45 minutes (when the gelatin is half-way set), so that they are suspended in the aspic. Refrigerate the aspic at least 4 hours before serving.
4. Serve the aspic chilled, on a bed of lettuce leaves, with mayonnaise on the side. Aspic keeps well in the refrigerator.
16 November 2007

Lida Lee's Cornbread Dressing


In the South, no meal would be complete without some form of cornbread, and no holiday can be had without cornbread dressing. Unlike in the North, where it is known as stuffing, this dish of crumbled bread moistened with broth is always baked outside the bird in a casserole dish (I realize this may be confusing, as it was when my boyfriend came to dinner, people kept offering him more dressing, but he couldn't figure out what he was supposed to put it on). You can think of it as stuffing, but around here, we call it dressing. My grandmother, Lida Lee, was born and raised in Tennessee and this is her recipe. The key to good homemade dressing is proper Southern cornbread and plenty of freshly made giblet stock. Though at its heart it is a simple, dish, in my experience it takes a bit of practice to a get a feel for making good dressing.

I've done the recipe as a pictorial, you can also get the printable version.

First, get out the 10" cast iron skillet and make your good old fashioned Southern cornbread. My grandmother kept about 20 different cornbread preparations in her repertoire, she called this kind of bread "egg bread" because it included eggs, unlike many other corn pones, corn cakes, hot water corn bread, etc. Basically, combine dry ingredients, add wet ingredients, bake at 450 F for 20 minutes.


It's best if you make the cornbread one or two days ahead, so it can dry out slightly. Of course, if you make it ahead, this will probably happen:


Cornbread, toasted, with honey drizzled on top, makes very good breakfast. Oops. But, for the purposes of the recipe you will be needing all the cornbread. Consider yourself warned.

Now, on Thanksgiving morning you get those giblets, you know the funky looking things that you had to stick your whole forearm up inside the turkey to dig out (fyi- if you have a kosher turkey you won't have giblets. We made this mistake one year and spent half of Thanksgiving day running around to butchers trying to find giblets). Giblets are your nuggets of gold here. Put them in a stock pot, I usuallly toss in the turkey neck too. Add 32 oz purchased low-sodium stock and 4 cups water and barely simmer for as long as possible, at least an hour and up to 3 hours. Then, dump in 1 cup each of chopped onion and celery and simmer for another 1/2 hour, until completely soft.


Meanwhile crumble your cornbread (get your fingers messy now). Also add 5-6 slices of stale sandwich bread, even if you didn't snack on your cornbread. You can use white or whole wheat, we like to use the heels. Add 1/2 cup chopped parsley (if you like sage you can add some of that too) and some black pepper. Now, here is where we deviate slightly from Lida Lee. Grandmother's recipe uses only stock to moisten the bread. But for years my version was never quite the perfect texture, so I started adding an egg to ensure fluffiness. My mom is like the genius of dressing makers and she uses only broth, but until I figure out the secret to her technique, the egg trick works nicely.


So, stir in a beaten egg, the proteins in it will help keep the perfect texture. Then, add the super-soft vegetables into the bread. This is the part where lily-gilders will add things like sausage and oysters and the like, in our family we do not practice such heretical acts.

Now, slowly ladle in the stock, this is the make-or-break part of your dressing. You do not want dry dressing, dry dressing is a true tragedy. I live in fear of dry dressing. To prevent this, add more stock than you think you should, if your dressing is too dry, there's no going back; however if the dressing is too wet, you can simply keep baking it to dry it out. So, add enough stock to make a soft porridgy consistency.


Presumably, you've timed this so you are now taking your turkey out of the oven. Pat the dressing into a greased baking dish, and drizzle a couple of tablespoons of those turkey drippings over the dressing (I say a couple in the "really I'm probably pouring on more like a 1/4 cup but I don't want to admit it" sense). If you don't have turkey drippings you can use melted butter.
Bake dressing at 350 F for about 20-25 minutes. Meanwhile, you're tenting your turkey with foil and running around like a mad woman trying to get the other dishes onto the table. After 20 minutes, test the dressing to make sure the bottom isn't too soupy, it should be golden and moist. If it needs a few more minutes, tell them to start carving the turkey, that part always takes forever. Serve hot, and enjoy.


Lida Lee's Cornbread Dressing

for the cornbread:
2 cups cornmeal
2 tsp baking powder
1 tsp baking soda, pinch salt
2 eggs
2 cups buttermilk
2 tbl shortening 

for the dressing:
cornbread
giblets
5-6 slices stale sandwich bread, white or whole wheat, preferably the heels
32 oz low-sodium chicken stock
4 cups water
1 cup chopped onion
1 cup chopped celery
black pepper
1 egg, beaten
1/2 cup chopped parsley
3 tbl turkey drippings or melted butter

1. Make the cornbread: Preheat the oven to 450 F. Put the shortening in a 10 inch cast iron skillet and place in the oven to preheat. Combine the dry ingredients in a bowl. Add the milk and eggs and stir to blend. Remove the hot skillet from the oven and swirl it around so it is well greased. Pour any excess oil into the batter, then pour the batter into the hot skillet. It will sizzle. Bake in the oven for 20-22 minutes, until golden. Let cool completely. Best if done 1-2 days ahead. I usually go ahead and crumble the cornbread 1-2 days ahead so the crumbs can dry out.
2. Make giblet stock: Place the giblets in a pot, if you want you can toss in the turkey neck too. Add the stoc and the water. Bring the mixture to a boil, skim the surface, then lower to the lowest possible simmer. The mixture should steam but not bubble. Simmer for at least one hour, or up to 3 hours, the longer the better. It will reduce slightly, but not too much. Add the chopped onion and celery and simmer another 1/2 hour until the vegetables are very soft.
3. Crumble the cornbread with the sandwich bread in a large bowl. Add the egg and stir to distribute. Using a slotted spoon, add the onion and celery to the mixture. Gently ladle the stock into the mixture, moistening it to a soft porridge like consistency. It is always better to add too much stock than risk your cornbread being dry. Season with pepper, salt, and add the chopped parsley.
4. Spread the cornbread mixture in a greased casserole dish. (presumably, you've timed this so that your turkey is now coming out of the oven and is going to rest while you bake the dressing and reheat all those other dishes). Drizzle about 3 tablespoons of the turkey drippings over the dressing (or more, as you like), then place in a 350 F oven until for 20-25 minutes, until nicely browned. Check to see that the dressing is the desired consistency: moist but not soupy, if it seems too wet you can bake it 5 more minutes, but be carefully not to make it too dry. Serve immediately.

15 October 2007

Speckled Butter Bean Shakshouka with Yogurt Sauce


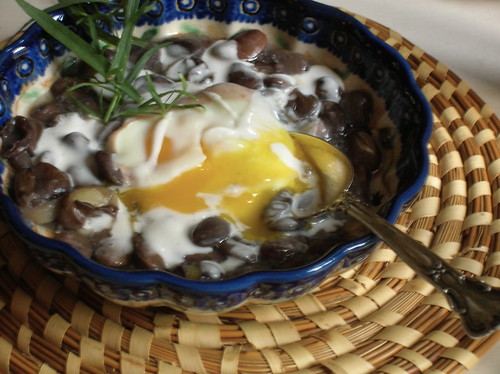
I grew up going to farmers markets and roadside stands where fresh shell beans were readily available. My family is from the south, which means fresh butter beans, baby limas, and black eyed peas are held in high regard. As much as I love New York and its Greenmarket, it is rather lacking in the fresh bean arena. I guess New Yorkers just aren’t beans people. That’s too bad, because fresh beans are wonderful: they cook up in minutes, and they’re far superior to canned beans and much easier than rehydrating dried beans. This past week I was delighted to see an array of fresh beans in Maryland, beautiful coolers full of slippery black beans, limas, crowder peas, and speckled butter beans.

Shakshouka is a Middle Eastern dish in which eggs are poached in a simmering vegetable mixture. The most traditional version of shakshouka involves eggs in a spicy tomato sauce, but it can also be made with beans or other vegetables. In the spring, shakshouka is made with a fresh fava bean and artichoke mixture, and in winter the eggs can be poached in a stew of dried fava beans and sausage. I’ve reinterpretted this Middle Eastern dish with American ingredients, using those speckled butter beans. Shakshouka is often served with a yogurt sauce made of yogurt and tahini, but to keep in the American way I’ve used peanut butter. Yogurt and peanut butter may sound like an odd combination, but they make a delicious sauce. This makes a nice brunch dish or a simple dinner, and make sure to have some toast or flat bread for mopping up the juices.


Butter Bean Shakshouka with Yogurt Sauce
If fresh beans aren’t available you can substitute 3 cups cooked beans and reduce the cooking time slightly. For those who can’t have a meal without meat, some chunks of merguez sausage make a good addition. Serve with pita bread or toast. Serves 4.

1/2 a medium onion, chopped
1 clove garlic, minced
1 lb fresh shell beans, like lima, butter, or fava beans
1 sprig thyme, optional
juice of half a lemon
4 eggs
olive oil, salt, red pepper
for yogurt sauce:
6 oz. plain yogurt
1 heaping tablespoon peanut butter or tahini
squeeze of lemon juice

1. Heat a glug of olive oil in a wide skillet or dutch oven. Saute the onion and garlic over medium heat until soft and translucent. Add 2 cups of water to the pan and add the beans and thyme, there should be enough water to half-way cover the beans. Season to taste with salt and red pepper. Simmer the mixture for 15-20 minutes until the beans are tender, adding water as necessary. Squeeze in the lemon juice.
2. One at a time, crack an egg and slide it into the simmering bean mixture, spacing them evenly in the pan. Place a lid on the pan and simmer over low heat until the egg whites are opaque and the yolks are soft set but still runny.
3. Scoop some of the beans into your serving bowls, then gently scoop an egg into each bowl. Stir together the yogurt, nut butter, and lemon. Drizzle the yogurt sauce over each bowl. Serve immediately with bread.

26 September 2007

G.O.O.P.


My grandfather always said of our island retreat in South Carolina, “if you have to ask what there is to do there, then it's not the right place for you.” He meant, of course, that you weren’t supposed to do anything when you were there, there was the beach and the creek, sunrises, sunsets, birds to watch, sea shells to collect, and if that didn’t fill your day up already, a few good books to read.

The area has changed a lot since my family started going there generations ago, the encroachment of chain stores and fast food outlets is painful, but the island is still relatively untouched and standing on the beach looking out the view is the same. We don’t get there nearly as often since my grandparents passed away over a decade ago, and when we do I’m afraid we don’t quite live up to Grandfather’s mantra. We’ve got a laundry list of things to do: visiting friends, swinging in hammocks, renting bikes, eating shrimp and grits and boiled peanuts, looking at alligators in the state park. Don’t get me wrong, we still plan our days around the tide charts, but we also make sure to go to Frank’s restaurant, where we play bocce on the back court and where we always, always order the G.O.O.P. appetizer.


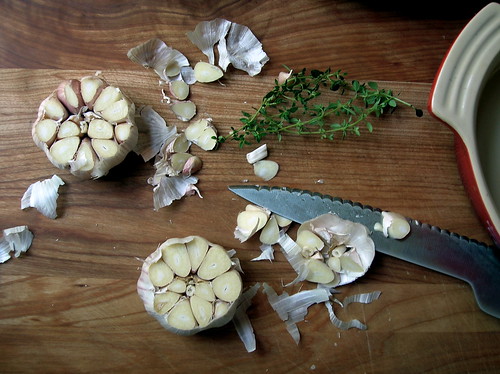
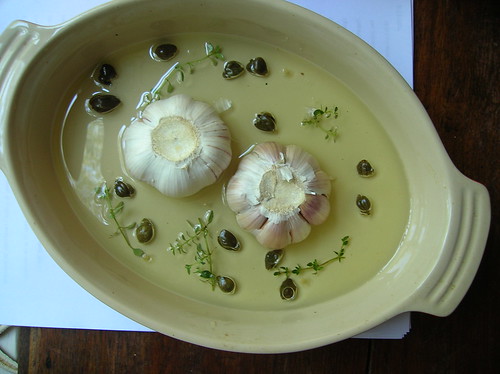
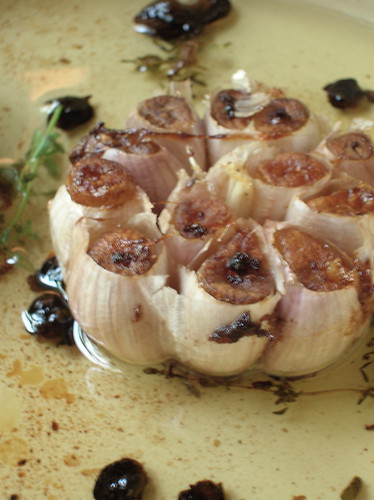
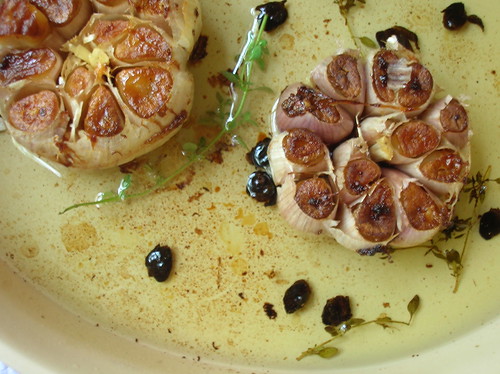
GOOP (it’s name was the kitchen code for garlic olive oil plate) is an addictively delicious plate full of roasted garlic, speckled with olives and capers and herbs. It’s also perfectly easy to make at home, and it’s as simple as it’s acronym suggests. Basically, put some garlic heads in a pan with some olive oil and herbs and capers, cover and roast for about an hour. That’s all, after it’s cooled you can add some olives if you like, and then you get out your baguette and go to work. Dip the bread in the olive oil, use a knife to spread the soft warm garlic over your bread, or fish an olive out with your fingers. Oh, and have you ever had a fried caper? Boy, you’re in for a treat because capers fry up into crunchy, salty explosions of flavor. This was actually a result of a mistake, I’m pretty sure the restaurant adds both capers and olives after roasting, but I accidentally put them in before, the crunchy capers were a delight, the olives not so much.


GOOP, or if you prefer roasted garlic plate, is a great thing for entertaining, not only because it is easy and delicious, but also because it needs a good bit of time to cool down (don’t want to burn anyone with hot oil now). So, toss it in the oven several hours before your guests are going to arrive, then put it on the back burner while you run around for a half hour hoping your guests don’t knock on the door before you’ve gotten dressed. I recommend one head of garlic per person, because people really devour the stuff. I actually love to make this on a night when I just don’t feel like fixing dinner, just a good baguette, maybe some wedges of cheese or fruit, a movie, and a lot of roasted garlic. It’s just the kind of quiet, simple pleasure that I think my grandfather would have approved of.


G.O.O.P. (Favorite Roasted Garlic Plate)
Roasting garlic turns it's flavor soft and mellow and perfect for enjoying on it's own. Any leftover oil can be filtered and reserved. Serves 4.

4-6 heads garlic
1 1/2 cups olive oil
4 sprigs thyme or rosemary
salt and pepper
1 tbl extra-large capers
mixed olives, optional
baguette or country-style bread for serving

1. Preheat the oven to 300 F. Cut the garlic through the equator to that the tips of the cloves are exposed, discard top bits. Pour the olive oil into a small roasting dish. Add the salt, pepper, thyme, and capers to the oil. Nestle the garlic cut-side down in the dish and cover tightly with foil.
2. Roast the garlic for 45-50 minutes, until the bottoms are well browned and the garlic is soft. Set aside to cool for at least 20 minutes (important! the oil is hot!).
3. To serve: add the olives, if using, and turn the garlic cut side up. Dip your bread in the oil, and scoop out garlic cloves and spread on bread with capers, munch on olives, etc.

26 April 2007

Why I Live At The P.O.


Two people meet, they fall in love, they share a wonderful summer together, and then they are forced to part. It's a typical love story, one echoed over and over in literature and clichéed in summer romances. My own love story is much the same, with one slight variation: we met, we fell in love, were forced to return to our separate cities, and then the packages began.


My mother instilled in me a love of the postal system: she is one of the few people I know who still sends handwritten letters; traveling in southern France one summer, we stopped at the local post office of each tiny town, sometimes to send a postcard or buy stamps, often with no particular purpose in mind. Now, my mother and I exchange postcards constantly, often with nothing written on the back other than the address, a visual way of saying hello.

My boyfriend and I have lived a short plane hop apart and with as little as a few tangled inches of sheets and as much as 5,663 miles between us. When you love someone that much, you count the miles, the minutes, the inches. We have amassed cell phone minutes and Skype bills and frequent flier miles, and peppered the post with letters and packages.


As a girl that loves to bake, I found my perfect excuse, wrapping up boxes of my mom's stellar chocolate chip cookie recipe, baking macaroons late at night. I nibble at edges, sneak a cookie or two, and then quickly wrap them for mailing lest I pilfer the whole batch. Concerned I might be damaging his glycemic level, I have even made crackers and baked breads, if I could have made and mailed a curry, I would have. I won't pretend every confection was perfect, he has been victim to my baking experiments, low-fat baked goods that probably didn't travel well, but each has been stirred with love.

There were lessons along the way, explaining to my London-born companion what a praline was, about eating them every summer in the market in Charleston, about the low-country cuisine of my youth. Those sugary pecan confections were a hit, even the little crumbly bits at the bottom of the tin, and the parts I scraped out of the pan and crunched from the spoon. There have been lessons of other kinds as well, that distance can be surmounted by dedication, but also that distance can be difficult, and that a box of cookies can't solve everything.


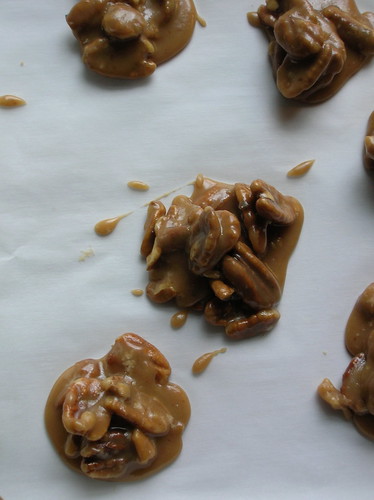
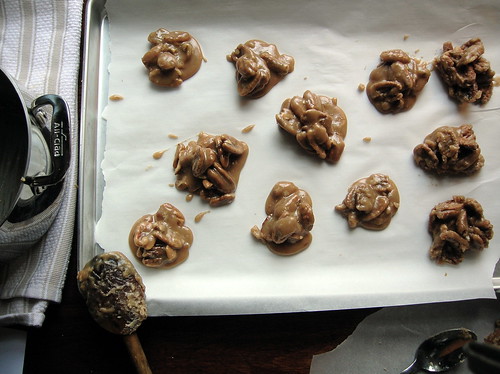
Pecan Pralines
These wonderful confections may take a little practice to get right, but even the not-so-perfect ones will still taste great. Some people prefer to add all the pecans at the end but I like to add half of them at the beginning, so they get a nice toasty flavor without over-crowding the pan.

3 cups brown sugar
2 cups pecan halves
1 cup buttermilk or whole milk
4 tbl butter
1 tsp salt
1 tbl vanilla
special equipment: candy thermometer

1. Line 2 baking sheets or a work surface with parchment or wax paper. Get two large metal spoons and rub them with butter or oil to grease.
2. Place the sugar, buttermilk, butter, salt, and half of the pecans in a medium-sized heavy duty sauce pan. Place over medium heat and stir so that the sugar dissolves. Bring to a boil and cook over medium-high heat until the mixture just reaches 236 F, about 15 minutes.
3. Remove the pan from the heat, add the vanilla and remaining pecans, and stir the mixture rapidly until it just begins to lose its shine, only about one minute. Working very quickly, use the two greased spoons to dollop out pralines onto the parchment. Don't worry if it seems runny at first, the mixture will begin to set very quickly. It's better to start sooner and have a runny one at first then risk having them harden in the pan.
4. Let sit until firm, store in an air-tight container at room temperature.

Note: Inevitably, your last few pralines might be less then pretty, but they'll still taste good. There will probably be some stray sugary pecan bits stuck to the pan, these are excellent crumbled over vanilla ice cream. In the unfortunate event your mixture hardens very quickly, you can pass off the nuts simply as sugared pecans.
__