Showing posts with label Personal Favorites. Show all posts

31 July 2011

Frozen Yogurt with Sour Cherry Compote

DSC_0023
The title of this post should really be, "the easiest thing you will make all summer." Because it is. I have a thing for frozen yogurt, I always have. It's cold, it's tangy, it's light, and it satisfies my continual obsession with ice cream. The proliferation of frozen yogurt places in the U.S. (Sweetgreen, Yogenfruz, Pinkberry, etc) is great in my book because the frozen yogurt is tart and tangy and not overly sweet. There is one such place between my house and my yoga studio, and it taunts me every time I walk past, trudging home sweaty and tired. I have a rule limiting myself to one visit per week.

A few weeks ago I made the vanilla ice cream from David Leibovitz's ice cream book. (PS- For ice cream makers, this is the best ice cream recipe, and it even stays perfectly in the fridge for weeks without getting icy or anything, virtually unheard of in the land of homemade ice cream). Anyway, as I'm flipping though the book I alight (alighted? alot? ugh, you know what I mean) upon a recipe for tangy frozen yogurt. The recipe said stir together yogurt and sugar, process though ice cream machine.

DSC_0017

With some amount of skepticism as to the simplicity of this endeavor, I whipped up a batch. The unfrozen mixture tasted exactly as delicious as I'd hoped it would. Surely, I thought, it couldn't be this easy? But it was, delicious, homemade frozen yogurt in literally a matter of minutes. My only qualm is that it does get rock hard and icy in the freezer after a few days, which is good news for my local frozen yogurt shop, because I'll still be keeping them in business.

P.S. Ramadan Kareem to all those observing!


DSC_0018


Frozen Yogurt

It's optional if you want to add a splash of vanilla extract or other flavoring (Cointreau, orange flower water, almond extract, etc). I used good quality low-fat local yogurt for this. You can make a richer version by using thick Greek yogurt, but really whatever kind of yogurt you'd like, so long as it's plain, will work.

3 cups plain yogurt, cold
3/4 cup sugar

1. Stir together yogurt and sugar. Process through an ice cream maker according to the manufacturer's instructions. Transfer to the freezer to harden for about 1 hour. Best served fresh.

Sour Cherry Compote
1 1/2 cups pitted sour cherries
1/2 cup sugar
1/4 cup water

1. Combine in a saucepan. Boil until mixture is thick and syrupy and cherries have collapsed. Set aside to cool.

23 November 2008

Pan-Roasted Brussels Sprouts

I have a problem. I really like brussels sprouts. I happily eat them, and them alone, for dinner. I like them a multitude of ways, finely shredded and sauteed, braised with bacon, roasted in the oven, even just plain boiled (!). In the winter I eat them so often it's become a household joke. I get excited when I see them in the markets for the first time in the fall, and sad when they disappear in the spring (no matter how much I love brussels sprouts, I'm an avowed seasonal eater).

Poor sprouts, they're so maligned. My friend hates them because her mother always referred to them as "little brains." Bitter when not properly handled and terribly mushy when overcooked, it's easy to go wrong with brussels sprouts. But when right, they are oh-so-good. The best brussels sprouts I've ever had are the teeny-tiny baby ones they sell at Citarella in New York, each one the size of a coin, you can roast them whole and they are almost sweetly vegetal.

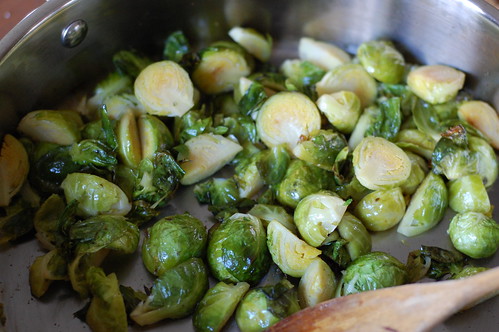
That taught me a good lesson about brussels sprouts, pick out the small ones and halve or quarter the larger ones so that they cook quickly without being bitter or over-cooked. My favorite way to cook brussels is to pan roast them: start on the stove-top and then finish them in the oven. These will be on our Thanksgiving table and if they aren't on yours, you've got a long season left to find a time for them.

Pan-Roasted Brussel Sprouts
By all means, saute a little bacon along with the shallot if you want to gild the lily. The brussels sprouts should be just tender in their centers when done (check with a knife tip), and I actually like it when some of the outer edges are crispy deep-brown-black crunchy savory perfection (the above picture, while they were delicious, weren't quite brown enough for my taste).

1 shallot, chopped
2 tablespoons vinegar or lemon juice
1/2 teaspoon (a sprinkling) of sugar
a medium bag of brussels sprouts, larger ones halved or quartered
salt and pepper to taste

1. Preheat the oven to 400 degrees F. In a large oven-proof skillet, heat a splash of olive oil. Add the shallot and cook until soft and translucent. Add the brussels sprouts and saute until the begin to brown on the edges - golden brown is good, but not completely done. Deglaze the pan with the vinegar, scraping up any brown bits, and sprinkle the sugar over, stirring so it melts. Season with salt
2. Transfer the pan to the oven to finish cooking. Check after 5-7 minutes, shaking the pan. Continue roasting, stirring every five minutes, until the brussels sprouts are cooked through and the edges are well browned (some of the stray leaves may blacken, that's totally fine). Check for seasoning, serve.

19 July 2008

Caramel Cake

Last year I told you all about the cake so good that I cannot celebrate my birthday, almost every birthday of my entire life, without it. And while that carrot cake is still irreplaceable, why have one cake when you can have a big party and two cakes on your birthday? It sure sounds good to me.

In fact, you could go as far as to say that the whole party was an excuse for me to cook, and in particular to bake two cakes. And not just any cake, but this cake, this caramel cake.


Caramel cake has long been an object of desire in my family, in South Carolina we look forward to the local 12-layer version, and in Tennessee we come home with Driver's Burnt Sugar cake. I've made a few attempts at caramel cake in the past, however I find the 12-layer version (like this) a bit too much like candy for my taste, not enough cake and too much sugary icing. Other versions involve just plain cake frosted with caramel icing, which doesn't have enough deep caramel flavor for me. So for a while now I scrounged caramel cake recipes, combining notes and coming up with a recipe that I thought would meet my caramel cake dreams.

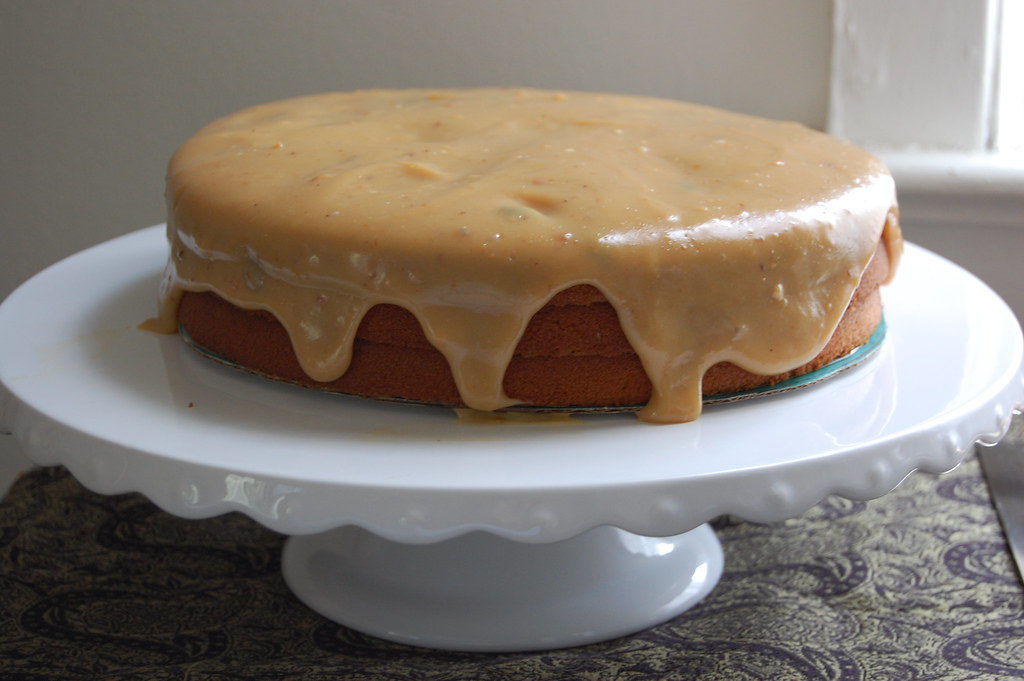
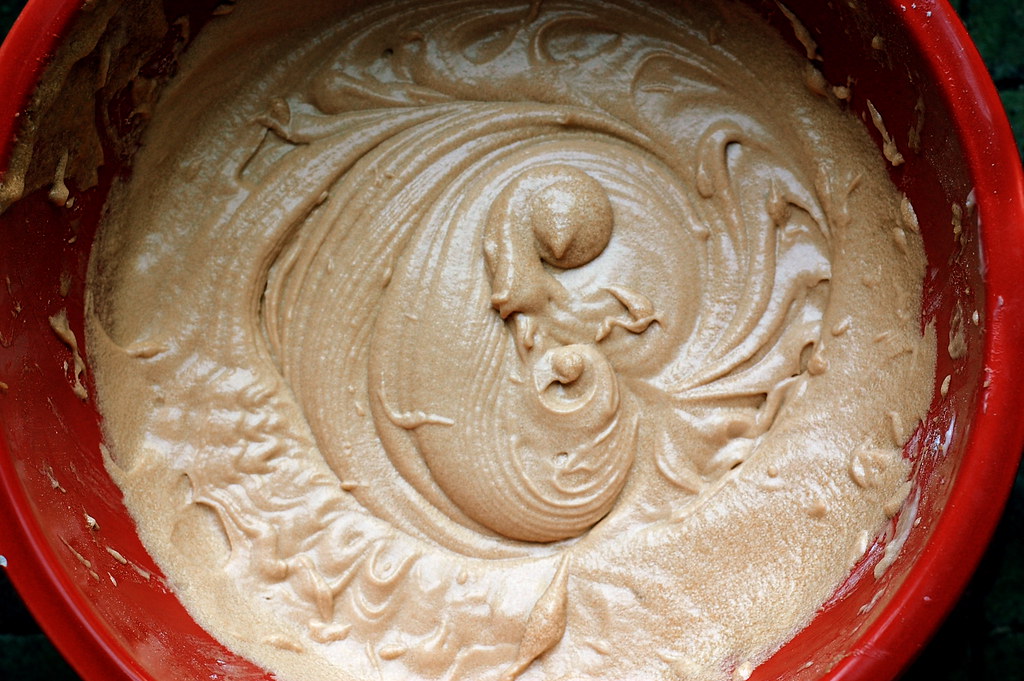
I may be biased, considering I'm eating a piece of this caramel cake as I type, but I think this is one of the best cakes I've made, ever, ever, ever. First of all, it incorporates caramel syrup into the cake itself, so it's a true caramel cake, and it's got just enough of that sweet-crackly burnt sugar icing that I love. But most of all, I think this is the most perfectly-moist crumbed cake I've had. I actually got nervous as I was typing up the recipe, wanting to make sure I copied my stained scribbled notes exactly right, so that I could record this one for all the future caramel cakes to come.

Caramel Cake
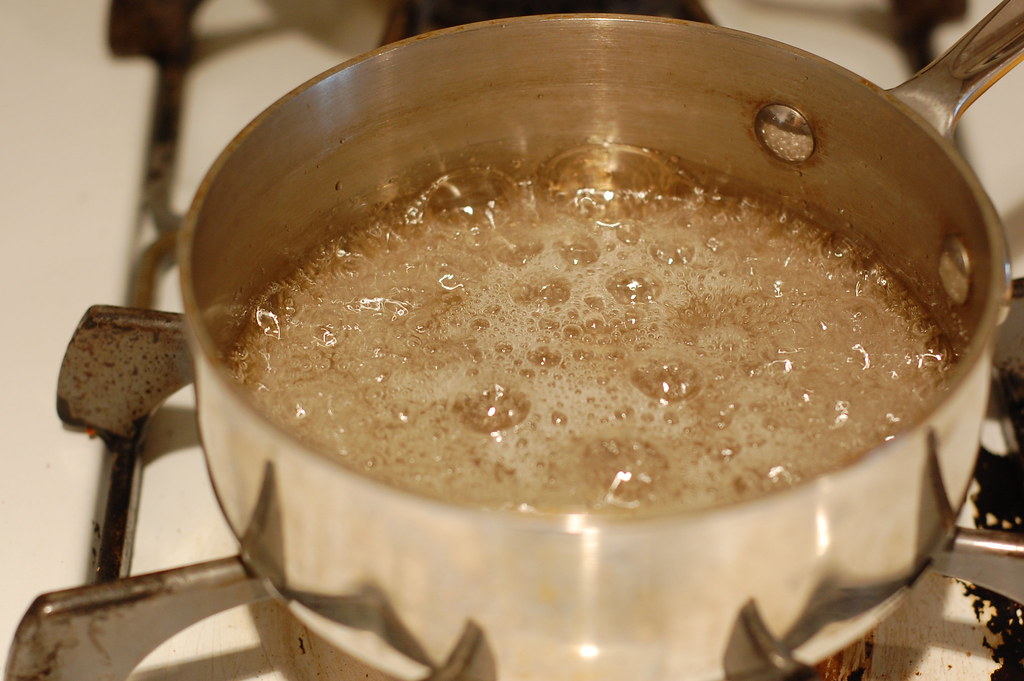
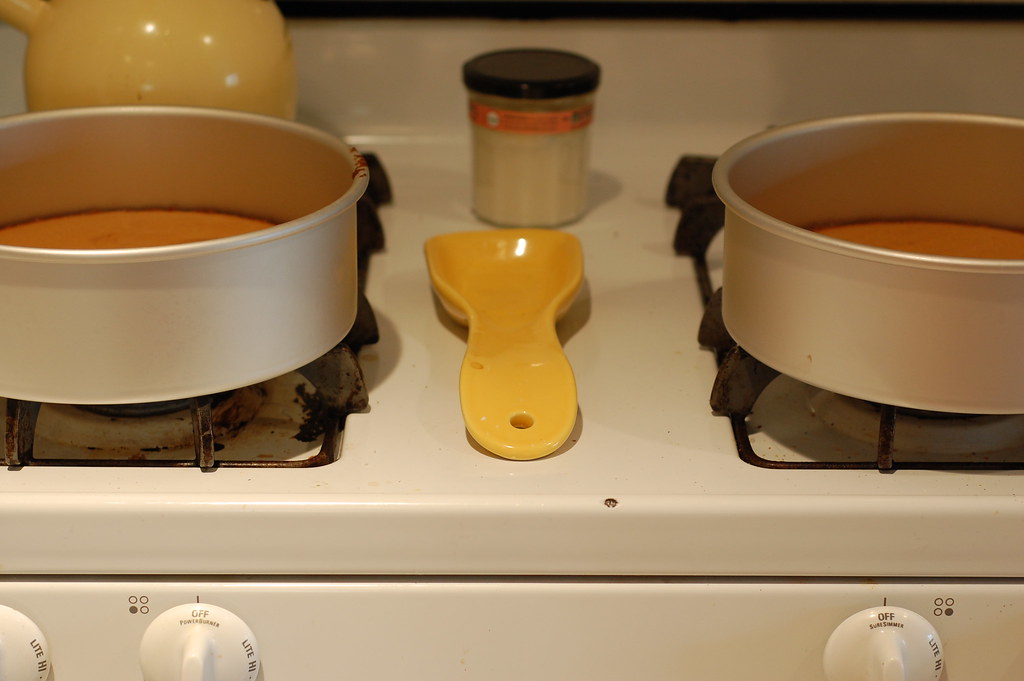
Don't be afraid of the caramel in the first step of this recipe, it's very easy and only requires that you watch the pan closely as it boils. I suppose it would be logical to make extra caramel syrup for adhering the cake layers, but I never remember to, so I simply assemble the cake layers with a few spoonfuls of maple syrup that I have on hand. Keep in mind these cakes don't rise very much, so don't be surprised.

for caramel syrup:
1 cup sugar plus 1/2 cup water
1/4 cup water for stopping

for cake:
14 tablespoons (7 oz) unsalted butter
1 3/4 cups light brown sugar
3/4 teaspoon salt
1/2 cup caramel syrup (from above)
3 eggs
1 teaspoon vanilla extract
3 cups all purpose flour
1 teaspoon baking powder
1 1/2 cups buttermilk

for assembly:
4 tablespoons maple syrup or caramel syrup

for glaze:
1 1/2 cups heavy cream
3/4 cup light brown sugar
1 tablespoon corn syrup
1 teaspoon vanilla
pinch salt

1. Make caramel syrup: Place the sugar and water in a saucepan and bring to a boil, have the additional 1/4 cup water ready on the side. Boil the syrup, watching closely, until it turns dark amber. Remove the pan from the heat and add the remaining water to "stop" the caramel. Stir the mixture with a fork until it comes together, then set aside to cool to room temperature.

2. Make cake: Preheat oven to 350 F, grease and flour 3 9-inch cake pans. In a bowl cream the butter until smooth, then cream in the brown sugar and salt until the mixture is light and fluffy. Stir in the caramel syrup. Beat in the eggs, one at a time, and then the vanilla, until very smooth and combined. Sift together the flour and baking powder. Add the flour in three additions, alternating with the buttermilk, to make a smooth cake batter. Divide cake batter among prepared pans. Bake in the center of the oven (rotating pans halfway through), for 30 minutes, or until firm, golden, and the sides pull away from the edge of the pan. Set aside to cool.

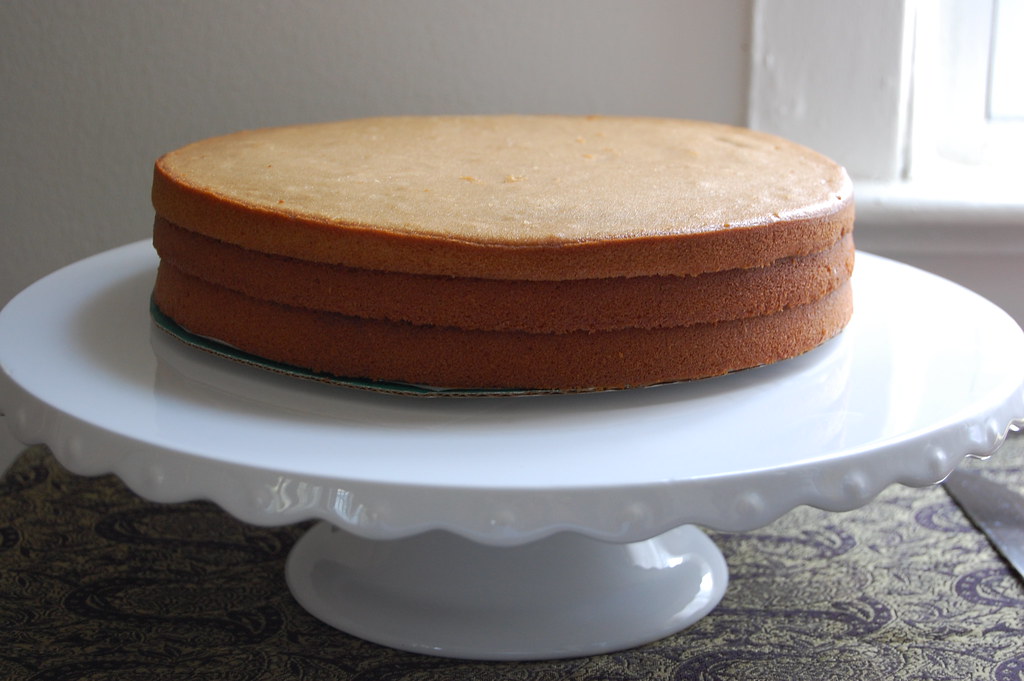
3. On a cake plate, stack the cake layers, spreading 2 tablespoons maple syrup or caramel syrup between the layers so that they stick together. Press down firmly (at this point, the cake can be triple-wrapped in plastic wrap and frozen for up to one month, or simply covered with plastic wrap and refrigerated overnight).

4. Glaze cake: Combine cream, brown sugar, corn syrup, and salt in a saucepan. Boil the mixture until it reaches 235 F, or soft-ball stage. Remove the pan from the heat and add the vanilla. Give the mixture several rapid stirs, then quickly pour it over the cake before the glaze hardens.

09 July 2008

Eggplant Fetteh


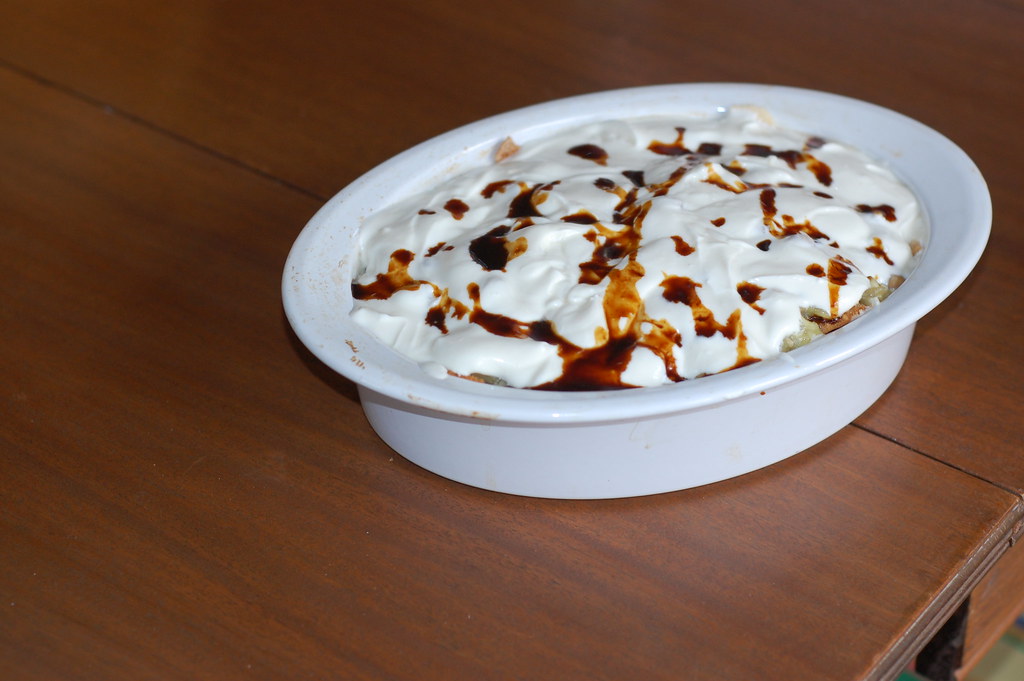
Ah-he-hem, where were we now? I hope you all had a nice holiday, with fireworks and plenty of grilling. Last time, we talked a little about one of my favorite dishes of all time, fetteh. I gave a basic recipe for the Middle Eastern combination of yogurt, chickpeas, and pita bread, but now it's time to delve a bit more into the dish fetteh, and try one of my favorite variations of fetteh with eggplant and pomegranate molasses.

While the history of fetteh is undocumented, it likely finds its roots in the ancient Middle Eastern dish tharida. Food historians Clifford Wright and Charles Perry have written that tharida (from the word tharada, to crumble bread into broth) involves bread moistened with stock and various meats, often layered with legumes and vegetables. Tharida historically included eggs rather than the yogurt used in fetteh. Today tharida no longer exists but fetteh is popular throughout the Arab world, and shops selling fetteh can be found on nearly every street of Damascus and across Syria, Lebanon, and Jordan.

The word fetteh means to crumble, and it comes from the crumbled pita pieces used to make the dish. I think there's a pantheon of great dishes made from stale bread: pappa e pomodoro, ribollita, tostadas, stuffing, gazpacho, and I think fetteh gets a star in that walk of fame. It's a classic peasant dish made of leftovers and staples. I once saw "fetteh" translated as "Middle Eastern panade," and while not exactly accurate, it is an interesting comparison as both Mediterranean dishes rely on a layering of stale bread, dairy, broth, and legumes.

These days, we're more likely to make fetteh by toasting or frying the pita pieces instead of waiting for them to get stale, and there are a myriad of variations made rich with poached chicken or lamb, even a favorite rural version involving a sheep's hoof served on top (I was served it once, and I'll admit totally turned off by the jelly-like quality that comes from the gelatin in the hoof).

Here's where we'll get into fetteh technique a little, and like I said before, there are a million different ways to make fetteh. First, fetteh is served warm, but the whole dish is not heated or baked. Rather, the heat comes from the freshly toasted bread and steaming hot chickpeas. By the time you take the yogurt out of the fridge and stir up the yogurt mixture, it should have come to room temperature so that it doesn't cool the dish off too much. Second, the fetteh dish should melt into a cohesive-almost-stew-like consistency. I choose either a large pyrex bowl or casserole dish, and the key to the consistency is to drizzle a little of the chickpea liquid over the pita pieces to encourage them to warm and soften into the dish, without making them soggy. If you include meat in your fetteh, like poached chicken breasts or lamb, you can drizzle that nice flavorful stock over the bread.

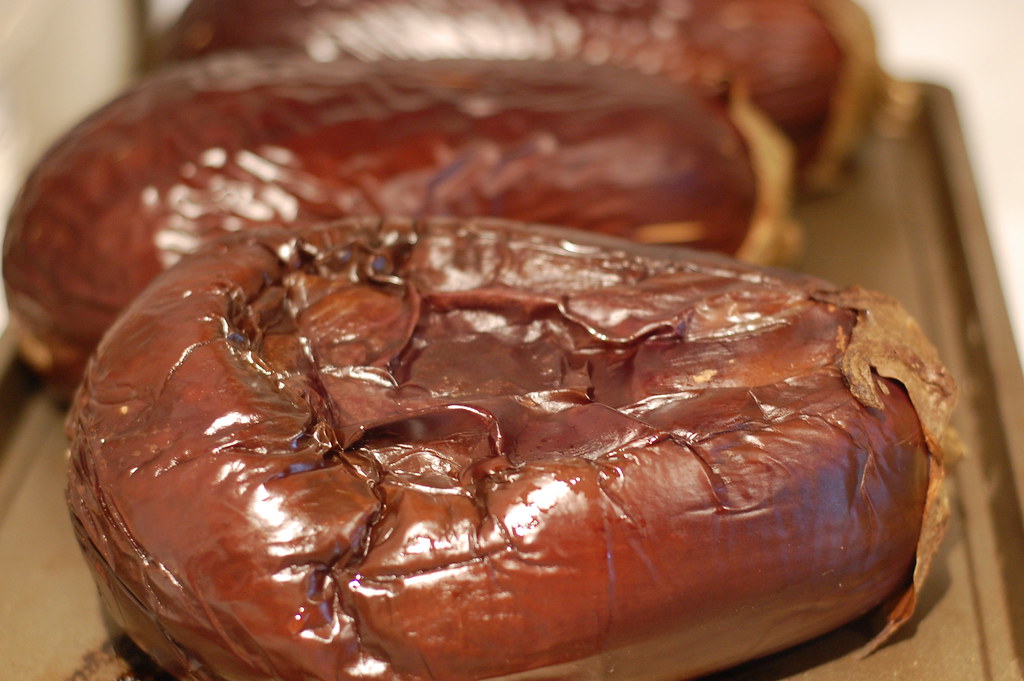
Fetteh should be served as soon as it's prepared, and purists will tell you it should never be kept as leftovers, when it gets soggy and cold, though I've eaten my fairshare of it (it's just too good to let go). That said, it's an easily portable dish, simply carry the components separately and assemble on site. My version of eggplant fetteh is admittedly a cheaters version. The fanciest versions start with lamb-stuffed eggplants (bathinjan mehshi), and other versions involve slow simmering of lamb and slicing and frying eggplants. Me, I usually skip the lamb altogether and just toss the eggplant in the oven to roast, then scoop out the flesh. It's a working girls short cut eggplant fetteh, but one I've made so many times I could do it in my sleep. And if you've taken the time to read all this about fetteh, well, you might need a short-cut too.

Eggplant, Yogurt and Bread Casserole with Pomegranate (Fetteh Bathinjan)
The amounts of yogurt may seem a bit odd, but I find buying the two containers of Greek-style and regular yogurt produces just the right amount and consistency for the yogurt sauce, without any odd leftovers.

1 very large or 2 medium sized pita breads
1 can chickpeas, or 1 1/2 cups cooked from scratch, with their liquid
2 medium sized eggplant
1 18-ounce container full fat Greek-style yogurt
1 6-ounce container regular plain yogurt
1 clove garlic
2 tablespoons lemon juice
2 tablespoons tahini
1/4 teaspoon salt
optional: shredded cooked lamb
pomegranate molasses, for drizzling
for garnish: pomegranate molasses, or pomegranate seeds, or pine nuts sauteed in butter

1. Preheat oven to 450F. Pierce eggplant with a knife in several places, place on a baking sheet and roast in the oven until tender and collapsed, about 45 minutes.
2. Meanwhile, separate the pita breads in half and toast in the oven until golden brown and firm (watch carefully that they don't burn). Break pita into approximately 1-2 inch pieces and set aside.
3. In the bottom of a large bowl, smash the garlic clove with the salt with a fork until the garlic is pulpy. Add the lemon juice and tahini and stir to combine. Stir in both containers of yogurt.
4. Empty chickpeas with their liquid into a pan and bring to a simmer. Simmer chickpeas until they are tender and smush easily between your fingers, this often takes as long as 20 minutes.
5. When the eggplant has cooled slightly, slit open the eggplant and scoop out the flesh into a bowl, discarding the skin. Slightly crush the eggplant flesh with a fork.
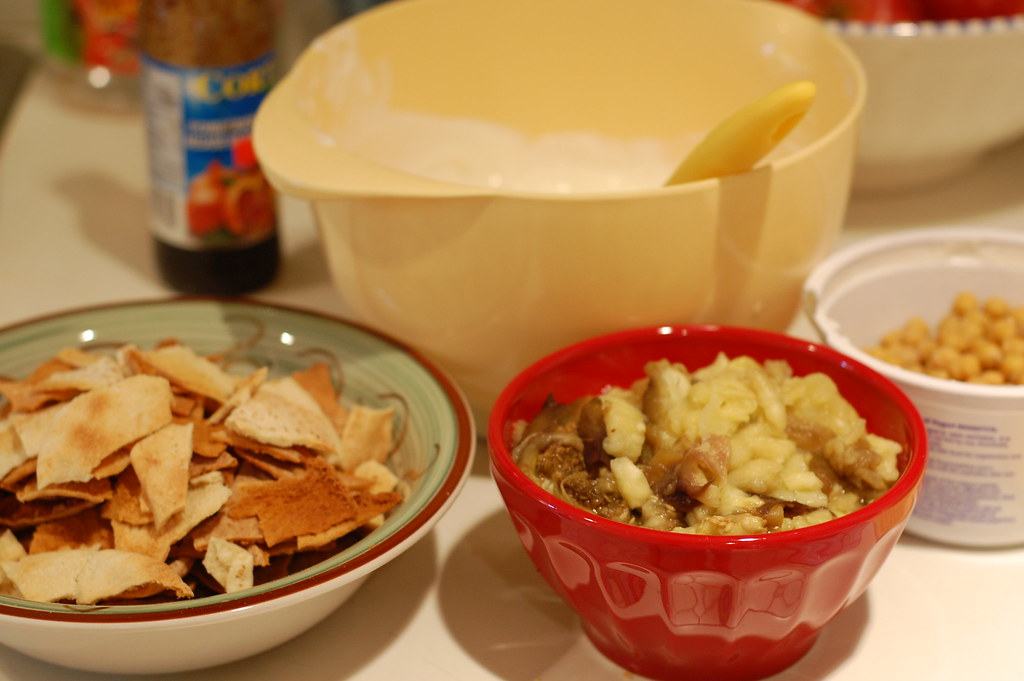
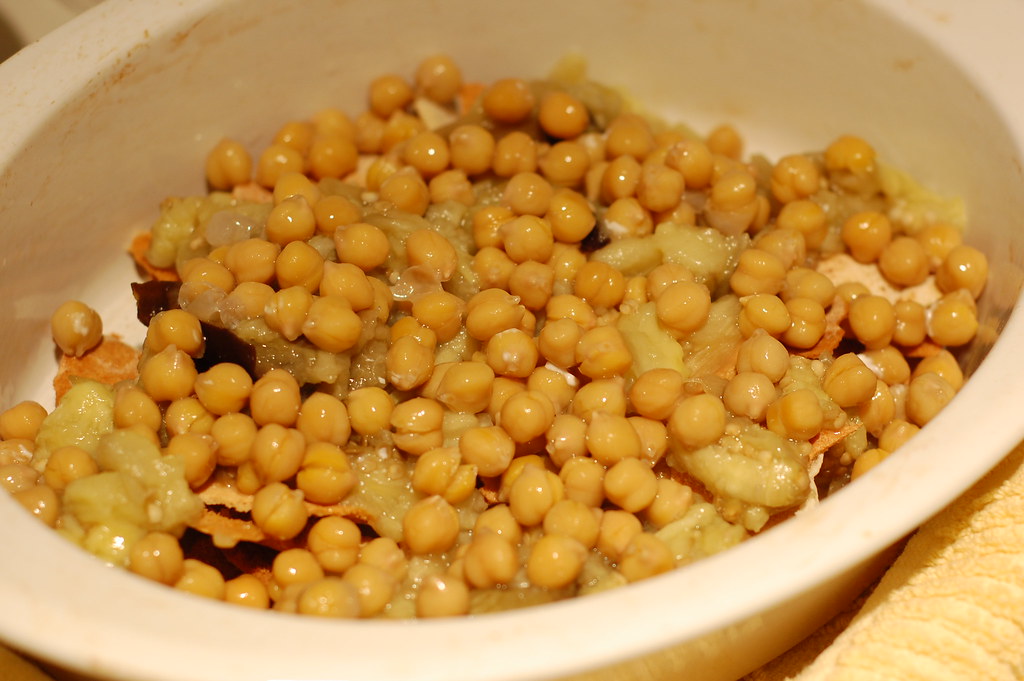
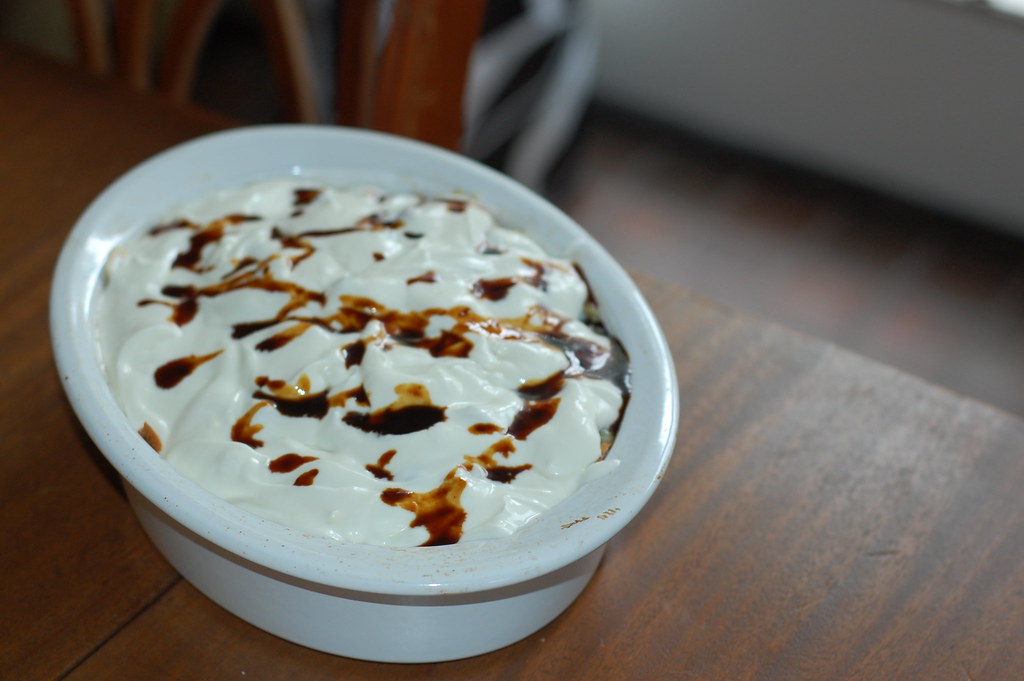
6. Get out a casserole dish or large pyrex bowl. Spread some of the pita pieces over the bottom of the dish, ladle some of the chickpeas over top, along with some of the chickpea liquid so that the liquid softens the bread. Top with some of the eggplant. Drizzle yogurt mixture over top so that the surface is completely covered. Drizzle just a tiny bit of pomegranate molasses over top. Repeat layering (I find a casserole only needs two layers, while a bowl usually three), finishing with the yogurt over top. Finish with a drizzle of pomegranate molasses, or pomegranate seeds or pine nuts. Serve immediately.

30 June 2008

Fetteh and Friends

Ask any ex-pat living in Syria (or Lebanon, Jordan, etc.) what they would miss the most about the Middle East and the answer will always be “the food.” We would gladly leave behind the dusty weather or the irreliable electricity, and though we may love our friends, it is the food and the culture around Middle Eastern food which will put that far-away dreamy look in our eyes.

Ah, the food, we reminisce, but which foods? Immediately, the list-making begins: wonderfully smooth hummus, green lemony taboule, the freshest pita breads, salty cheeses, maqloubeh, and of course, the baklava. The baklava that we will cart boxes of back to our homes and the zaatar spices and rose jam we tuck into our suitcases. And just when we think we are all packed and ready to go, a friend will come by with a box of beautifully arranged dates, which we will cram into the last remaining centimeter of our carry-on, lest we starve on the long plane ride home.


“What I’ll miss most is the stuff I just can’t get back home, like that greasy bowl of foul,” said my Brooklyn-born friend Alex, whose small frame belies a legendary appetite. Alex can regularly be found eating foul, a simple stew of brown fava beans drowned in oil and lemon juice, in the little eateries in Saahat Bab Touma. These are the kind of places with only three items on their menus, all variations on stewed beans. I like the Damascene specialty of beans in hummus sauce- hummus has been thinned and warmed to make a sauce for the foul beans, topped with a showering of the reddest tomatoes, to be scooped up with pita bread, with pickles and hot glasses of tea on the side.

It occurs to me that what we will miss is not just the food, but the culture of food. In a place where so much of the society revolves around cooking and eating, the food serves as our cultural anchor. It’s going to the market and bargaining for vegetables, it’s eating everything in season, tucking into the little hummus shop for a quick lunch or sitting for hours over tea.


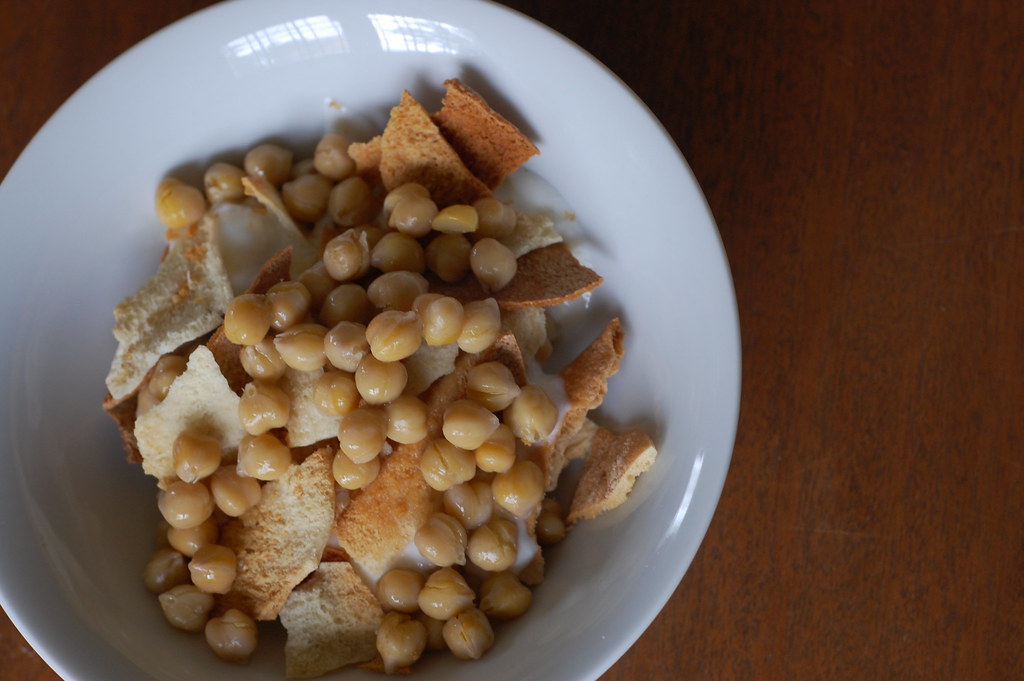
This is probably why I don’t make Middle Eastern food very often at home. Somehow, the same recipes, when prepared in a tiny New York apartment, just aren’t the same as the huge platters of beautifully arranged dishes, the hundreds of appetizers, the groups of friends. What I miss most is fetteh, a dish in which toasted pita bread and chickpeas are layered in a dish with a warm yogurt sauce to make a soft, thick stew. Served at breakfast or lunch, it is the ultimate comfort food and probably one of my all time favorite dishes. But what I really miss are the big glass bowls fetteh is served in, and Mahmoud standing over our office stove teaching me to make fetteh for the first time, and scooping it up with spoons with a group of good friends, the call to prayer and honking horns in the background. Sometimes I make it home for myself, but it won’t taste the same until I’m in the Middle East again.

There are as many versions of fetteh as there are cooks in the Middle East. Sometimes it's served in a wide flat tray, other times in deep glass bowls; some people fry the pita chips while others toast them; some add chicken, lamb, eggplant, and even rice. The simplest version, given below, always involves bread, yogurt, and chickpeas. Next time I'll give my recipe for one of my favorite versions of fetteh, and talk about the history of the dish, so stay tuned.


Fetteh (Chickpea, Yogurt, and Bread Casserole)
Fetteh is traditionally topped with a big slick of pine nuts sauteed in clarified butter, or with a douse of olive oil. However, the person who taught me to make fetteh often topped it with a huge showering of chopped tomatoes and parsley, and I prefer this slightly healthier version. Of course, if you cook the chickpeas from scratch all the better. Makes two-individual size bowls.

1 large thin pita bread
1 clove garlic
a squeeze of fresh lemon juice
12 ounces plain good quality plain yogurt, full fat or 2%, not fat free, at room temperature
1 can chickpeas
pinch of cumin
chopped tomatoes and parsley, for serving

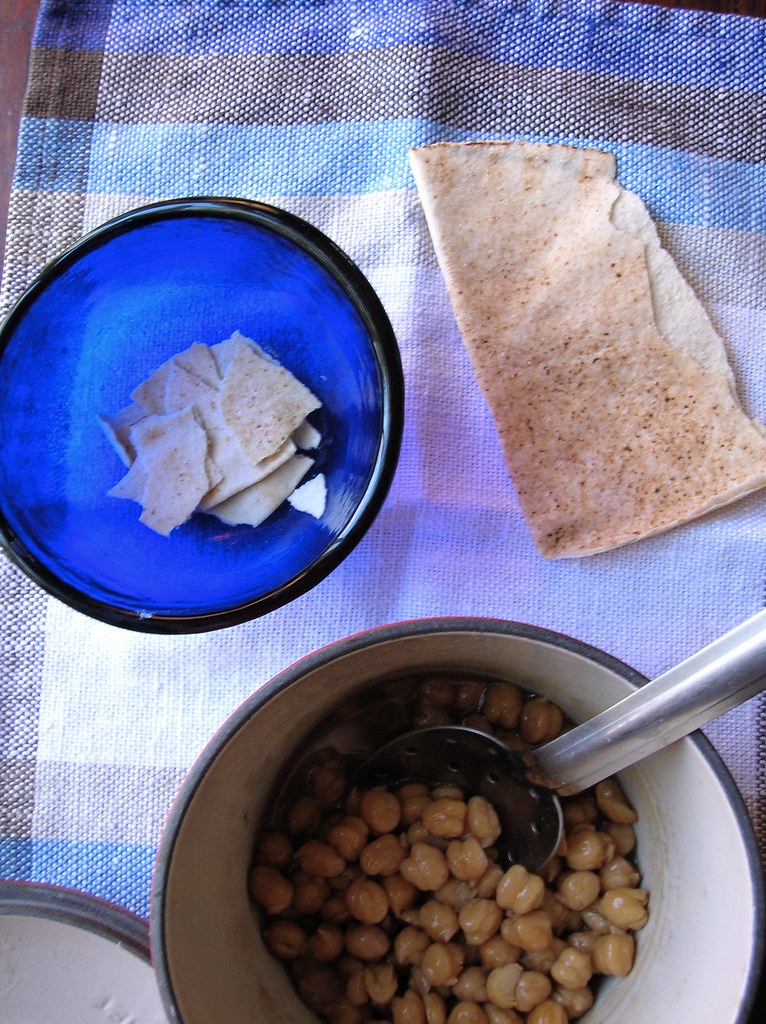
1. Preheat oven to 450 F. Seperate the pita bread in half and toast in the oven until golden brown and toasted, but not burned. Set aside until cool enough to handle, then break into bite-size pieces.
2. Meanwhile, empty chickpeas into a saucepan with their liquid and bring to a simmer. Cook chickpeas until completely tender- most canned chickpeas are too firm and I find they take about 15-20 minutes of simmering before they are tender enough to smush easily between your fingers.
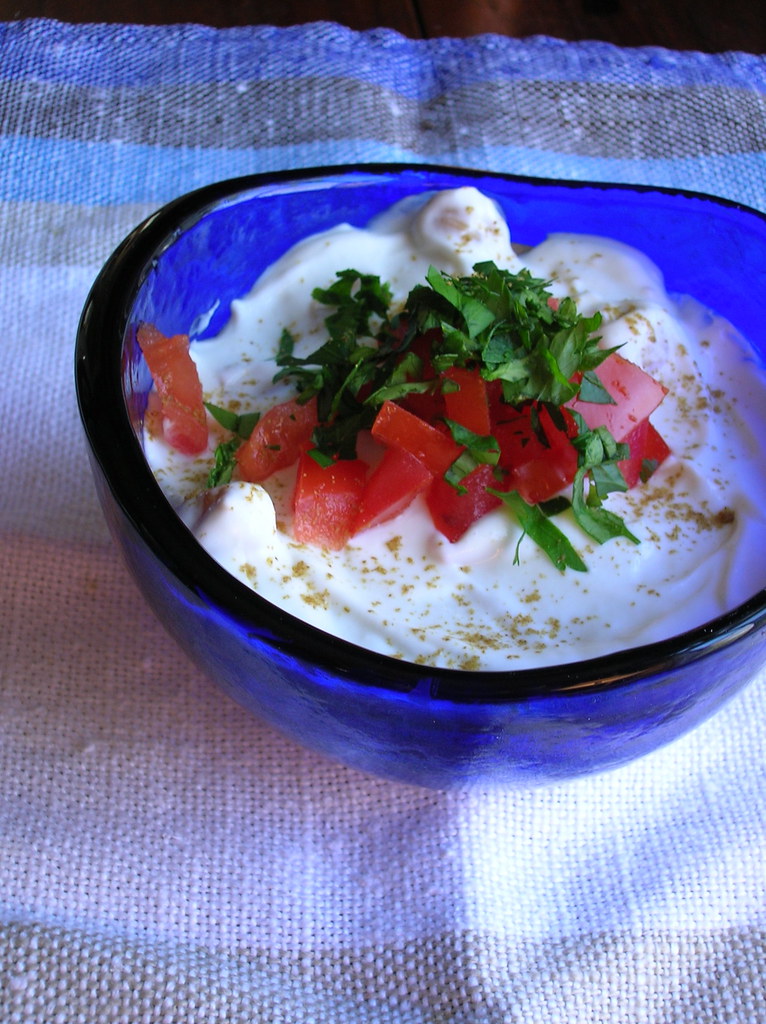
3. Place yogurt in a bowl. Crush garlic in a mortar and pestle or press garlic through a garlic press. Add the garlic to the yogurt along with a pinch of salt and a squeeze of lemon juice. Stir to combine. If your yogurt is on the thick side, add a touch of water to make your yogurt pourable consistency.
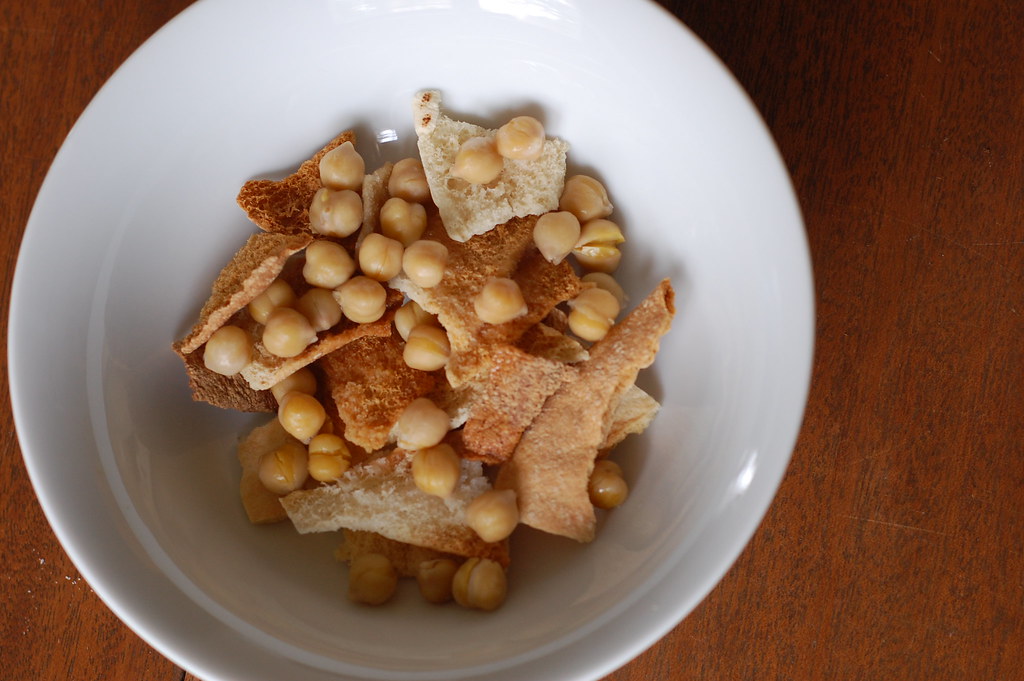
4. Divide half the crumbled pita between two individual-size bowls. Spoon half the chickpeas over the pita pieces, allowing a little of the warm chickpea liquid to soak the bread pieces. Pour half the yogurt mixture over the bread and chickpeas, sprinkle with a pinch of cumin. Repeat the layering in the bowls: bread, chickpeas, yogurt, pinch of cumin. Top with chopped tomatoes and parsley (or sauteed pine nuts, if you prefer). Serve immediately.

25 May 2008

Lemon-Chamomile Cream Pie

Last week I had one of those perfect Sundays. You know, the one where you go wander around the farmers market in the morning and then, on an impromptu shopping trip, find the pair of jeans that fit perfectly and are on sale for sixty percent off. I took one of my two new books and curled up in the back of the Georgetown Dean and Deluca, with a box of sushi and fifty pages of a wonderful novel, went for a walk in my favorite Smithsonian garden, and I didn't even mind getting caught in the rain on my way home. And then I made pie.

Except, about that pie. You see, I was entranced by a recent Martha Stewart Living feature on custard pies, and had my eye on a lemon-chamomile version that looked particularly spring-like. Except personal experience has taught me that Martha's recipes often fail, and even before I began I made a few adjustments. I reduced the custard quantities, realizing they were way too much for a normal-sized pie pan, and used only 3 chamomile tea bags instead of the 12 called for! I am quite sure the floral chamomile air would have quickly lost its charm with 12 tea bags. Unfortunately, I blithely followed Martha's instructions to add the lemon juice to the custard while it was still cooking, which I should have known would turn the mixture into a curdled mess. Despite my efforts to save it, the custard was beyond repair, and the following day I started the process all over again.

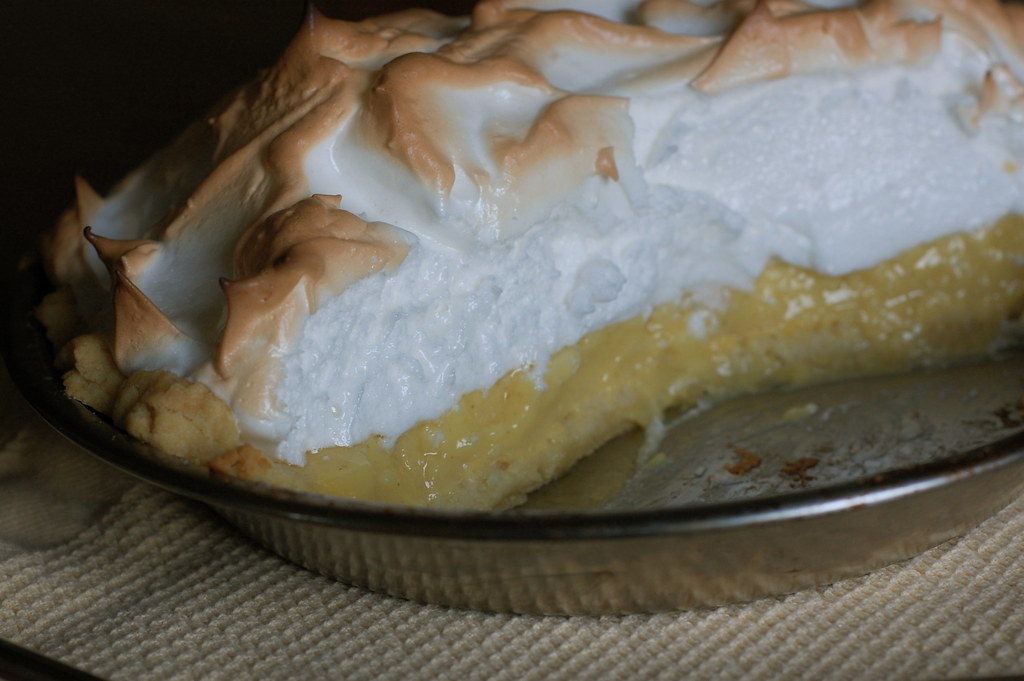
With a successful second custard, I wasn't willing to take any risks and went with my default favorite meringue for pies. This meringue has a cornstarch slurry mixed in, and the result is a meringue that stands up to the heat at a barbeque and lasts for days in the fridge without drooping or weeping. In short, why would you use anything else?

Despite the missteps and the fact that this pie took me three days to complete, the end result was wonderful. The crust is nubbly with cornmeal, thick and perfectly flaky. The filling is brightly lemony and the custard is just thick enough to hold up to being sliced but soft enough to droop all over your plate, almost making a sauce for the crunchy crust and billows of meringue. Hopefully next time (and there will be a next time) my perfect-Sunday pie will actually be completed before the following Wednesday!

Lemon-Chamomile Cream Pie
Though called a cream pie, there is no cream involved in this luscious custard-based concoction. The pudding-like filling and addition of chamomile make it much better than your average lemon-meringue pie.

cornmeal dough (recipe below)

2 1/4 cups whole milk
3 chamomile tea bags
3 tablespoons cornstarch
3/4 cup sugar
4 large egg yolks
1 tablespoon butter, cut into pieces
zest of 1 lemon
1/4 cup fresh lemon juice (from 1-2 lemons)

2 tbl sugar
1 tbl cornstarch
1/2 cup water
4 large egg whites, room temperature
1/4 tsp cream of tartar
1/3 cup sugar

1. For crust:On a lightly floured work surface, roll cornmeal dough to 1/4-inch thickness. Fit into a 9-inch pie dish. Trim edges, leaving a 1-inch overhang. Tuck overhang under dough so edges are flush with rim, and crimp edges. Lightly prick bottom of dough with a fork. Refrigerate for 30 minutes or freeze for 10.
2. Preheat oven to 375 degrees. Bake until edges begin to turn gold, about 18 minutes. Let cool completely on a wire rack.
3. For filling: Bring milk to a boil in a medium saucepan with the tea bags. Remove from heat, cover, and steep for 5 minutes. Press on tea bags to extract liquid. Discard tea bags.
4. Combine cornstarch and 3/4 cup sugar in a medium saucepan. Whisk in milk mixture. Set over medium-high heat, and cook, stirring constantly, until bubbling and thick, about 7 minutes total (about 2 minutes after it comes to a boil).
Whisk yolks in a medium bowl until combined. Pour in milk mixture in a slow, steady stream, whisking until completely incorporated. Return mixture to the saucepan. Cook over medium heat, stirring constantly, until it returns to a boil, 1 to 2 minutes.
5. Remove from heat, and stir in lemon zest. Add butter whisking until butter melts. Let custard cool in saucepan on a wire rack, whisking occasionally, for about 10 minutes. Stir in the lemon juice and taste for sweet/tart balance. Pour custard into cornmeal crust. Press plastic wrap directly on surface of custard. Refrigerate until custard filling is chilled and firm, at least 4 hours (or overnight).
6. For meringue: Preheat oven to 375F. In a small saucepan, whisk together sugar, cornstarch and water. Cook over medium heat, stirring constantly, until mixture is thick and becomes somewhat clear. Cool to room temperature (it will thicken).
7. In a medium bowl, beat egg whites and cream of tartar to soft peaks. Gradually beat in sugar, followed by the cooled cornstarch mixture (add in dollops with mixer on medium speed). Spread meringue over pie to cover filling completely, smooth with a spatula. Bake the pie in the center of the oven for 10-12 minutes, until meringue is nicely browned. Cool, then refrigerate before serving.

Cornmeal Dough
1 1/2 cups all-purpose flour
3/4 cup yellow cornmeal
1/2 teaspoon salt
1 teaspoon sugar
10 tablespoons (5 oz) cold unsalted butter, cut into small pieces
1/4 cup ice water

Pulse flour, cornmeal, salt, and sugar in a food processor to combine. Add butter, and process until mixture resembles coarse meal, about 10 seconds. With the machine running, add ice water in a slow, steady stream until dough just begins to hold together (no longer than 30 seconds). Shape dough into a disk. Wrap in plastic, and refrigerate until firm, at least 1 hour (or up to 2 days). (Dough can be frozen for up to 1 month; thaw in the refrigerator before using.)

03 May 2008

Dulce Danger

The first time I made dulce de leche I almost killed my mother. Really. I was busy cooking dinner and had recently finished a batch of the sweet milky caramel sauce, which was cooling on the counter. When my mum asked how she could help, I nodded towards the can and asked her to open it. Apparently, the can had not been cooling long enough, so when my mother punctured it with a can opener the boiling hot sauce went flying everywhere. Luckily, it just grazed my mother’s cheek and splattered all over the kitchen wall, leaving a bit of a mess but sparing any permanent eye damage.

Yes, for years I made dulce de leche by boiling an unopened can of sweetened condensed milk submersed in water. Add to my own experience, the countless stories of people whose boiling cans subsequently exploded, and you may be wondering why you should undertake this possibly life-threatening endeavor. But not to worry, I’ve actually found a faster and safer way of making dulce de leche using the oven, although I still think there’s nothing wrong with the can method. Most importantly, there’s the reward of the sauce itself, which I dare you not to eat by the spoonful.


As an Argentine, I feel obliged to point out that the authentic way of making dulce de leche is by slow-cooking milk and sugar, and though I’ve been meaning to try this method, I’m perfectly happy with the shortcut version. Though dulce de leche has made it into the vernacular in the U.S., it’s still not widely available (especially any decent brand), so chances are you’ll need to make your own. And if you are wondering what to do with your sauce, besides drizzle it on ice cream, spread it on toast, stir into coffee, or make bread pudding or cheesecake with it, well you make alfajores.

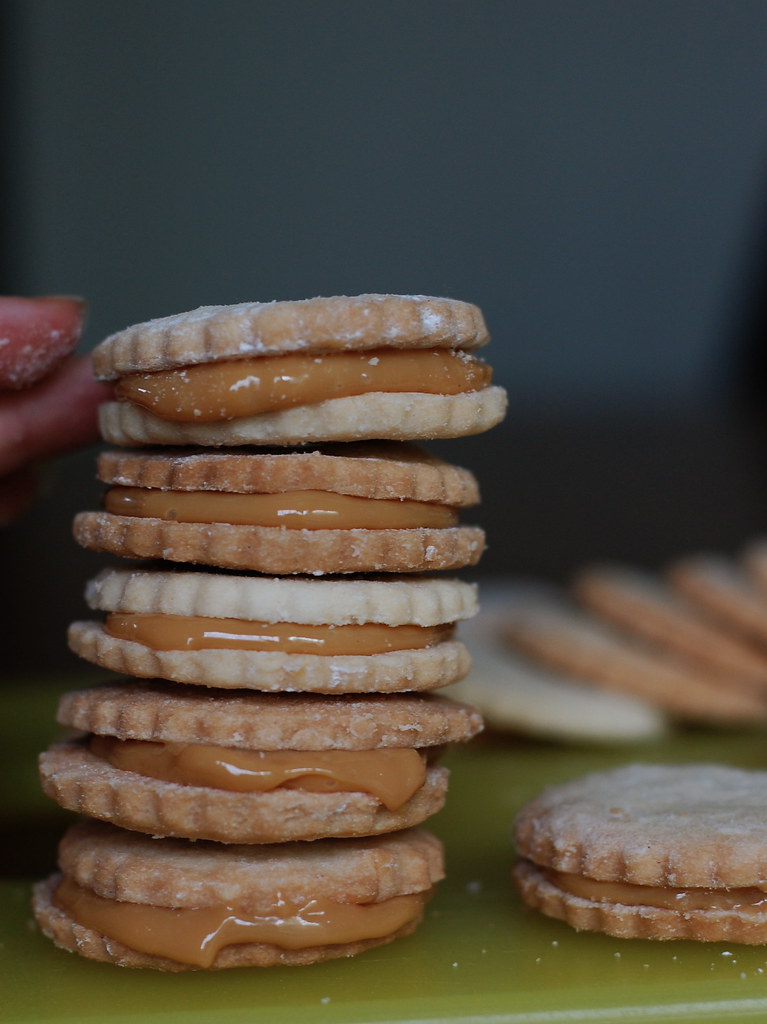
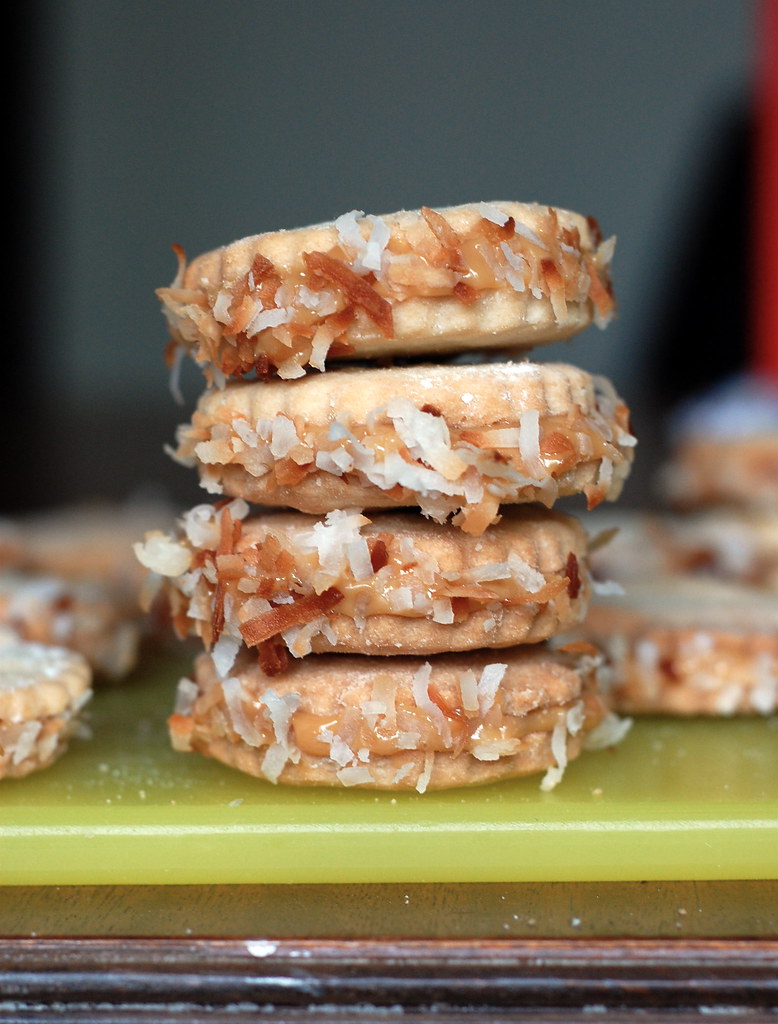
Alfajores are the quintessential Argentine sweet, the thing every homesick Argentine craves and every tourist carries home in yellow Havanna boxes. The basic version is a tender shortbread cookie sandwiched with dulce de leche, which can then be dressed up most often with a roll in coconut, though it can also be dipped in dark or white chocolate. In my mind, an alfajore is the queen of the sandwich cookie, the way the filling melts into the crisp crust, it’s parallel only the likes of the regal French macaron. I think the cookies are best after they’ve rested overnight, it gives the cookie and filling a chance to meld together, but I won’t blame you if you bite into one right away.


Alfajores (Caramel Sandwich Cookies)
Do not be alarmed by the amount of cornstarch in the shortbread, it’s what gives the cookies their tender texture. If you want to make the cookies on their own, as I often do, adding a bit of lemon zest to the mixture is a nice touch. Instead of rollling the edges in coconut, you can also dip the cookies in melted chocolate (dark or white), or simply leave them plain.

1 cup (1/2 lb.) butter, at room temperature
2/3 cup sugar
1 large egg + 1 egg yolk
2 tablespoons dark rum
1 teaspoon vanilla
2 cups all-purpose flour (plus more for rolling)
1 cup cornstarch
1 teaspoon baking powder

about 1 3/4 cups dulce de leche or cajeta (recipe follows)
about 1 cup sweetened flaked dried coconut, toasted

1. In a large bowl, with a mixer on medium speed, beat the butter and sugar until smooth. Add egg + yolk, rum, and vanilla and beat until well blended.
2. In a medium bowl, mix 2 cups flour, cornstarch, and baking powder. Stir into butter mixture, then beat until well blended. Divide dough in half, press each half into a disk, wrap in plastic wrap, and chill until firm, about 30 minutes.
3. Preheat oven to 350º F. Unwrap dough. On a lightly floured surface, with a floured rolling pin, roll one disk at a time to about 1/8 inch thick. With a floured, 2- to 3-inch round cutter, cut out cookies. Place about 1 inch apart on greased or lined baking sheets. Gather excess dough into a ball, reroll, and cut out remaining cookies. (I usually toast the coconut while I'm rolling out the cookies, just keep an eye so it doesn't burn.)
4. Bake until cookie edges just begin to brown, about 10 minutes. If baking two sheets at once in one oven, switch their positions halfway through baking. Let the cookies cool on sheets for 5 minutes, then use a spatula to transfer them to racks to cool completely.
5. Turn half the cooled cookies bottom side up and spread each with a heaping tablespoon dulce de leche (be generous). Top with remaining cookies. Place toasted coconut in a shallow bowl. Gently squeeze each sandwich until filling begins to ooze out sides, then roll edges in coconut. Cookies are best on the second day, they keep well for 2 weeks in an air-tight container at room temperature.

Dulce de Leche (adapted from David Lebovitz):

Preheat the oven to 425° F. Pour one can of sweetened condensed milk (not evaporated milk) into a glass pie plate or shallow baking dish. Stir in a few flecks of sea salt. Set the pie plate within a larger pan, such as a roasting pan, and add hot water until it reaches halfway up the side of the pie plate. Cover the pie plate snugly with aluminum foil and bake for 1 to 1¼ hours. (Check a few times during baking and add more water to the roasting pan as necessary, make sure the water is as high as the dulce de leche, otherwise the surface may burn). Once the Dulce de Leche is nicely browned and caramelized, remove from the oven and let cool. Once cool, whisk until smooth.

19 April 2008

Kubbe

If I could write a cookbook from the ground up, I'd want to travel all over the towns of Kurdistan, from the mountains of southern Turkey to the Tigris in Iraq to northern Iran, and collect their recipes. I want to know more about malthoum and kebab kishkash, about the wheat harvest in Mosul and mountain cheeses. This region is a great reminder that the borders of the modern Middle East were mainly drawn by arbitrary lines sketched on a map, and there are a lot of different ways to view the Middle East along ethnic, religious, and even culinary or linguistic lines.


My introduction to the diversity of this region came while living in Damascus, where I spent a good amount of time with a Christian family that hailed from Hasake and Qamishli, in the far northeastern corner of Syria. The Kurdish region stretches from it's western tip in Aleppo, Syria through Turkey, Iraq, and the it's eastern edge in Iran. Western media seems to paint this region simply as Kurdish, but in reality it's a fascinatingly beautiful part of the world that has long been home to a wide variety of ethnicities and religions: there's Armenians and Arabs, Yazidis and Zoroastrians, a large Christian population, including Assyrians and Chaldeans, and the region had a sizeable Jewish population before 1948. I had two Kurdish friends in Damascus who regularly conversed in Sorani and introduced me to colorful Kurdish textiles and fiercely flavored red pepper dip. We went to a concert of Kurdish music held at the French Embassy one evening (Kurdish music and gatherings are banned from public venues in Syria), and I saw old men cry at the joy of being able to share their beautiful songs.

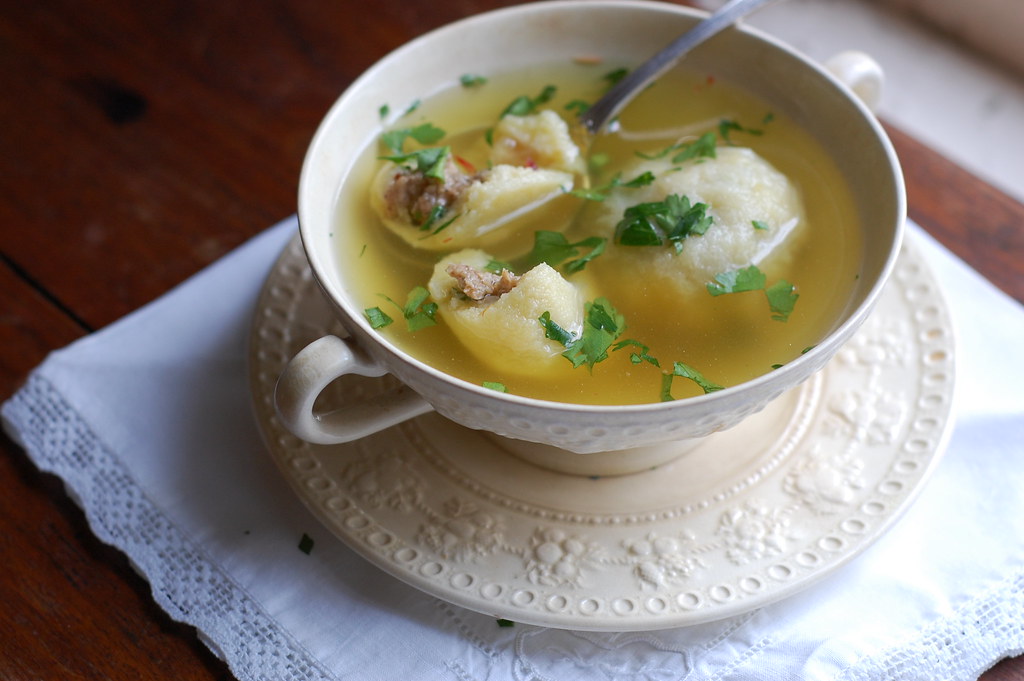
The cuisine of Kurdistan is rich with the influences of Arab, Armenian, and Persian cooking, and it's also terrifically unexplored. The most famous dish from this region is kubbe, a meat-stuffed dumpling poached in broth. As the name implies, kubbe is related to kibbe, the Middle Eastern meat and bulgur dumplings (or patties, or casserole, depending on the incarnation). Similarly, there are many variations of kubbe- some people make the dumpling shell with a mixture of bulgur and semolina, some use all semolina, others add some matzo meal or use ground rice. The broth always has a slight tart element to it but it can vary from a simple lemony chicken broth to a saffron broth to a tomato-tamarind broth favored in Iraq or even a plum-flavored soup in Iran.

Ever since I first made kubbe, kneading about 20 pounds of dough with two other women on the floor of a Damascene apartment, I've been collecting kubbe recipes and tips. These days I make an all semolina dough and stuff it with a lamb mixture brightly spiced with parsley, dried fruits and pine nuts. A homemade chicken stock with a good dose of fresh lemon juice and a pinch of saffron (if I'm feeling plush) makes the base of the soup. You don't have to have any interest in Kurdish cuisine to love kubbe, there's something universally appealing about these dumplings in warm lemony broth.

Kubbe is very popular in Israel, where it was brought by Jewish immigrants from northern Iraq, it's similarity to matzo ball soup makes it a popular choice for Passover, which begins tonight. If you want to make it for Passover, use matzo meal in the dough, as semolina is hametz.

Kubbe (Meat-Stuffed Semolina Dumplings in Broth)
Though the dough can seem difficult to work with at first, in reality it's quite forgiving, if it tears merely patch it with another bit of dough. I've made this for vegetarians using vegetarian sausage and vegetable broth (heresy, I know!) and even avowed carnivores couldn't tell the difference. Makes about 4 main-coarse servings.

for the dough:
2 cups fine semolina (semolina flour, often found in the pasta aisle, works perfectly)
1/4 cup flour
pinch salt
1 cup hot water
for the filling:
1 small onion or shallot, diced
1 lb lean ground lamb (you can also use beef)
1/4 teaspoon each cinnamon, allspice
1/4 cup chopped dried cherries, currants, or cranberries
1/2 cup chopped parsley
2 heaping tablespoons pine nuts or chopped slivered almonds
for the broth:
6 cups good homemade chicken stock
1/2 cup fresh lemon juice
a pinch of saffron
salt, a tiny bit of red pepper to taste
chopped parsley for serving

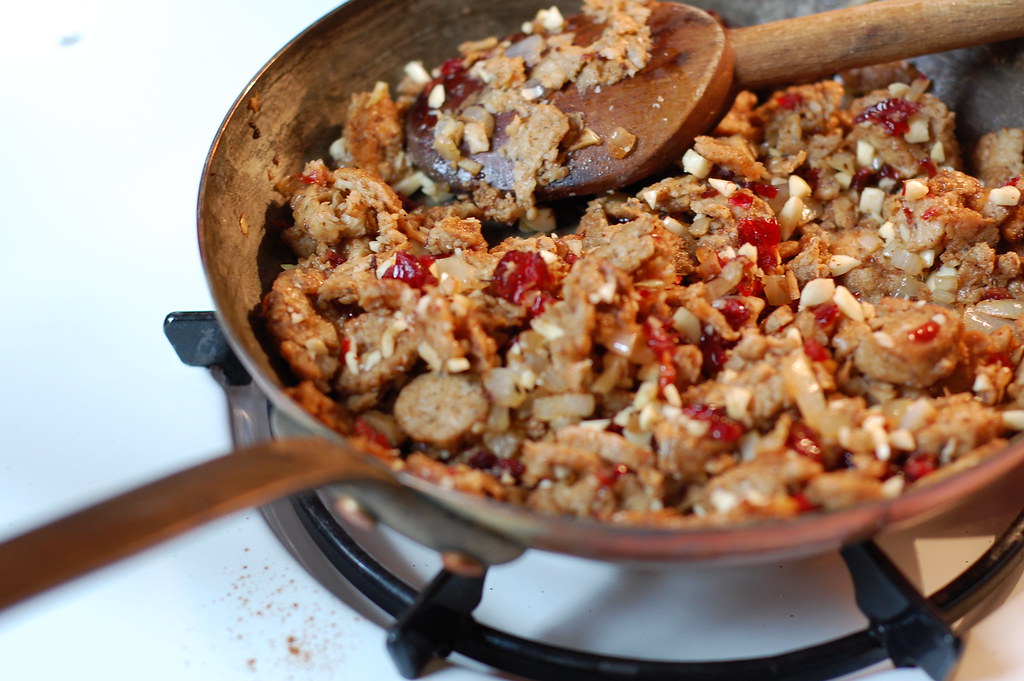
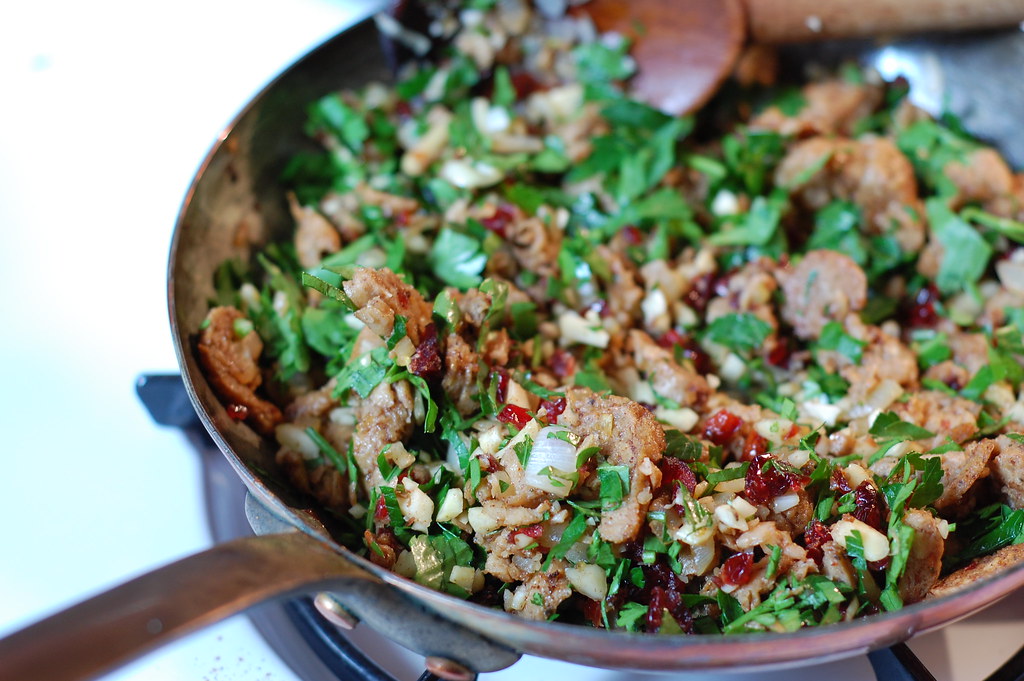
1. Make filling: Heat some olive oil in a saute pan. Add the onion and saute until softened, a few minutes. Add the ground lamb, season with salt and cook over medium heat, breaking up the pieces, until it is nicely browned, 10-15 minutes. Stir in the cherries and pine nuts in the last few minutes of cooking. Stir in the parsley to combine and then remove from the heat.
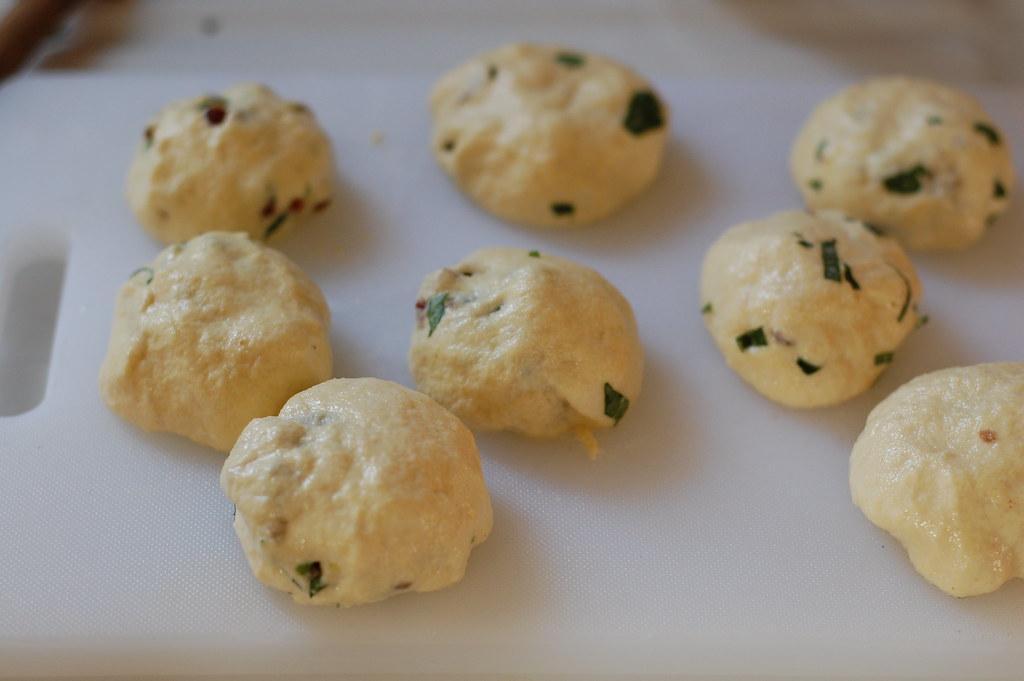
2. Make dough: mix together semolina, flour, and salt in a bowl. Gradually mix in hot water, stirring with a fork, until the consistency of playdough. Add a touch more water if necessary. Let rest 15 minutes. Knead the dough again (I do this by pressing it around with a silicone spatula) until pliable. Working with damp hands, take a walnut sized piece of dough and flatten it in your palm. Place a small spoonful of the meat mixture in the center, then close up the dumpling and roll it around between your palms. Your goal is to have a very thin shell encasing a good portion of meat, but this takes some practice. Continue forming dumplings, always keeping your hands damp to prevent sticking.
3. Bring a pot of water to boil, lower the heat so the water is just simmering. Poach the dumplings in the water (you may have to do this in batches) for 15 minutes. The dumplings may float before this, but they need the full 15 minutes for the semolina to cook. Remove with a slotted spoon.
4. While the kubbe are poaching, bring chicken broth to a simmer, add the saffron and season to taste. Stir in the lemon juice. Add as many kubbe as you are going to serve to the broth (reserve any extra dumplings separately), and let reheat for 1-2 minutes. Place a few kubbe in a bowl, ladle the broth over top. Sprinkle with parsley and serve.

05 April 2008

Flaky Sesame Rolls (Tahinli)


Having grown up in Baltimore and lived in both New York and Washington D.C. I’ve spent more time on Amtrak’s northeast corridor than anyone can imagine or should have to endure. Despite the fact that this should merit a medal of valor (I once joked that I was the curse that made every train I got on break down, including the time we had to dismount in the snow and walk on the train tracks to the nearest platform!) I actually still love the train. I also have an uncanny habit of always running into someone I know, often a collegaue or former classmate, which makes the time fly by.


Recently, I ran into a high school classmate of mine, both of us returning home briefly. When I mentioned my travels abroad, Lisa delighted, exclaiming her parents had grown up in Beirut and had wonderful memories of it and soon we were ensconced in a conversation of travels, languages, and cultures. I had always known Lisa was Armenian, but in the vague way you know things when you’re sixteen and think you know much more than you really do. Now, of course, I knew about the genocide her family must have fled, I’d visited the Armenian district in Beirut with its amazing goldmarket. But mainly, I knew about the great influence Armenian cuisine has had on the cuisine of the Middle East. And I couldn’t help thinking what great culinary knowledge her family might hold (is it bad that I see most people as a potential source of heirloom recipes?)


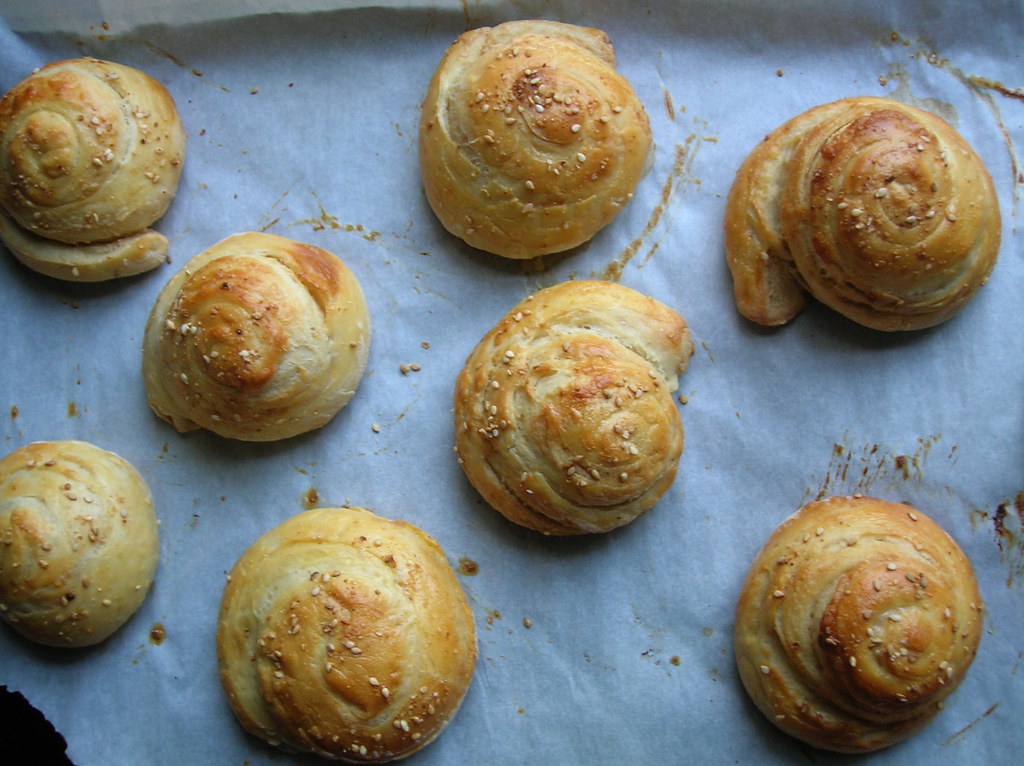
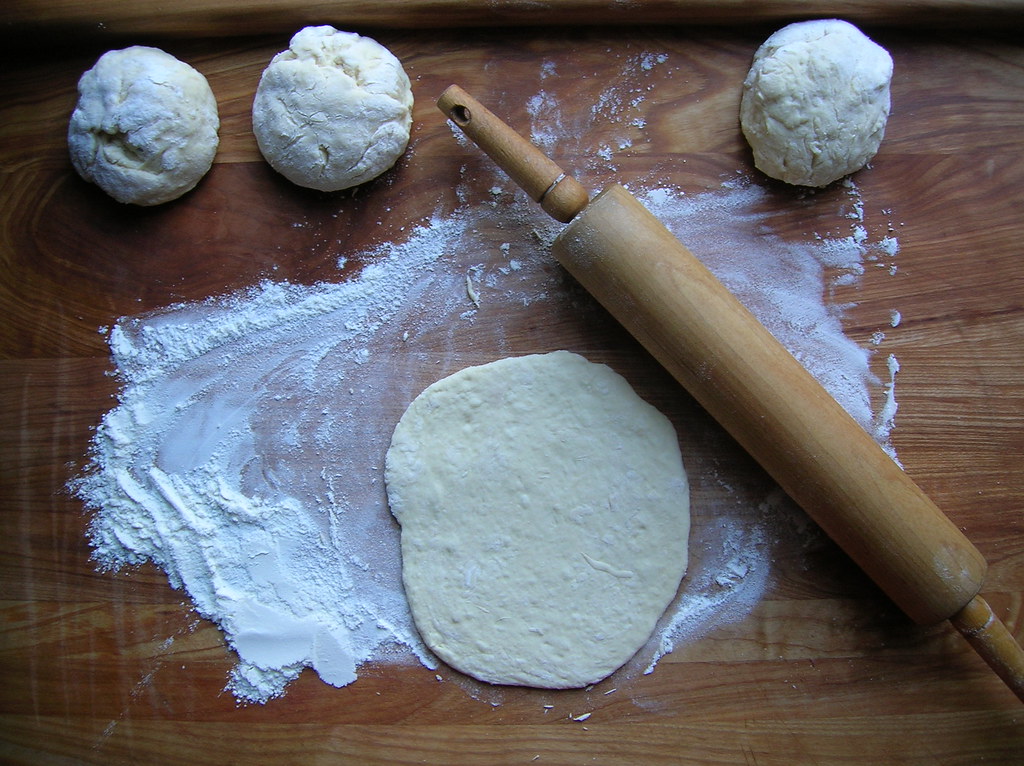
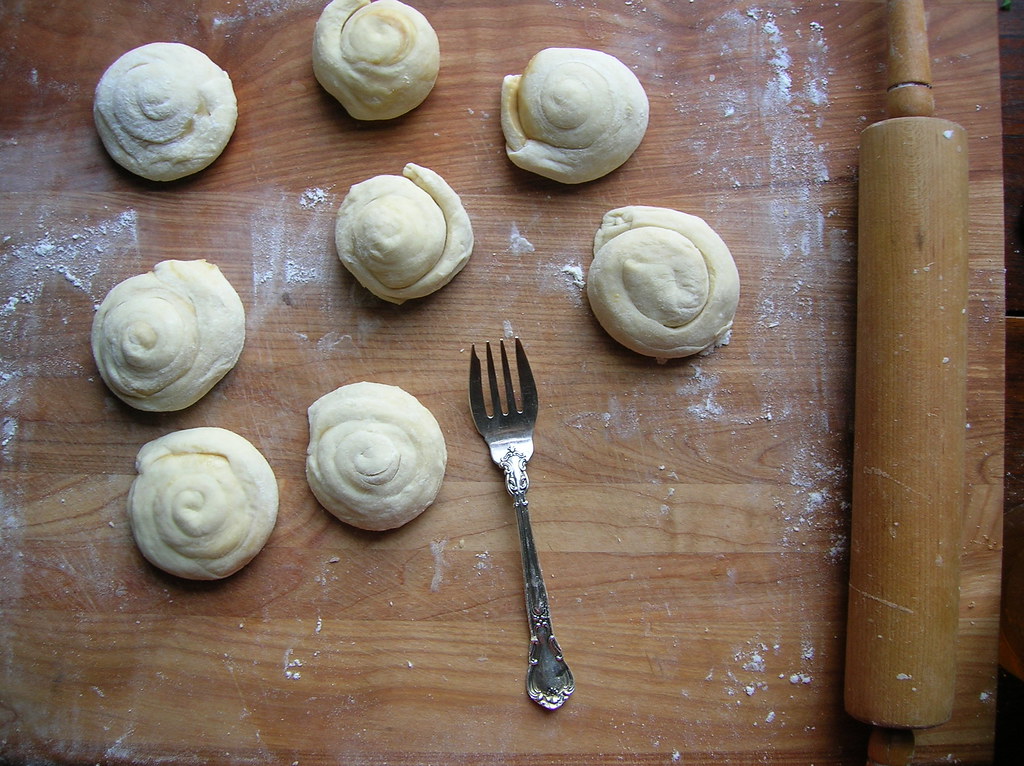
Armenian cuisine is most famous for its use a of red peppers and spices and also for its cured sausages, but one of my favorite Armenian contributions to Middle Eastern cuisine are the flaky sesame rolls known as tahinli. The rolls are made with a yeast dough which is rolled out, spread with sweetened tahini (sesame seed paste), then rolled up and twisted into coils, resulting in a wonderfully flaky texture and a nutty taste. Sesame bread rolls are popular all over the Middle East, sometimes the spirals are as large as a plate but I like them small dinner-roll size. If you imagine a flaky roll with a taste redolent of peanut butter, you’ll understand why I love them so much.

I never got to ask Lisa if her family made tahinli, but when I went home I dug up my own recipe and made them. Dunked in a homemade beet soup, or toasted for breakfast, they were gone before we knew it. And while I won't be thanking Amtrak any time soon, who knows what friend or recipe my next trip will turn up.


Flaky Sesame Rolls (Tahinli)

Dough:
3 1/2 cups flour, sifted
1 cup milk
2 1/4 tsp (1 envelope, 7 gr) yeast
1/3 cup olive oil
1 Tablespoon sugar
1 teaspoon salt
1 egg, beaten
Filling:
1 cup tahini
1/2 cup honey
Glaze:
1 egg beaten
sesame seeds

Directions
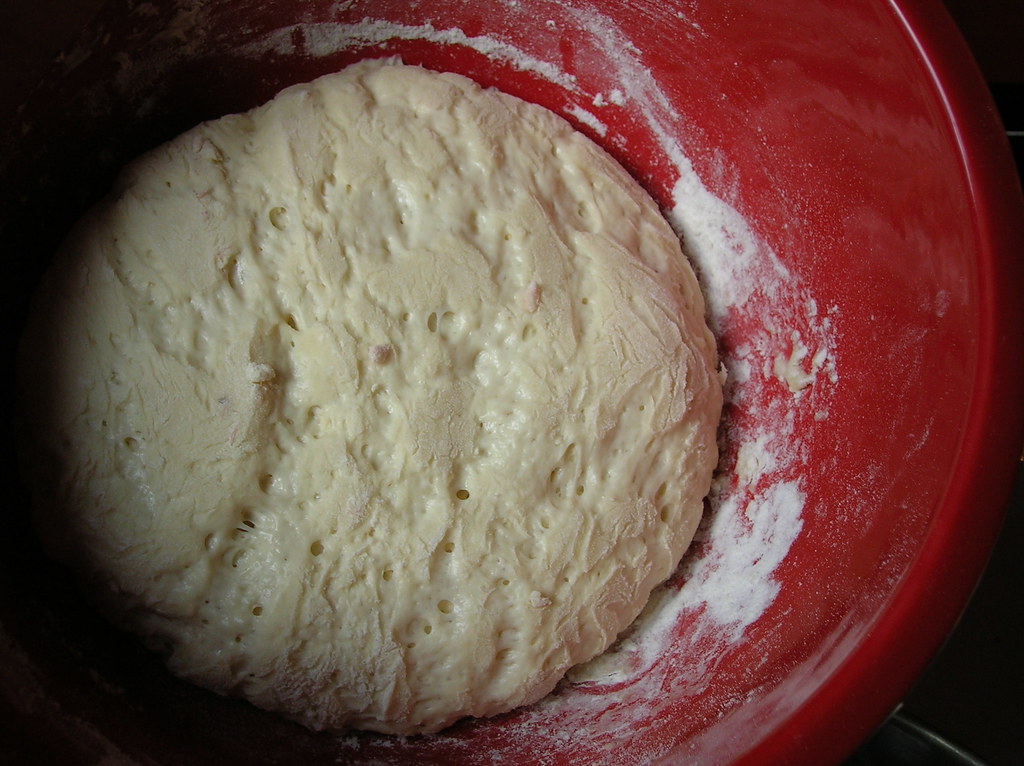
1. Combine the flour, sugar, yeast, and salt in a bowl. In a small bowl combine the egg and oil. Heat the milk to warm (120 - 130F). Add the milk to the flour mixture, then work in the egg mixture to make a smooth, elastic and not sticky dough. If needed add more flour.
2. Cover with a damp cloth and let it rest for 30 minutes. It will not rise like other breads, do not panic. Mix the filling ingredients while the dough is resting.
4. Divide the dough into 12 pieces, lightly grease them with a bit of oil so they do not dry out and make it east to roll. Let rest, covered, 15-20 minutes.
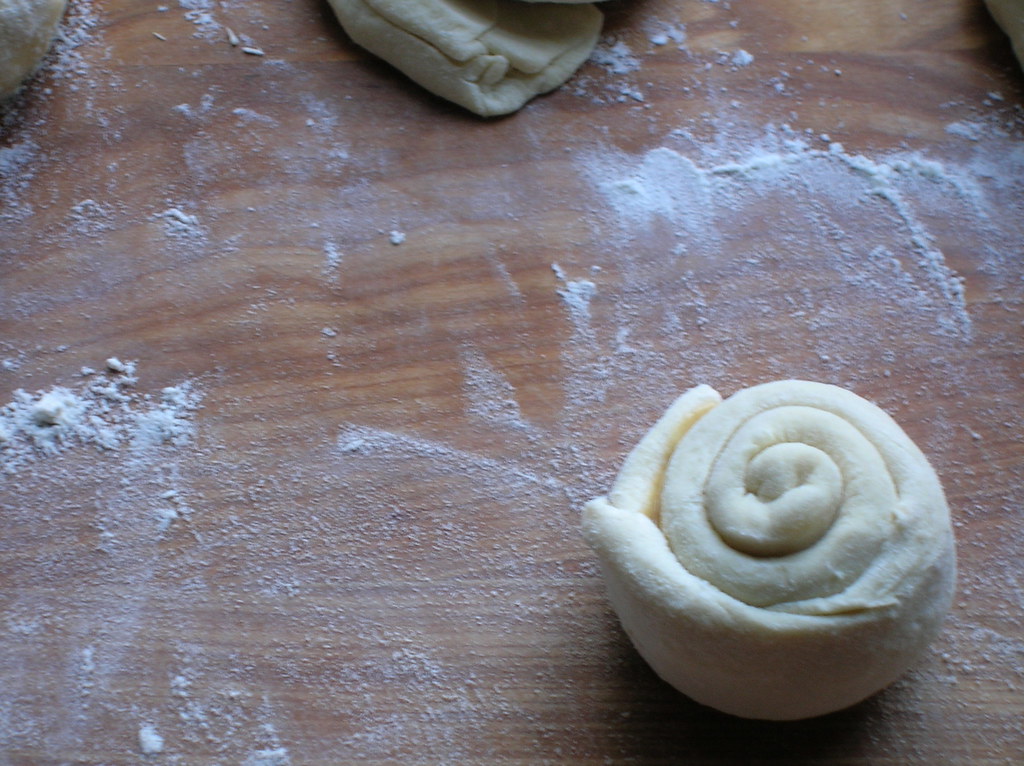
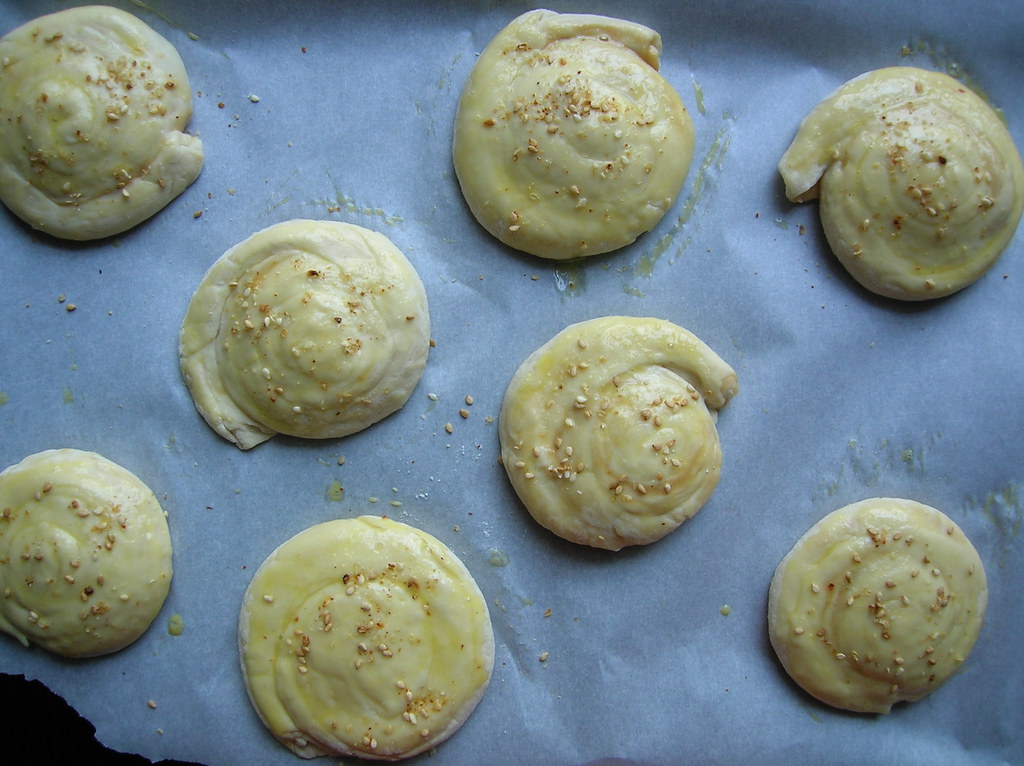
5. Preheat oven to 325 F. Roll one ball of dough out to very wide thin circle. Spread with a thin layer of the tahini mixture (I find it easiest to drizzle the tahini over, then sort of spread it with the back of the spoon). Starting at the longest edge, roll up the dough into a rope. Gently twist the rope so it is spiraled. Roll up the rope to a form a coiled bun. Gently flatten the bun with the rolling pin or a firm press of your hand. Place on a greased or lined baking sheet. Repeat with remaining dough.
6. Brush the rolls with the beaten egg, then sprinkle a few sesame seeds over top. Bake 25-30 minutes, until light brown.

05 March 2008

The Power of Kebab


Never underestimate the power of a good kebab. Regular readers here may have noticed I don’t eat a lot of meat, I’m not a vegetarian and I eat plenty of seafood, but meat just isn’t to my taste. I’d probably forget about it completely if it weren’t for other people reminding me and a once-a-year hankering for a BLT. But while living in Damascus, there was one meat dish I could always be counted on partaking in, one carnivorous dish I truly loved. Kebab halabi, or Aleppo-style kebabs.

Before we talk about those kebabs, however, it’s important to backtrack and talk about kebabs in general. How unfortunate is it that outside the Middle East people think of kebabs as chunks of things stuck on skewers, how drab, how boring, how limited. No, no, no, I always want to say, you are missing out on the best kebabs! You see, most often the favored kebabs are those made with ground meat. Both kinds of kebabs are available, the kind made with chunks of skewered meat are known as shish kebabs (from the Turkish sis) and the kind made with ground meat are called kefta or kofte kebabs. It is no wonder that kefta kebabs are the favorite kebabs because when you think about it they are really just like hamburgers only made into a different shape. The meat for these kebabs is most likely lean ground beef or lamb, and occasionally camel.

The second key element of eating kebabs is presentation. You do not simply plop the kebab down on a plate all naked and alone. No! Kebabs are always placed over pita breads, which have often been rubbed with a little tomato paste, and then they are usually covered with more bread over top. Just like when you order a hamburger you expect a bun and some ketchup, when you order kebabs you expect it to be sandwiched with those tomato-rubbed flatbreads. And those breads which have absorbed the kebab juices, they’re my favorite part.

At a kebab house, you’ll be presented with a variety of choices of kefta kebab. Most of the choices are named after geographical locations and refer to how the kebab will be seasoned, kebab Istambouli includes pine nuts in the meat mixture, while Izmirli includes cubes of cheese interspersed between the meat. I’ve always been rather fascinated by this, who, for example, decided that Anataklia was synonymous with eggplant or Anatbli with mushrooms?

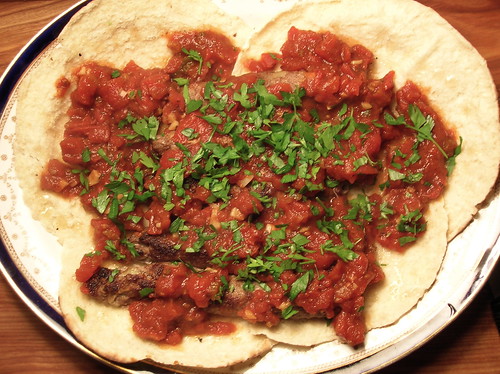
So what’s so special about those kebab halabi, the Aleppo-style ones? Well, the kebabs themselves have chopped parsley in them, but the best part is the spicy thick tomato sauce they come bathed in. Tongue-tinglingly spiced with the famous Aleppo pepper, that chunky tomato sauce transforms the kebabs into one of my favorite meals.

All the time I’ve lived, worked, and studied in the Middle East, my mom has never come to visit me. She’s practically refused to travel to the region, preferring to send my uncle as an envoy. She’s heard a million stories, seen a plethora of my pictures, and knows more about daily life there more than most Americans, but traveling was never on her agenda. I made Aleppo-style kebabs for dinner together one night, and as we sat and I explained about all the kinds of kebabs, she said “you know, I think I might like to visit there one day.” Just as I said, never underestimate the power of a good kebab.


Aleppo-Style Kebab
While traditionally made with lean meat, I think it’s fine to make these kebabs with a fattier meat, like a shoulder cut of lamb, just make sure to keep an eye on the grill as any dripping fat can cause flare-ups. We make these all the time in the winter using the broiler as well.

2 lbs ground lamb or beef, preferably very lean
2 medium-sized onions, grated or pulsed in a food processor
1/2 cup chopped flat-leaf parsley
1 teaspoon each cinnamon, allspice
salt and pepper to taste
for the tomato sauce:
1/4 cup olive oil
6 garlic cloves, sliced
1/4 cup tomato paste
1 28-ounce can diced tomatoes
1 to 2 teaspoons Aleppo pepper, or substitute a mixture or red pepper and paprika
1/2 teaspoon sumac or lemon zest
to serve:
pita bread (the very thin kind)
lots of chopped parsley

1. Place all the kebob ingredients in a large bowl. Knead the mixture with your hands for 5-10 minutes. The mixture will change consistency and become quite sticky (the nature of the proteins in the meat have changed, which is what you want). Cover the mixture and refrigerate for at least half an hour.
2. Make tomato sauce: Heat the olive oil in a large pan. Add the sliced garlic and cook over low heat so that the garlic softens but does not brown. Add the tomato paste, stirring so that it lightly toasts, then add the chopped tomatoes. Season with salt, pepper, and sumac. Simmer the mixture for about 20 minutes until it forms a nice chunky-thick sauce. Taste for seasoning (it should be pleasantly spicy) then set aside.
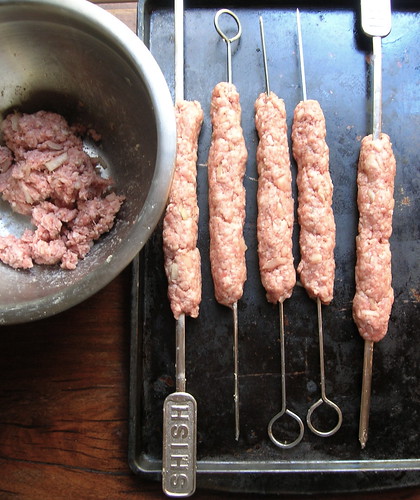
3. Preheat a grill or broiler. Have the tomato sauce warm, but not piping hot. Using damp hands, form the kebabs around metal skewers (they may want to fall off at first, just work the meat mixture around the skewer with your hands until it is cohesive). Grill or broil the kebobs for 8-10 minutes, turning once.
4. Open up half the pita breads. Use the breads open-side up to line your serving platter. Slide the kebobs off their skewers onto the bread (if you used a broiler and there are some meat juices on the pan, pour them over the bread as well). Spread the tomato sauce over the kebabs. Sprinkle chopped parsley over the platter. Serve, making sure everyone gets some of the bread, kebab, and sauce, with extra pita bread alongside.

20 February 2008

Anbari Rice Pilaf

muhammar
Anbar, Mosul, Bosra, Samarra. What do you think of when you hear these names? Chances are, you think of violence, of roadside bombs and IEDs, of suicide bombers and gun fights. How sad it is that these cities, once famous for their history and traditions, are now thought of in the context of war and conflict. Samarra, that ancient city, once most famous for the fabulous spiral minaret that every art history student studies.

I’ve been doing research recently about the culinary traditions of different Middle Eastern cities: Aleppo’s unique use of spices, Anataklia and its eggplants, the biscuits of Saida. Mosul is famous for its kibbe mosul, a casserole of ground lamb and rice, and the cuisine of Bosra is characterized by its use of dried limes. It got me thinking about those city names, that those cities can have more than one meaning, that in the past when someone said Iraq one thought of Babylonian gardens, the cradle of civilization, an old and rich culinary tradition, and not of war.

My goal here is not political, in fact, by writing about Iraqi foods my aim is to depoliticize. When you understand what someone eats everyday, how they shop, how they prepare their foods, you begin to understand how they live and what their values are.

That region often in the headlines, el Anbar, was once known for producing some of the best rice in the world. Iraq’s most esteemed anbari rice is slender and highly aromatic. Unfortunately, Anbari rice is no longer available, but you can make a truly witching pilaf using the similar basmati rice. You’ll find this rice dish from Iraq to Oman and it is particularly popular in the Gulf, but it uses those most beloved Iraqi ingredients: dates, cardamom, and rose water. The dish also reflects the Iranian influence on Iraqi cuisine: the technique of cooking the rice to yield a crispy crust and the spice mix similar to the Iranian mix advieh.

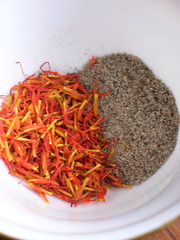
Quite frankly, this is one of my favorite recipes, it always shows up whenever I’m cooking for a crowd and sometimes I make the whole recipe just for the two of us so we can eat it all week long. It has the wonderful scent of rose water, cardamom, and saffron, with a hint of sweetness from the dates. (Or, if you’re feeling cheap, a bit of safflower in place of saffron) The rice is par-boiled, then mixed with the seasonings and cooked over very low heat so that the bottom of the rice forms a delectable crispy crust (tah dig in Persian). Making the crust is part experience and part sheer luck: turn the heat too high and the crust will burn, too low and the crust will be pale and not crisp. The real talent is to be able to turn out the dish in one piece so that the crust makes a beautiful crown on the serving platter. Despite practice, I am never this lucky, and usually half my crust sticks to the pan, in which case you can just crumble the crusty bits over the top, which tastes equally as good. I actually don’t mind if it gets a touch burnt, it adds a nice toasty crunch.

I’ve called this dish Anbari rice pilaf, not because it is specific to el Anbar, but rather in remembrance of that legendary rice. I hope you’ll make it mainly because it’s amazingly good, but also so that next time Anbar comes on the news maybe your senses will be flooded with the scents and tastes of rice pilaf, and not just images of war.

Anbari Rice Pilaf

2 cups basmati rice, rinsed in cold water
1/2 cup date molasses*
1/2 tsp ground saffron
1/2 tablespoon cardamom
2 teaspoons rose water
1 teaspoon salt
3 tablespoons ghee or butter

1. Combine, saffron, cardamom and rose water in a small cup.
2. Bring a large pot of water to boil with the salt. Add the rice and boil uncovered for precisely 8 minutes, then drain.
3. Mix the date molasses with the rice, then mix in the rose water mixture.
4. Choose a medium sized heavy bottomed pot. Melt the butter in it over medium heat. Add 2 spatula-fulls of rice and mix with the butter, patting down to cover the bottom of the dish. Pile the reminder of the rice in a loose cone shape and poke a few holes in the rice with the spoon handle. Sprinkle a few tablespoons of water over the rice, then wrap the pots lid with a towel and cover the dish. Place over very low heat and let cook for 20-25 minutes. Keep a close eye at the end as the rice can burn (use your nose to see if it begins to smell burned).
5. The easiest way to unmold the rice is to prepare a sinkful of cold water, dip the bottom of the pot in cold water for about 30 seconds, then invert the pot onto a serving platter. If the rice crust does not release fully, simply break up the crunchy pieces that stuck to the pot and scatter over top.

*Date molasses is available in Middle Eastern groceries. You can make a quick substitute by placing 1/3 cup minced Medjool dates in a small saucepan with 3 tablespoons water. Bring the mixture to a simmer and mash with a fork so that the dates melt into a paste.

Serving Suggestion: this rice is delectable alongside any saucy dish (I often serve it with Sweet and Sour Fish), but our favorite serving is the following. Mound the rice on a platter, or on individual plates. Take shredded cooked chicken meat (from a roast chicken or poached chicken breasts, whatever you’d like), scatter the chicken meat over the rice. Get some good plain yogurt, add a pinch of salt, and thin it with a bit of water so that the yogurt is thick but pourable. Pour the yogurt all over the chicken to cover. Sprinkle cinnamon over the top. Serve immediately.

Note: In parts of the Gulf this dish is called Muhammara- which just means red. The name muhammara is often used to refer to any reddish colored dish, do not confuse it with the red pepper dip from Syria or the Iraqi dish of rice with tomatoes, both of which bear the same name.