Showing posts with label Thanksgiving. Show all posts

20 November 2010

A Middle Eastern Thankgiving

DSC_0056
A few years ago at Thanksgiving dinner, a friend who knows about this blog, asked me if I thought it would be possible to do a Middle Eastern Thanksgiving. Despite some people's scepticism, I said I actually thought it was a great idea. Middle Eastern cooking makes great use of spices like cinnamon and allspice, and they have numerous recipes for things like pumpkin and kale and nuts.

My goal here was to do things that hemmed closely to the traditional Thanksgiving, as opposed to just throwing some tabbouleh and hummus next to the turkey. The only real challenge was the stuffing (aka dressing), especially given my great love of cornbread dressing. But a rice pilaf was a good substitute.

DSC_0058

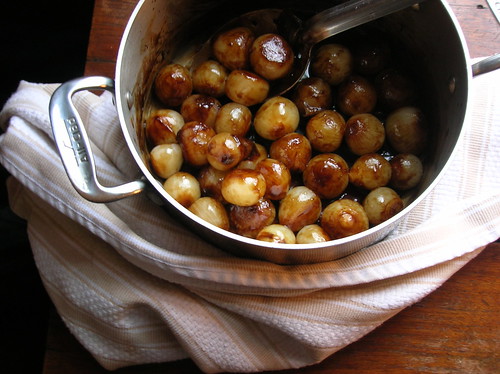
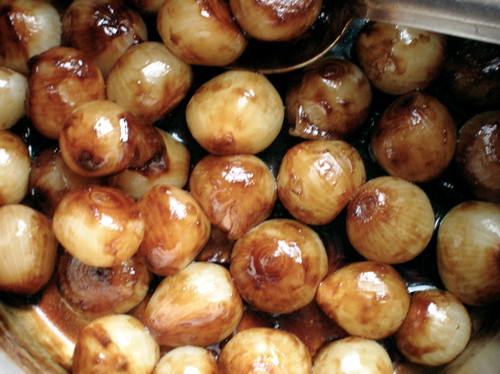
On other things it was much easier to find a good substitute, like pearl onions with a touch of tamarind and swiss chard with a tahini sauce. For the potato kibbeh, imagine mashed potatoes mixed with caramelized onions and then baked until the top is crackly and crispy. I've been told that people actually prefer the mashed carrots to overly-sweet mashed sweet potatoes.

As for the turkey, it's a completely traditional roasting recipe that we tested out last week. A good rubbing of butter, salt, and pepper, and that's pretty much it. But it came out perfectly, moist breast meat and falling-off the bone thighs. But the gravy, infused with some reduced pomegranate gravy, is what makes it special.

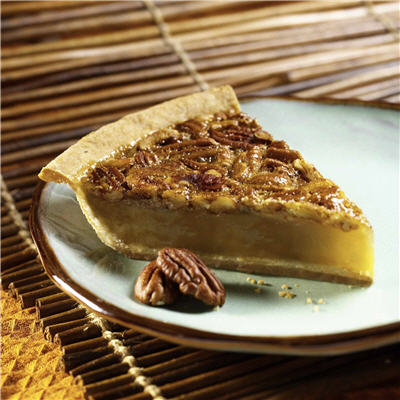
As for dessert, what could be more similar to pecan pie than baklava, or a sweet date tart. I know everyone has their die-hard Thanksgiving traditions, but hopefully this can serve as some food for thought for future meals. After all, roast turkey should be served more than once a year. Happy Thankgiving to you and yours!

Pumpkin Hummus
Olive-Potato Bites

Turkey with Pomegranate Gravy (recipe follows)

Pearl Onions in Tamarind
Swiss Chard with Tahini
Potato Kibbeh in a Tray
Anbari Rice Pilaf
Mashed Carrot Salad

Flaky Sesame Rolls

Custard Baklava or Regular Baklava
Marya's Date Tart

(another good addition: Bulgur Salad with Walnuts and Pomegranate)

tahinli baked

Turkey with Pomegranate Gravy
Adapted from Gourmet.

For turkey

* 1 (12 to 14 lb) turkey, any quills removed
* turkey neck and giblets reserved for making stock
* 6 tablespoons butter, softened, plus 4 tbl melted butter for basting
* 1 tablespoon salt
* 1 1/2 teaspoons black pepper
* 1 onion, quartered
* 4 fresh thyme sprigs

For gravy

* 16 oz bottled pomegranate juice
* pan juices (and roasting pan) from turkey
* about 3 cups hot turkey giblet stock
* 1 cup water
* 4 tablespoons all-purpose flour

1. For stock: place neck and giblets (not liver) in a saucepan with one small chopped onion, one clove onion, one chopped carrot, and some salt, pepper and any herbs you have on hand. Cover with water and set to very low simmer for 2-3 hours, or until you're ready to make the gravy.

2. For pomegranate: Place pomegranate juice in a saucepan and simmer until reduced to 2/3 to 1/2 a cup. Set aside.

3. Preheat oven to 350 F. Rinse and pat dry turkey. From the neck, gently run fingers under skin of turkey to loosen the skin all over breast and thighs. Grabbing bits of softened butter with your fingers, work the butter under the skin all over breast and thighs to cover them with butter. Rub turkey outside all over with salt and pepper. Stuff cavity with onion and thyme and place on roasting rack in roasting pan.

4. Place in oven and bake, basting with melted butter every 20-30 minutes, until turkey is golden brown and thermometer inserted into fleshy part of a thigh (do not touch bone) registers 170°F, 2 1/2 to 3 hours. (If turkey is browning too quickly, tent with foil. If bottom of pan looks like it's burning, add some water to pan juices.)

5. Remove turkey from oven, tilting turkey so any juice in cavity run into pan. Move turkey to carving board and tent with foil. Let rest 30 minutes (this temp will rise to 180 F).

6. Meanwhile, pour off any pan juices into a container and place in the fridge. Straddle roasting pan over two burners, add water and cook to deglaze pan, scraping up any brown bits, about 1 minute. Pour liquid through a fine-mesh sieve into a bowl. Add enough turkey stock to pan juices to total 3 cups liquid.

7. Skim 4 tbl of fat off the top of the container you placed in the fridge. Whisk together fat and flour in a heavy saucepan and cook roux over moderately low heat, whisking, until pale golden, 7 to 10 minutes. Add hot stock mixture in a stream, whisking constantly to prevent lumps. Bring to a boil, whisking, and add pomegranate syrup, then reduce heat and simmer, whisking occasionally, until thickened, about 5 minutes.

8. Carve turkey and serve with gravy.

30 November 2008

Pumpkin Pie

I fully realize that talking about a Thanksgiving recipe the weekend after the grand feast is a bit like predicting Superbowl scores the week after the big game. By now, you've all eaten your turkey and cranberry sandwiches, made turkey soup, and had that leftover slice of pie for breakfast. But if you'll allow me some culinary Monday morning quaterbacking, I think we'll all be Thankful, both this year and next.

You see, a few years ago I found the pecan pie of my dreams, the pecan pie that is requisite at every Thanksgiving henceforth. But that requisite pumpkin pie, well, I just never liked it. The last two years I made a pumpkin cheesecake, but this year I thought I'd give the pumpkin pie a try again. Adapted from Cook's Illustrated recipe, the filling is smooth to the point of creamy, light and just subtly spiced. The only problem was, the filling made enough for two pies. Not one to let things go to waste, I quickly made another crust, this one made of crushed gingersnaps, and baked a second pie.

It was the buttery crumbly gingersnap crust paired with the creamy not-too-sweet pumpkin that won me over. And apparently several other people at dinner, because there was only one sliver left. I may still go for the pecan pie first, but I'll no longer look at pumpkin pie with such skepticism. In fact I'll be saving room, if not for a sliver after dinner, than a good slice, cold from the fridge, the next day for breakfast.

Pumpkin Pie
Make sure to cook the mixture down until it's nice thick, otherwise your pie will risk being soft set. The original recipe had you press the filling through sieve for ultimate smoothness, but I found a blender did the trick just fine.

1 gingersnap crust or crust of choice, prepared and par-baked (see below)

1 cup of half and half
2 large eggs
1/2 teaspoon vanilla extract
3/4 cup pumpkin puree (canned or better yet homemade)
1 cup drained candied yams from 15-ounce can (pack the yams into the measuring cup)
6 tablespoons sugar
3 tablespoons maple syrup
1/2 teaspoon ground ginger
1/4 teaspoon ground cinnamon
1/8 teaspoon ground nutmeg
1/2 teaspoon table salt

1. Preheat oven to 400 F. Whisk cream, milk, eggs, and vanilla together in medium bowl. Combine pumpkin puree, yams, sugar, maple syrup, ginger, cinnamon, nutmeg and salt in large heavy-bottomed saucepan; bring to sputtering simmer over medium heat, 5 to 7 minutes. Continue to simmer pumpkin mixture, stirring constantly and mashing yams against sides of pot, until thick and shiny, 10 to 15 minutes.

2. Remove pan from heat. Whisk in cream mixture until fully incorporated. Pour the mixture into blender in batches and blend until smooth. Re-whisk mixture and transfer to warm pre-baked pie shell. Return pie plate with baking sheet to oven and bake pie for 10 minutes. Reduce heat to 300 degrees. Continue baking until edges are set 30 to 35 minutes longer. Transfer pie to wire rack and cool to room temperature, 2 to 3 hours. (The pie finishes cooking with resident heat; to ensure the filling sets, cool it at room temperature and not in the refrigerator.)

For the crust: Process in a food processor 1 box (16 oz) gingersnap cookies until they are fine crumbs. Slowly drizzle in 1 stick of melted butter, pulsing to combine. Press the mixture into a pie pan. Par-bake at 400 degrees for 5-7 minutes. Set aside.

23 November 2008

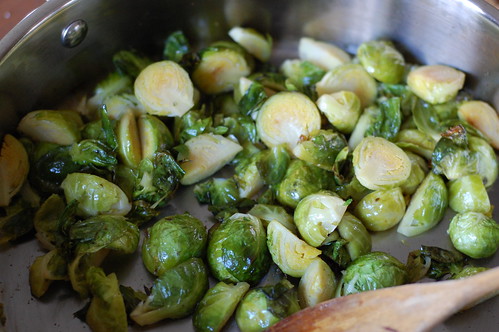
Pan-Roasted Brussels Sprouts

I have a problem. I really like brussels sprouts. I happily eat them, and them alone, for dinner. I like them a multitude of ways, finely shredded and sauteed, braised with bacon, roasted in the oven, even just plain boiled (!). In the winter I eat them so often it's become a household joke. I get excited when I see them in the markets for the first time in the fall, and sad when they disappear in the spring (no matter how much I love brussels sprouts, I'm an avowed seasonal eater).

Poor sprouts, they're so maligned. My friend hates them because her mother always referred to them as "little brains." Bitter when not properly handled and terribly mushy when overcooked, it's easy to go wrong with brussels sprouts. But when right, they are oh-so-good. The best brussels sprouts I've ever had are the teeny-tiny baby ones they sell at Citarella in New York, each one the size of a coin, you can roast them whole and they are almost sweetly vegetal.

That taught me a good lesson about brussels sprouts, pick out the small ones and halve or quarter the larger ones so that they cook quickly without being bitter or over-cooked. My favorite way to cook brussels is to pan roast them: start on the stove-top and then finish them in the oven. These will be on our Thanksgiving table and if they aren't on yours, you've got a long season left to find a time for them.

Pan-Roasted Brussel Sprouts
By all means, saute a little bacon along with the shallot if you want to gild the lily. The brussels sprouts should be just tender in their centers when done (check with a knife tip), and I actually like it when some of the outer edges are crispy deep-brown-black crunchy savory perfection (the above picture, while they were delicious, weren't quite brown enough for my taste).

1 shallot, chopped
2 tablespoons vinegar or lemon juice
1/2 teaspoon (a sprinkling) of sugar
a medium bag of brussels sprouts, larger ones halved or quartered
salt and pepper to taste

1. Preheat the oven to 400 degrees F. In a large oven-proof skillet, heat a splash of olive oil. Add the shallot and cook until soft and translucent. Add the brussels sprouts and saute until the begin to brown on the edges - golden brown is good, but not completely done. Deglaze the pan with the vinegar, scraping up any brown bits, and sprinkle the sugar over, stirring so it melts. Season with salt
2. Transfer the pan to the oven to finish cooking. Check after 5-7 minutes, shaking the pan. Continue roasting, stirring every five minutes, until the brussels sprouts are cooked through and the edges are well browned (some of the stray leaves may blacken, that's totally fine). Check for seasoning, serve.

13 December 2007

Tamarind-Glazed Pearl Onions

Tamarind is a sweet-tart fruit that comes from the pods of tamarind trees. Though native to Africa, tamarind is used in Middle Eastern cuisine, most commonly in the form of a tamarind drink. Aleppo, in northern Syria, is famous for its highly developped cuisine which is quite distinct from other parts of the region. The Arab name for Aleppo is Halab, derived from the word for milk (haleeb) on account of its excellent dairy products, it seems Aleppo has always been associated with great food. There are several key ingredients that are hallmarks of Aleppian cuisine: smoky-hot spices in the form of Aleppo pepper, plenty of red peppers, tart tangy pomegranate molasses, and the use of tamarind concentrate. These aspects of Aleppian cuisine developped as a result of many factors: Aleppo was a major city on ancient trade routes like the Silk Road, also the presence of Armenian immigrants, nearby Kurds and a strong Jewish community (though no longer extent) have all contributed to a unique repertoire of dishes.


Tamarind came to the Middle East by way of India, where it is popular, hence its name in Arabic tamr hindi, or Indian date. In Aleppo, the tamarind concentrate made by extracting the thick viscuous syrup from the fruit’s pulp is known as ou. Ou is an important ingredient in everything from soup broths to tomato sauces to bulgur salads. In a uniquely Aleppian dish called mehshi basal, onions are formed into rolls stuffed with a meat mixture, and then simmered in a tamarind sauce. A simpler version involves small baby onions simmered in that sweet-sour sauce.

I prefer this second (albeit less traditional) version, not only because it’s easier, but mainly because I love pearl onions. We always have little baby onions at the holidays, and the poor person who volunteers to help me in the kitchen usually gets stuck with the task of peeling them (and I wonder why they stop asking?). These tamarind glazed onions are quite similar to the popular Italian cippoline in agrodolce but I like the way the sauce is even thicker and tangier than those made with balsamic vinegar. The recipe’s provenance may be far away, but spearing them with a fork as they slippery-slither across the plate, crashing into the potatoes, the onion layers bursting from inside each other, and finally using the last bit of sauce to coat your entree, it tastes like the holidays to me.


Tamarind-Glazed Pearl Onions
Tamarind concentrate is available at Whole Foods and international markets, it keeps well and has many uses so it's a great addition to your pantry. This Syrian version of sweet-and-sour onions has a great thick and tangy sauce.

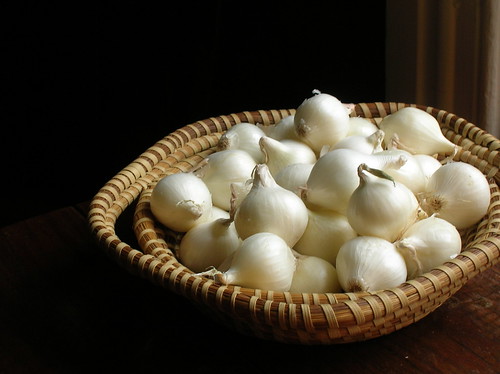
2 pounds white pearl onions (about 30)
3 tablespoons extra-virgin olive oil
3 tablespoons tamarind concentrate
1 tablespoon lemon juice
3-4 tablespoons sugar, to taste
pinch of salt

1. Heat a large pot of water to boiling. Trim off the base and tips of the onions. Submerge the onions in the water and let boil 7 minutes. Drain the onions into a colander and rinse with cold water. Slip the peels off the onions.
2. Heat the olive oil in a saucepan. Add the peeled onions and saute over medium heat for 5 minutes, until just browned. Add the tamarind, lemon, sugar and salt and cook until the mixture caramelizes and turns sticky, 3-5 more minutes. Taste for seasoning. Serve at room temperature.

P.S. If you don't have tamarind concentrate on hand, the recipe works perfectly well using balsamic vinegar instead.
____________________________________

24 November 2007

Pecan Pie


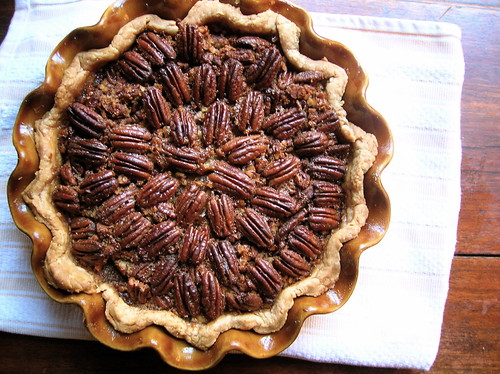
In my opinion, the only dessert you need for the holidays is pecan pie. Oh sure, I make other desserts, pies and crumbles and cookies and cakes, but really, I’m just holding out for the pecan pie. It’s in my genes. The problem is that good pecan pies are hard to come by, most of the time they are too sweet or too rich and after my fourth bite I’m ready to keel over in diabetic shock. Some pies are runny, others gewey, too few pecans or too many, and for the love of goodness please don’t put chocolate in it. And so for years, rather than tackle yet another pecan pie recipe, I simply gave up and ordered one. You see, my uncle introduced us to Goode Company Pecan Pie, a Texas pie so famous they set up drive through pick ups over the holidays. And people, that pie is damn good, and with all the other things to do over the holidays, it was one less thing to worry about.

But it slowly started to irk me, the fact that I wasn’t making my own pie for Thanksgiving. So I started culling through recipes again, reading and searching and testing recipes. As a base I started with a recipe from the venerable Craig Claiborne which was inherited from his mother. I've made several small tweaks, the most important being: I add a teaspoon of vinegar and a splash of lemon juice. Don’t worry, you won’t taste the vinegar at all, but the acidity just cuts the sweetness and brightens the flavor perfectly. You could use bourbon in place of the lemon if you prefer, but since we usually have another bourbon-flavored dessert at the holidays, I’ve always avoided it in pecan pie and now I really prefer it without. For the crust, I took a hint from that Goode Company pie, and made a more shortbread-like crust that stands up to the pecan filling. Finally, I made sure to bake the pie as long as possible without burning it, this makes sure that the eggs set which prevents a runny pie, and I tented the top with foil to prevent burning.

I felt confident about my pecan pie, but by the time Thanksgiving rolled around, I was just plain nervous. Would my family, spoiled by years of Goode Company pies, reject this homemade specimen? Would one of the other two desserts steal the show? It’s always fun when you make a bunch of dishes to see which one is people’s favorite, will the caramel ice cream hog the spotlight, will the pumpkin cheesecake be the run away hit?

Well, I am pleased to report that there is no question which dessert stole the show. The pecan pie. The crumbly shortbread crust, the pecans just shy of being burnt so that they were instead toasted to caramelly crunch, and that one-wedge shy of empty pie pan at the end of dinner. Which leaves me with only two small problems: a scarcity of leftovers and the realization that I’ll be making a lot more pecan pies in the future. I can’t wait.


Pecan Pie

for the crust:
1 1/2 cups flour
10 tablespoons cold butter
1 tbl sugar
1/4 cup ice water
for the filling:
4 eggs
1 cup dark corn syrup (like Karo)
1 cup (packed) dark brown sugar
4 tbl unsalted butter, melted
1 tbl lemon juice or bourbon
1 teaspoon mild vinegar
1 cup chopped pecans
1 cup whole pecans

equipment: a 9 inch pie pan, preferably deep dish ceramic

1. Prepare the crust: Place the flour and sugar in a bowl. Add the butter and rub with your finger tips until the mixture forms coarse crumbs. Sprinkle in the cold water until the mixture comes together, form the dough into a ball. Flatten the ball slightly, cover with plastic wrap, and place in the fridge to chill for at least half an hour.
2. On a lightly floured surface, roll the dough out into a 12 inch circle. Transfer to your pie pan and trim the edges. Place in the freezer to chill until ready to use.
3. Make pie: Set an oven rack in the lower third of your oven. Preheat oven to 375 F. In a bowl, beat the eggs with brown sugar until combined and thick. Add the dark corn syrup, melted butter, lemon juice and vinegar. Add the chopped pecans to combine. Get the pie crust out and scrape in the filling. Put the whole pecans in the bowl that had held the filling, and toss them around to coat with the remains of the corn syrup (they won’t be completely covered, but it’s a nice gesture). Arrange the pecan halves over the filling. Bake the pie for about 50 minutes, until the filling is set and only jiggles slightly in the middle. You will probably have to cover the pie with foil in the last 15 minutes of cooking to prevent the top from burning, keep an eye on it. Uncover and cool to room temperature.

Recipe Notes:
1. In my opinion, there's no real substitute for dark Karo, however, if you live somewhere where it is unavailable, golden syrup(like Lyle's) or treacle are good alternatives. I'd also like to point out that while it is corn syrup, it is made by a different process than high fructose cornsyrup.
2. I skip blind baking the crust and simply bake the pie in the lower third of the oven, and I find no harm is done. If you are using a metal pie pan you should keep an eye that the bottom doesn't burn.
3. If buying the pecans by weight, you'll need about 8 oz pecans total.
4. If you are the kind of person who really likes the custardy layer underneath the pecans (I know who you are), then you can omit the chopped pecans or reduce them to a half cup. If you are the kind of person who likes your pie to be full of pecans, leave it as written, and if you think pecan pie should really be more like a pecan tart or a pecan bar you can even increase the chopped pecans to 1 1/2 cups. Personally, I think it’s just right as written.
__________________________________

23 November 2007

America: Please Make More Pies.

Dear America,
I’m worried about you. I’m worried you’re loosing your culinary traditions. I went out to buy a pie pan Monday, I’ve got a couple nice ones but I wanted a deep dish pie pan to make that chock-full-of pecans-pie for Thanksgiving. First, I went to Crate and Barrel, and when I asked about pie pans I was directed to one terribly shallow, glass Pyrex pan for $6. Not only was there no deep dish pan, there were no other pie pans. One lousy pan, for the whole store. Don’t you think there would be at least one decorative ceramic pan, what with the holidays around the corner?

I moved on to Sur La Table with high hopes, and there again I was confronted with the same one lame glass pan. America, I’m getting worried. You are not making pies. You are not making enough pies. Oh, you are making pies, but I know your secret. You’re buying those pre-made crusts, aren’t you? The premade crusts with the disposable tin pans, don’t tell me it’s so. If you were making pies regularly, you’d know that homemade pie crust is so much better, and cheaper too. If you were making pies regularly, you’d want that nice solid pretty pie pan, the one you can use over and over again.


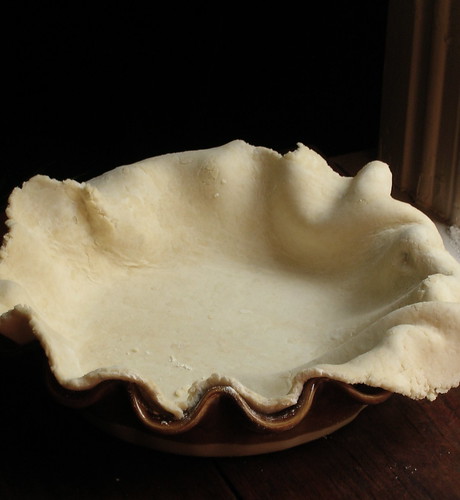
I did finally find a pie pan, and a deep dish one at that, at Williams-Sonoma. But even then, there were only two types of pie pans on offer, and I had to pay a boatload for it and it was made in France. She’s a beauty, and I love her dearly, the way her fluted edges craddle that gooey filling. But I’m worried about you America, you must embrace your pie heritage. When I lived outside the U.S. I wanted to make a pie, but the only options were a cake pan or a tart pan, and neither does a pie make. Ever since then I’ve been rather passionate about the pie pan. Appreciate the uniquely sloped sides that make pie such an American tradition. Please go buy a pie pan, a good solid one that has the promise of years of use to come, and then make yourself a pie.

Until I get around to telling you about that pecan pie, here's a delicious Apple-Cranberry Crumble Pie we love around the holidays. It's even better served with caramel ice cream.

Apple-Cranberry Crumble Pie
I always thought the idea of combining a pie and a crumble sounded excessive until I made this one Thanksgiving and discovered how delicious it is. The bursts of tart cranberries are perfect foil for the sweet-crunchy crumble.

1 pie crust, prepared, fitted into a 9" pie pan, and refrigerated
3 large (or 4 medium) Granny Smith apples
2 cups cranberries, fresh or thawed if frozen
1 cup plus 2 tablespoons sugar
1/4 cup flour
1 tbl lemon zest
1 tsp cinnamon
1/8 tsp nutmeg
pinch salt
for crumble:
1/2 cup brown sugar
1/2 cup oats (not quick-cooking)
1/3 cup flour
pinch salt
4 tbl butter, chilled and cut in small dice

1. Preheat oven to 375 F, arrange a rack in the lower part of the oven. Have your crust chilled in the refrigerator.
2. Place sugar, flour, lemon zest, cinnamon, nutmeg, salt in a bowl and toss to combine. Peel, core, and thinly slice the apples and add to the sugar mixture. Add the cranberries and toss to combine. Let mixture sit 10 minutes while you prepare the topping.
3. For the crumble topping, combine the brown sugar, oats, flour and salt in a bowl. Add the butter and rub the mixture with your fingers until it forms a coarse meal.
4. Pile the filling into the chilled crust. Scatter the crumble over top. Place the pan on a baking sheet to catch the drips and bake in the lower part of the oven for 55 minutes, or until golden and juices are bubbling. Let cool a few hours before serving.

16 November 2007

Lida Lee's Cornbread Dressing


In the South, no meal would be complete without some form of cornbread, and no holiday can be had without cornbread dressing. Unlike in the North, where it is known as stuffing, this dish of crumbled bread moistened with broth is always baked outside the bird in a casserole dish (I realize this may be confusing, as it was when my boyfriend came to dinner, people kept offering him more dressing, but he couldn't figure out what he was supposed to put it on). You can think of it as stuffing, but around here, we call it dressing. My grandmother, Lida Lee, was born and raised in Tennessee and this is her recipe. The key to good homemade dressing is proper Southern cornbread and plenty of freshly made giblet stock. Though at its heart it is a simple, dish, in my experience it takes a bit of practice to a get a feel for making good dressing.

I've done the recipe as a pictorial, you can also get the printable version.

First, get out the 10" cast iron skillet and make your good old fashioned Southern cornbread. My grandmother kept about 20 different cornbread preparations in her repertoire, she called this kind of bread "egg bread" because it included eggs, unlike many other corn pones, corn cakes, hot water corn bread, etc. Basically, combine dry ingredients, add wet ingredients, bake at 450 F for 20 minutes.


It's best if you make the cornbread one or two days ahead, so it can dry out slightly. Of course, if you make it ahead, this will probably happen:


Cornbread, toasted, with honey drizzled on top, makes very good breakfast. Oops. But, for the purposes of the recipe you will be needing all the cornbread. Consider yourself warned.

Now, on Thanksgiving morning you get those giblets, you know the funky looking things that you had to stick your whole forearm up inside the turkey to dig out (fyi- if you have a kosher turkey you won't have giblets. We made this mistake one year and spent half of Thanksgiving day running around to butchers trying to find giblets). Giblets are your nuggets of gold here. Put them in a stock pot, I usuallly toss in the turkey neck too. Add 32 oz purchased low-sodium stock and 4 cups water and barely simmer for as long as possible, at least an hour and up to 3 hours. Then, dump in 1 cup each of chopped onion and celery and simmer for another 1/2 hour, until completely soft.


Meanwhile crumble your cornbread (get your fingers messy now). Also add 5-6 slices of stale sandwich bread, even if you didn't snack on your cornbread. You can use white or whole wheat, we like to use the heels. Add 1/2 cup chopped parsley (if you like sage you can add some of that too) and some black pepper. Now, here is where we deviate slightly from Lida Lee. Grandmother's recipe uses only stock to moisten the bread. But for years my version was never quite the perfect texture, so I started adding an egg to ensure fluffiness. My mom is like the genius of dressing makers and she uses only broth, but until I figure out the secret to her technique, the egg trick works nicely.


So, stir in a beaten egg, the proteins in it will help keep the perfect texture. Then, add the super-soft vegetables into the bread. This is the part where lily-gilders will add things like sausage and oysters and the like, in our family we do not practice such heretical acts.

Now, slowly ladle in the stock, this is the make-or-break part of your dressing. You do not want dry dressing, dry dressing is a true tragedy. I live in fear of dry dressing. To prevent this, add more stock than you think you should, if your dressing is too dry, there's no going back; however if the dressing is too wet, you can simply keep baking it to dry it out. So, add enough stock to make a soft porridgy consistency.


Presumably, you've timed this so you are now taking your turkey out of the oven. Pat the dressing into a greased baking dish, and drizzle a couple of tablespoons of those turkey drippings over the dressing (I say a couple in the "really I'm probably pouring on more like a 1/4 cup but I don't want to admit it" sense). If you don't have turkey drippings you can use melted butter.
Bake dressing at 350 F for about 20-25 minutes. Meanwhile, you're tenting your turkey with foil and running around like a mad woman trying to get the other dishes onto the table. After 20 minutes, test the dressing to make sure the bottom isn't too soupy, it should be golden and moist. If it needs a few more minutes, tell them to start carving the turkey, that part always takes forever. Serve hot, and enjoy.


Lida Lee's Cornbread Dressing

for the cornbread:
2 cups cornmeal
2 tsp baking powder
1 tsp baking soda, pinch salt
2 eggs
2 cups buttermilk
2 tbl shortening 

for the dressing:
cornbread
giblets
5-6 slices stale sandwich bread, white or whole wheat, preferably the heels
32 oz low-sodium chicken stock
4 cups water
1 cup chopped onion
1 cup chopped celery
black pepper
1 egg, beaten
1/2 cup chopped parsley
3 tbl turkey drippings or melted butter

1. Make the cornbread: Preheat the oven to 450 F. Put the shortening in a 10 inch cast iron skillet and place in the oven to preheat. Combine the dry ingredients in a bowl. Add the milk and eggs and stir to blend. Remove the hot skillet from the oven and swirl it around so it is well greased. Pour any excess oil into the batter, then pour the batter into the hot skillet. It will sizzle. Bake in the oven for 20-22 minutes, until golden. Let cool completely. Best if done 1-2 days ahead. I usually go ahead and crumble the cornbread 1-2 days ahead so the crumbs can dry out.
2. Make giblet stock: Place the giblets in a pot, if you want you can toss in the turkey neck too. Add the stoc and the water. Bring the mixture to a boil, skim the surface, then lower to the lowest possible simmer. The mixture should steam but not bubble. Simmer for at least one hour, or up to 3 hours, the longer the better. It will reduce slightly, but not too much. Add the chopped onion and celery and simmer another 1/2 hour until the vegetables are very soft.
3. Crumble the cornbread with the sandwich bread in a large bowl. Add the egg and stir to distribute. Using a slotted spoon, add the onion and celery to the mixture. Gently ladle the stock into the mixture, moistening it to a soft porridge like consistency. It is always better to add too much stock than risk your cornbread being dry. Season with pepper, salt, and add the chopped parsley.
4. Spread the cornbread mixture in a greased casserole dish. (presumably, you've timed this so that your turkey is now coming out of the oven and is going to rest while you bake the dressing and reheat all those other dishes). Drizzle about 3 tablespoons of the turkey drippings over the dressing (or more, as you like), then place in a 350 F oven until for 20-25 minutes, until nicely browned. Check to see that the dressing is the desired consistency: moist but not soupy, if it seems too wet you can bake it 5 more minutes, but be carefully not to make it too dry. Serve immediately.